HP 5500ps HP Designjet 5500 series printers - Quick Reference Pocket Guide - Page 106
ink system installation
 |
View all HP 5500ps manuals
Add to My Manuals
Save this manual to your list of manuals |
Page 106 highlights
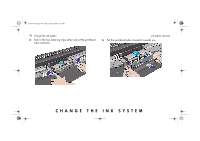
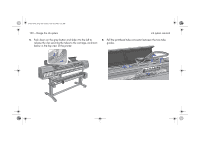
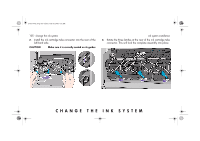
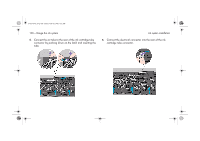
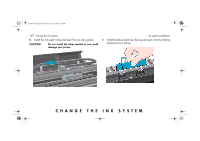
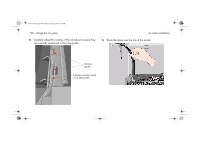
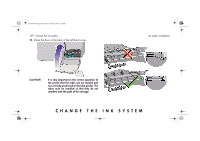
pocket.book Page 104 Friday, June 28, 2002 4:31 PM 104 - change the ink system ink system installation ink system installation ink system installation animation NOTE: Before starting the procedure for installing the ink system it is highly recommended that you first view the animation of this procedure provided on the Using Your Printer CD. See the "How do I ..." section on the CD. installing the ink tubes The installation of the ink system into the printer is the same as the removal procedure but in reverse order. Start at the ink cartridge tube connector and work your way along the tubes. Listed below are some notes to help you when installing the tubes. I Take care that you do not damage the tubes while installing them. Do not bend or twist the tubes excessively. I If you are installing tubes that have already been used, be careful because they are filled with ink. I Install the tubes first at the back of the printer then work your way to the carriage. I If you are installing tubes that have already been used, they must be the same ink type as the printheads, printhead cleaners, and ink cartridges that you are also installing. All the components must have the same identification symbol. Use the following procedure to install the ink tubes. 1. Carefully lift the ink tubes out of the ink tubes container (see troubleshooting on page 119).
-
 1
1 -
2
-
3
-
4
-
5
-
6
-
7
-
8
-
9
-
10
-
11
-
12
-
13
-
14
-
15
-
16
-
17
-
18
-
19
-
20
-
21
-
22
-
23
-
24
-
25
-
26
-
27
-
28
-
29
-
30
-
31
-
32
-
33
-
34
-
35
-
36
-
37
-
38
-
39
-
40
-
41
-
42
-
43
-
44
-
45
-
46
-
47
-
48
-
49
-
50
-
51
-
52
-
53
-
54
-
55
-
56
-
57
-
58
-
59
-
60
-
61
-
62
-
63
-
64
-
65
-
66
-
67
-
68
-
69
-
70
-
71
-
72
-
73
-
74
-
75
-
76
-
77
-
78
-
79
-
80
-
81
-
82
-
83
-
84
-
85
-
86
-
87
-
88
-
89
-
90
-
91
-
92
-
93
-
94
-
95
-
96
-
97
-
98
-
99
-
100
-
 101
101 -
 102
102 -
 103
103 -
 104
104 -
 105
105 -
 106
106 -
 107
107 -
 108
108 -
 109
109 -
 110
110 -
 111
111 -
112
-
113
-
114
-
115
-
116
-
117
-
118
-
119
-
120
-
121
-
122
-
123
-
124
-
125
-
126
-
127
-
128
-
129
-
130
-
131
-
132
-
133
-
134
-
135
-
136
-
137
-
138
-
139
-
140
-
141
-
142
-
143
-
144
-
145
-
146
-
147
-
148
-
149
-
150
-
151
-
152
-
153
-
154
-
155
-
156
-
157
-
158
-
159
-
160
-
161
-
162
-
163
-
164
-
165
-
166
-
167
-
168
-
169
-
170
-
171
-
172
-
173
-
174
-
175
-
176
-
177
-
178
-
179
-
180
-
181
-
182
-
183
-
184
-
185
-
186
-
187
-
188
-
189
-
190
-
191
-
192
-
193
-
194
-
195
-
196
-
197
-
198
-
199
-
200
-
201
-
202
-
203
-
204
-
205
-
206
-
207
-
208
-
209
-
210
 |
 |