HP A1210n Media Center Software Guide - Page 36
Editing pictures in HP Photosmart in Media Center, Sharing Pictures in HP Photosmart Premier
 |
View all HP A1210n manuals
Add to My Manuals
Save this manual to your list of manuals |
Page 36 highlights
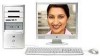
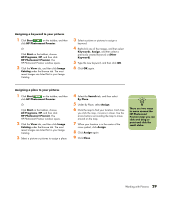
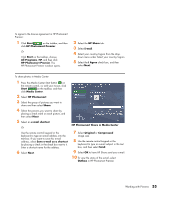
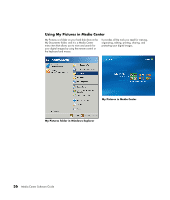
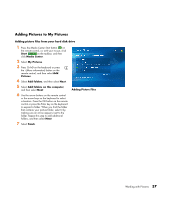
n You may need to refresh the window to view your edited picture in your HP Photosmart Premier folders. Editing pictures in HP Photosmart in Media Center You can make changes to your pictures in HP Photosmart Premier from the desktop. Some of the editing features include removing red eye, cropping, resizing, and rotating images. 1 Press the Media Center Start button on the remote control, or, with your mouse, click Start on the taskbar, and then click Media Center. 2 Select HP Photosmart. 3 Select the picture you want to edit. The edit window appears when you select a picture file. 4 Select an editing option such as Crop. 5 Select the arrow buttons under the picture to crop your picture. 6 Select Save As when you are finished editing the picture. 7 Select OK to save your edited picture. HP Photosmart Crop in Media Center n For more information about the HP Share tools, refer to the Help menu in the HP Photosmart Premier program. Sharing Pictures in HP Photosmart Premier You can quickly share your photos with friends and family by first creating e-mail shortcuts and then sending thumbnails of your photos. The recipient then clicks on a link in the e-mail message to view the full-size photo on a secure Web page without downloading any attachments. The Web page is automatically displayed in a language based on the recipient's Web browser settings. The photos can be viewed, printed, and saved to a computer. Before you can share photos in Media Center, you must agree to the license agreement in the desktop version of HP Photosmart Premier. See the following procedure. 32 Media Center Software Guide
-
 1
1 -
2
-
3
-
4
-
5
-
6
-
7
-
8
-
9
-
10
-
11
-
12
-
13
-
14
-
15
-
16
-
17
-
18
-
19
-
20
-
21
-
22
-
23
-
24
-
25
-
26
-
27
-
28
-
29
-
30
-
 31
31 -
 32
32 -
 33
33 -
 34
34 -
 35
35 -
 36
36 -
 37
37 -
 38
38 -
 39
39 -
 40
40 -
 41
41 -
42
-
43
-
44
-
45
-
46
-
47
-
48
-
49
-
50
-
51
-
52
-
53
-
54
-
55
-
56
-
57
-
58
-
59
-
60
-
61
-
62
-
63
-
64
-
65
-
66
-
67
-
68
-
69
-
70
 |
 |