HP A1210n Media Center Software Guide - Page 61
Making the movie, Saving the movie project
 |
View all HP A1210n manuals
Add to My Manuals
Save this manual to your list of manuals |
Page 61 highlights
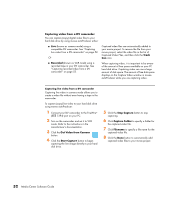
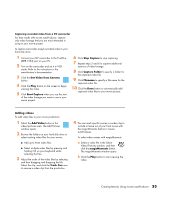
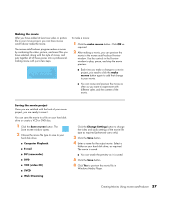
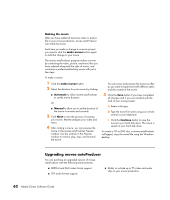
Making the movie After you have added at least one video or picture file to your movie project, you can have muvee autoProducer make the movie. The muvee autoProducer program makes a movie by combining the video, picture, and music files you have selected, along with the style of movie, and puts together all of these pieces into a professionallooking movie with just a few steps. To make a movie: 1 Click the make muvee button. Click OK as required. 2 After making a movie, you can preview the movie in the muvee autoProducer Preview window. Use the controls in the Preview window to play, pause, and stop the movie preview: ■ Each time you make a change to a movie project, you need to click the make muvee button again to add that change to your movie. ■ You can revise and preview the movie as often as you want to experiment with different styles and the content of the movie. Saving the movie project Once you are satisfied with the look of your movie project, you are ready to save it. You can save the movie to a file on your hard disk drive or create a VCD or DVD disc: 1 Click the Save muvee button. The Save muvee window opens. 2 Choose the movie file type to save to your hard disk drive: ■ Computer Playback ■ E-mail ■ DV (camcorder) ■ DVD ■ VCD (video CD) ■ SVCD ■ Web Streaming Click the Change Settings button to change the video and audio settings of the movie file type as required (advanced users only). 3 Click the Save button. 4 Enter a name for the output movie. Select a folder on your hard disk drive, as required. The movie is saved. ■ You can watch the preview as it is saved. 5 Click the Save button. 6 Click Yes to preview the movie file in Windows Media Player. Creating Movies Using muvee autoProducer 57
-
 1
1 -
2
-
3
-
4
-
5
-
6
-
7
-
8
-
9
-
10
-
11
-
12
-
13
-
14
-
15
-
16
-
17
-
18
-
19
-
20
-
21
-
22
-
23
-
24
-
25
-
26
-
27
-
28
-
29
-
30
-
31
-
32
-
33
-
34
-
35
-
36
-
37
-
38
-
39
-
40
-
41
-
42
-
43
-
44
-
45
-
46
-
47
-
48
-
49
-
50
-
51
-
52
-
53
-
54
-
55
-
 56
56 -
 57
57 -
 58
58 -
 59
59 -
 60
60 -
 61
61 -
 62
62 -
 63
63 -
 64
64 -
 65
65 -
 66
66 -
67
-
68
-
69
-
70
 |
 |
