HP BladeSystem bc2500 Administrator's Guide HP Session Allocation Manager (SAM - Page 37
Manage Administrative Permissions, Enabled, Public, Create New Role, Create, Group Name, Description
 |
View all HP BladeSystem bc2500 manuals
Add to My Manuals
Save this manual to your list of manuals |
Page 37 highlights
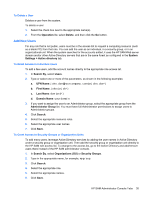
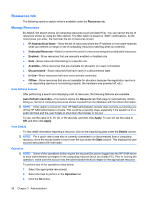
● Enabled column: ◦ If selected, the role is available for allocation. ◦ If there is no check mark, then all blades are unavailable for user connection through HP SAM within the scope of that role. ◦ To change the setting, select or clear the check box, and then click Save. ◦ If the setting check box was cleared: - New user connection requests to this role are denied by the HP SAM Web server. - Current active connections are left as is. - Disconnected users are not permitted to reconnect back to their disconnected sessions. ● Public column: ◦ If selected, the role is available for all users. ◦ If not selected, then the role is only available to user(s) in that particular role access list. ◦ To change the setting, select or clear the check box, and then click Save. ● Create New Role button: Click to create a new role that you can assign to resources. Manage Administrative Permissions NOTE: You must have full HP SAM Administrator permissions to: - Create, modify, or delete an Administrator group. - Assign users to an Administrator group. Use this window to customize permissions for differing levels of administrator access. After you create administrative levels, to grant user access you must add the users to the Administrator groups you created. NOTE: If you assign a user to multiple Administrator Groups which have different sets of access privileges, the user will have all the privileges from the assigned Administrator Groups. To create a new administrative permission group: 1. Click Create. 2. In the Group Name box, type a name for the administrator group. 3. In the Description box, type a description for the group. 4. In the Category list, select the category for which to specify specific permission levels. 5. In the Permissions area, select the permissions to allow for this category for this specific administrative group. 6. Repeat steps 4 and 5 for each category. 7. Click Save. To modify an Administrator group: 1. Select the group to modify by clicking the group name hyperlink. 2. Make changes as necessary. You can make changes to any value in the Manage Administrator Group dialog box that pops up. HP SAM Administrator Console Tabs 31
-
 1
1 -
2
-
3
-
4
-
5
-
6
-
7
-
8
-
9
-
10
-
11
-
12
-
13
-
14
-
15
-
16
-
17
-
18
-
19
-
20
-
21
-
22
-
23
-
24
-
25
-
26
-
27
-
28
-
29
-
30
-
31
-
 32
32 -
 33
33 -
 34
34 -
 35
35 -
 36
36 -
 37
37 -
 38
38 -
 39
39 -
 40
40 -
 41
41 -
 42
42 -
43
-
44
-
45
-
46
-
47
-
48
-
49
-
50
-
51
-
52
-
53
-
54
-
55
-
56
-
57
-
58
-
59
-
60
-
61
-
62
-
63
-
64
-
65
-
66
-
67
-
68
-
69
-
70
 |
 |