HP Brocade 8/12c DATA CENTER Best Practices Guide: High Density Cable Manageme - Page 16
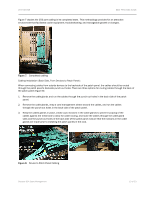
Servicing high density solutions, Connecting a cable to a empty mSFP
 |
View all HP Brocade 8/12c manuals
Add to My Manuals
Save this manual to your list of manuals |
Page 16 highlights
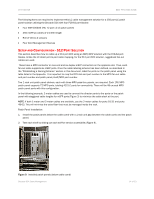
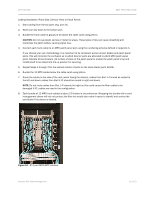
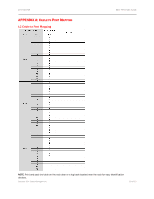
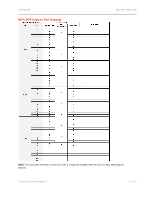
DATA CENTER BEST PRACTICES GUIDE The following items are required to implement this MPO/MTP cable management solution for a 512 port solution utilizing the Brocade DCX with eight FC8-64 port blades: • Two XBR-000307 1RU 72 port MPO-MPO patch panels • 96 mSFP-MPO/MTP cables of 2 meter length • Roll of Velcro & scissors • Eight Cord Management Sleeves SERVICING HIGH DENSITY SOLUTIONS Identifying and servicing fibre cables at a port level can be a challenge when servicing cables during an anomaly due to the cable density. The mSFP transceivers used in the FC8-64 port blade are fitted with a pull-tab to aid in installation and removal. The steps below with will ease the servicing process. For additional details, refer to the mSFP, SFP, SFP+, and XFP Optical Transceiver Replacement Procedure. Connecting a cable to a empty mSFP 1. Remove the mSFP from the port. Hold the mSFP pull-tab firmly and gently pull the mSFP away from the connected port. 2. Verify the chosen optical cable supports mSFPs. Note: If using a recommended patch cable, the clip that holds the two fiber cables in place should be black. 3. Connect the cable to the mSFP. 4. Insert the mSFP into the port. Hold the pull-tab on the mSFP firmly and insert the mSFP into the port and slide it back into the port until the transceiver clicks (locks into place). Removing a cable from a populated mSFP 1. Remove the mSFP from the port. a) Make sure the patch cable is not wrapped around the pull-tab. b) Loosen any cable ties used for holding the cables in place. c) Hold the mSFP pull-tab firmly and gently pull the mSFP away from the connected port. 2. Disconnect the cable from the mSFP. BEST PRACTICES FOR MANAGING THE CABLING Whether implementing, upgrading, or maintaining cabling in the data center, establish a set of guidelines that are thoroughly understood and supported by the staff. Here are some cable management pointers. During Installation √ Avoid over-bundling the cables or placing multiple bundles on top of each other, which can degrade performance of the cables underneath. Additionally, keep fiber and copper runs separated, because the weight of the copper cables can crush any fiber cables that are placed underneath. √ Avoid mounting cabling components in locations that block access to other equipment (power strip or fans) inside and outside the racks. √ Keep all cable runs under 90 percent of the maximum distance supported for each media type as specified in the relevant standard. This extra headroom is for the additional patch cables that will be included in the end-to-end connection. Brocade DCX Cable Management 16 of 23
-
 1
1 -
2
-
3
-
4
-
5
-
6
-
7
-
8
-
9
-
10
-
 11
11 -
 12
12 -
 13
13 -
 14
14 -
 15
15 -
 16
16 -
 17
17 -
 18
18 -
 19
19 -
 20
20 -
 21
21 -
22
-
23
 |
 |