HP Business Inkjet 2300 HP Business Inkjet 2300 - Getting Started Guide - Page 12
Schritt 9: Anschließen des Netzkabels.
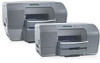 |
View all HP Business Inkjet 2300 manuals
Add to My Manuals
Save this manual to your list of manuals |
Page 12 highlights
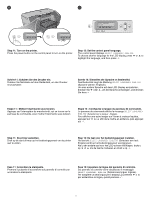
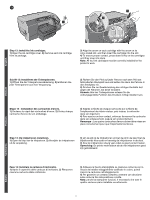
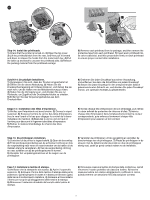
9 English Deutsch 7 6 6) Replace the DIMM cover. 7) Replace the side cover. Step 9: Connect the power cord. Connect the power cord to the printer and an AC power outlet. Note: Do not connect the printer to the computer at this time. 6) Setzen Sie die Abdeckung der DIMMs wieder ein. 7) Bringen Sie die seitliche Abdeckung wieder an. Schritt 9: Anschließen des Netzkabels. Schließen Sie das Netzkabel am Drucker und einer Wechselstromdose an. Hinweis: Verbinden Sie den Drucker noch nicht mit dem Computer. 6) Remettez le capot de la barrette DIMM en place. 7) Remettez le capot latéral en place. Etape 9 : Branchez le cordon d'alimentation. Branchez une extrémité du cordon d'alimentation dans l'imprimante, puis l'autre l'extrémité dans une prise murale. Remarque : Ne connectez pas encore l'imprimante à l'ordinateur. 6) Plaats de DIMM-klep terug. 7) Plaats de zijklep terug. Stap 9: Het netsnoer aansluiten. Sluit het netsnoer aan op de printer en een stopcontact. Opmerking: Sluit de printer nu nog niet aan op de computer. 6) Richiudere il coperchio del modulo DIMM. 7) Richiudere il coperchio laterale. Fase 9: Collegare il cavo di alimentazione. Collegare il cavo di alimentazione alla stampante e a una presa di corrente alternata (CA). Nota: non collegare la stampante al computer in questa fase. 12 Français Nederlands Italiano
-
 1
1 -
2
-
3
-
4
-
5
-
6
-
 7
7 -
 8
8 -
 9
9 -
 10
10 -
 11
11 -
 12
12 -
 13
13 -
 14
14 -
 15
15 -
 16
16 -
 17
17 -
18
-
19
-
20
-
21
-
22
-
23
-
24
-
25
-
26
-
27
-
28
-
29
-
30
-
31
-
32
-
33
-
34
-
35
-
36
-
37
-
38
-
39
-
40
 |
 |
