HP Color LaserJet Pro MFP M476 User Guide - Page 52
Set up Scan to E-mail, Introduction, Use the Scan to E-Mail Wizard (Windows)
 |
View all HP Color LaserJet Pro MFP M476 manuals
Add to My Manuals
Save this manual to your list of manuals |
Page 52 highlights
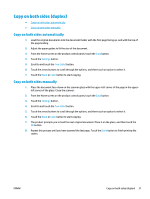
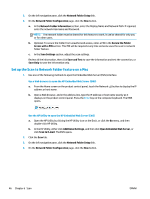
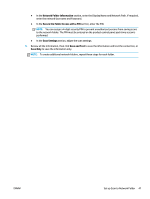
Set up Scan to E-mail Introduction To use this scan feature, the product must be connected to a network. This scan feature is not available until you configure it. To configure this features, use the Scan to Email Setup Wizard (Windows), which is installed in the HP program group for the product as part of the full software installation. You can also use the HP Embedded Web Server to configure this feature. The following instructions describe configuring the feature by using both the Scan to Email Setup Wizard and the HP Embedded Web Server. ● Use the Scan to E-Mail Wizard (Windows) ● Set up the Scan to Email feature via the HP Embedded Web Server (Windows) ● Set up the Scan to Email feature on a Mac Use the Scan to E-Mail Wizard (Windows) Some HP products include driver installation from a software CD. At the end of this installation is an option to Setup Scan to Folder and Email. The setup wizards include the options for basic configuration. After installation, access the setup wizard by clicking the Start button, selecting the Programs or All Programs item, and then clicking the HP item. Click the product name item, and then click the Scan to E-mail Wizard to start the configuration process. 1. To add a new outgoing email address, click the New button. 2. Enter the email address. Click the Next button. 3. In the Display Name box, type the name to display for this email address, and then click Next. NOTE: To secure the email profile, enter a 4-digit PIN. After a security PIN is assigned to a profile, the PIN must be entered on the product control panel before the product can send an email using that profile. 4. Enter the name or the IP address of the SMTP server and the SMTP server port number. If the outgoing SMTP server requires additional security authentication, click the check box labeled E-mail Log-in Authentication and enter the required User ID and Password. Click the Next button when finished. NOTE: If you do not know the SMTP server name, SMTP port number, or authentication information, contact the email/Internet service provider or system administrator for the information. SMTP server names and port names are typically easy to find by doing an Internet search. For example, use terms like "gmail smtp server name" or "yahoo smtp server name" to search. 5. Review the information and verify all the settings are correct. If there is an error, click the Back button to correct the error. When finished, click the Save and Test button to test the configuration and finish the setup. NOTE: Create additional outgoing email profiles to scan from more than one email account. Set up the Scan to Email feature via the HP Embedded Web Server (Windows) 1. Open the HP Embedded Web Server (EWS): a. From the Home screen on the product control panel, touch the Network button to display the IP address or host name. 42 Chapter 6 Scan ENWW
-
 1
1 -
2
-
3
-
4
-
5
-
6
-
7
-
8
-
9
-
10
-
11
-
12
-
13
-
14
-
15
-
16
-
17
-
18
-
19
-
20
-
21
-
22
-
23
-
24
-
25
-
26
-
27
-
28
-
29
-
30
-
31
-
32
-
33
-
34
-
35
-
36
-
37
-
38
-
39
-
40
-
41
-
42
-
43
-
44
-
45
-
46
-
 47
47 -
 48
48 -
 49
49 -
 50
50 -
 51
51 -
 52
52 -
 53
53 -
 54
54 -
 55
55 -
 56
56 -
 57
57 -
58
-
59
-
60
-
61
-
62
-
63
-
64
-
65
-
66
-
67
-
68
-
69
-
70
-
71
-
72
-
73
-
74
-
75
-
76
-
77
-
78
-
79
-
80
-
81
-
82
-
83
-
84
-
85
-
86
-
87
-
88
-
89
-
90
-
91
-
92
-
93
-
94
-
95
-
96
-
97
-
98
-
99
-
100
-
101
-
102
-
103
-
104
-
105
-
106
-
107
-
108
-
109
-
110
-
111
-
112
-
113
-
114
-
115
-
116
-
117
-
118
-
119
-
120
-
121
-
122
-
123
-
124
-
125
-
126
-
127
-
128
-
129
-
130
-
131
-
132
-
133
-
134
-
135
-
136
-
137
-
138
-
139
-
140
-
141
-
142
-
143
-
144
 |
 |