HP Color LaserJet Pro MFP M476 User Guide - Page 55
Set up Scan to Network Folder, Introduction, Use the Scan to Network Folder Wizard (Windows)
 |
View all HP Color LaserJet Pro MFP M476 manuals
Add to My Manuals
Save this manual to your list of manuals |
Page 55 highlights
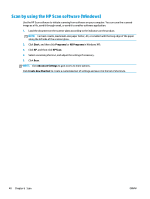
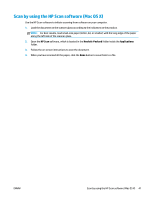
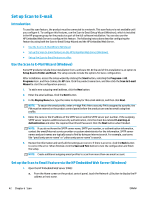
Set up Scan to Network Folder Introduction To use this scan feature, the product must be connected to a network. This scan feature is not available until you configure it. To configure this feature, use the Scan to Network Folder Setup Wizard (Windows), which is installed in the HP program group for the product as part of the full software installation. You can also use the HP Embedded Web Server to configure these features. The following instructions describe configuring the feature by using both the Scan to Network Folder Wizard and the HP Embedded Web Server. ● Use the Scan to Network Folder Wizard (Windows) ● Set up the Scan to Network Folder feature via the HP Embedded Web Server (Windows) ● Set up the Scan to Network Folder feature on a Mac Use the Scan to Network Folder Wizard (Windows) Some HP products include driver installation from a software CD. At the end of this installation is an option to Setup Scan to Folder and Email. The setup wizards include the options for basic configuration. After installation, access the setup wizard by clicking the Start button, selecting the Programs or All Programs item, and then clicking the HP item. Click the product name item, and then click the Scan to Network Folder Wizard to start the configuration process. 1. To add a new network folder, click the New button. 2. Enter the network folder address or click the Browse button to locate a folder to be shared. Enter the display name that will appear on the control panel. Click the Next button. 3. To share the folder with other users, check the box for that option. Enter the security pin if required. Click the Next button. 4. Enter the User Name and Password. Click the Next button. 5. Review the information and verify all the settings are correct. If there is an error, click the Back button to correct the error. When finished, click the Save and Test button to test the configuration and finish the setup. Set up the Scan to Network Folder feature via the HP Embedded Web Server (Windows) 1. Open the HP Embedded Web Server (EWS): a. From the Home screen on the product control panel, touch the Network button to display the IP address or host name. b. Open a Web browser, and in the address line, type the IP address or host name exactly as it displays on the product control panel. Press the Enter key on the computer keyboard. The EWS opens. 2. Click the Scan tab. ENWW Set up Scan to Network Folder 45
-
 1
1 -
2
-
3
-
4
-
5
-
6
-
7
-
8
-
9
-
10
-
11
-
12
-
13
-
14
-
15
-
16
-
17
-
18
-
19
-
20
-
21
-
22
-
23
-
24
-
25
-
26
-
27
-
28
-
29
-
30
-
31
-
32
-
33
-
34
-
35
-
36
-
37
-
38
-
39
-
40
-
41
-
42
-
43
-
44
-
45
-
46
-
47
-
48
-
49
-
 50
50 -
 51
51 -
 52
52 -
 53
53 -
 54
54 -
 55
55 -
 56
56 -
 57
57 -
 58
58 -
 59
59 -
 60
60 -
61
-
62
-
63
-
64
-
65
-
66
-
67
-
68
-
69
-
70
-
71
-
72
-
73
-
74
-
75
-
76
-
77
-
78
-
79
-
80
-
81
-
82
-
83
-
84
-
85
-
86
-
87
-
88
-
89
-
90
-
91
-
92
-
93
-
94
-
95
-
96
-
97
-
98
-
99
-
100
-
101
-
102
-
103
-
104
-
105
-
106
-
107
-
108
-
109
-
110
-
111
-
112
-
113
-
114
-
115
-
116
-
117
-
118
-
119
-
120
-
121
-
122
-
123
-
124
-
125
-
126
-
127
-
128
-
129
-
130
-
131
-
132
-
133
-
134
-
135
-
136
-
137
-
138
-
139
-
140
-
141
-
142
-
143
-
144
 |
 |