HP Designjet 9000s HP Designjet 9000s Printer Series - User Guide - Page 160
Leading edge mode LEADING EDGE, Vacuum level setting VACUUM LEVEL
 |
View all HP Designjet 9000s manuals
Add to My Manuals
Save this manual to your list of manuals |
Page 160 highlights
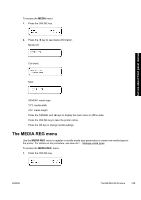
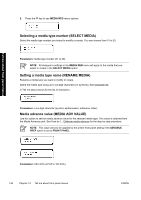
Tell me about front panel menus Hint TENSION is the recommended take-up reel mode particularly when printing on long rolls. This helps to reduce the risk of media skew. NOTE If you see banding, perform the Media Advance calibration in the mode that your are using. See How do I... Leading edge mode (LEADING EDGE) This option allows you to define how the printer detects the position of the media when it is loaded or make media settings on the front panel. NOTE This setting is not applied when you use the take-up reel. Parameters: ● NORMAL - Detects the leading edge of the media when you replace or load the media, and then completes media loading after checking for skew. ● REDUCED - Detects the leading edge of the media when you replace or load media, and then completes media loading after detecting the edge of the media by rewinding. NOTE The recommended setting is NORMAL. If you select REDUCED, follow these instructions: ● Cut the edge of the media so that the edge of the media is parallel to the guide line and then load the media. If the edge of the media is not straight, the printer will deposit ink on the platen and that can cause a printhead crash. ● Load the media after checking that there are no wrinkles on the edge of the media. Wrinkled media can cause a printhead crash. ● Load the media after checking that there is no tape or glue on the edge of the media. If using media with tape or glue, it can cause a media jam. Vacuum level setting (VACUUM LEVEL) Use the VACUUM LEVEL option to set the suction force of the vacuum fan on the printing platen for the selected media type. 150 Chapter 14 Tell me about front panel menus ENWW
-
 1
1 -
2
-
3
-
4
-
5
-
6
-
7
-
8
-
9
-
10
-
11
-
12
-
13
-
14
-
15
-
16
-
17
-
18
-
19
-
20
-
21
-
22
-
23
-
24
-
25
-
26
-
27
-
28
-
29
-
30
-
31
-
32
-
33
-
34
-
35
-
36
-
37
-
38
-
39
-
40
-
41
-
42
-
43
-
44
-
45
-
46
-
47
-
48
-
49
-
50
-
51
-
52
-
53
-
54
-
55
-
56
-
57
-
58
-
59
-
60
-
61
-
62
-
63
-
64
-
65
-
66
-
67
-
68
-
69
-
70
-
71
-
72
-
73
-
74
-
75
-
76
-
77
-
78
-
79
-
80
-
81
-
82
-
83
-
84
-
85
-
86
-
87
-
88
-
89
-
90
-
91
-
92
-
93
-
94
-
95
-
96
-
97
-
98
-
99
-
100
-
101
-
102
-
103
-
104
-
105
-
106
-
107
-
108
-
109
-
110
-
111
-
112
-
113
-
114
-
115
-
116
-
117
-
118
-
119
-
120
-
121
-
122
-
123
-
124
-
125
-
126
-
127
-
128
-
129
-
130
-
131
-
132
-
133
-
134
-
135
-
136
-
137
-
138
-
139
-
140
-
141
-
142
-
143
-
144
-
145
-
146
-
147
-
148
-
149
-
150
-
151
-
152
-
153
-
154
-
 155
155 -
 156
156 -
 157
157 -
 158
158 -
 159
159 -
 160
160 -
 161
161 -
 162
162 -
 163
163 -
 164
164 -
 165
165 -
166
-
167
-
168
-
169
-
170
-
171
-
172
-
173
-
174
-
175
-
176
-
177
-
178
-
179
-
180
-
181
-
182
-
183
-
184
-
185
-
186
-
187
-
188
-
189
-
190
-
191
-
192
-
193
-
194
-
195
-
196
-
197
-
198
-
199
-
200
 |
 |