HP Designjet L65500 HP Designjet L65500 Printer series - Installation Guide (E - Page 15
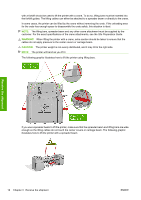
Lift the printer to a second floor using a crane
 |
View all HP Designjet L65500 manuals
Add to My Manuals
Save this manual to your list of manuals |
Page 15 highlights
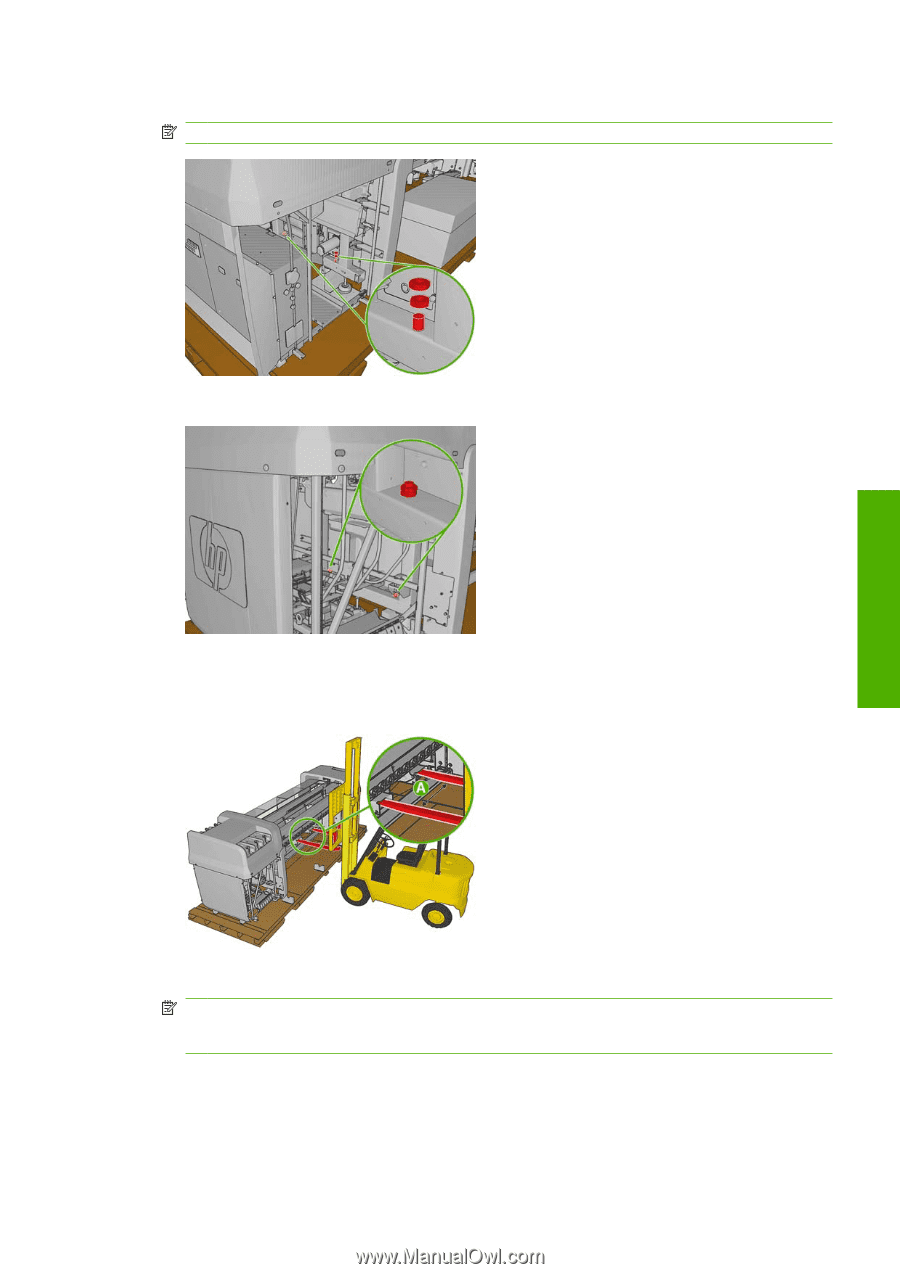
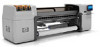
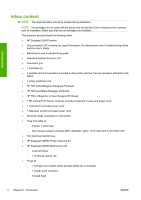
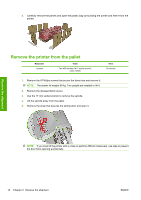
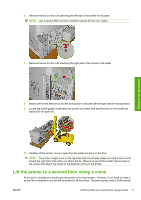
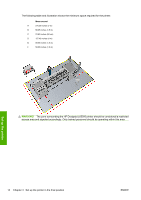
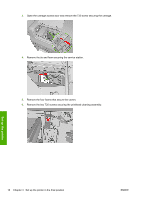
6. Remove the two 30 mm nuts attaching the left side of the printer to the pallet. NOTE: Use a second M30 wrench to hold the second 30 mm nut in place. Receive the shipment 7. Remove the two 30 mm nuts attaching the right side of the printer to the pallet. 8. Make sure that the feet are up and the sliding door is secured with the tape used for transportation. 9. Locate the forklift guides underneath the printer and make sure that the forks on the forklift are spaced 80 cm apart (A). 10. Carefully lift the printer, move it away from the pallet and set it on the floor. NOTE: The printer weighs more on the right side than the left side. Make sure that it does not tilt toward the right hand side when you lift the printer. Make sure you lift the printer high enough so the screws that attach the printer to the pallet do not touch the printer. Lift the printer to a second floor using a crane At this point, normally you would push the printer to the final location. However, if you need to make a second floor installation, a crane will be needed to lift the printer. The same guides used to lift the printer ENWW Lift the printer to a second floor using a crane 11
-
 1
1 -
2
-
3
-
4
-
5
-
6
-
7
-
8
-
9
-
 10
10 -
 11
11 -
 12
12 -
 13
13 -
 14
14 -
 15
15 -
 16
16 -
 17
17 -
 18
18 -
 19
19 -
 20
20 -
21
-
22
-
23
-
24
-
25
-
26
-
27
-
28
-
29
-
30
-
31
-
32
-
33
-
34
-
35
-
36
-
37
-
38
-
39
-
40
-
41
-
42
-
43
-
44
-
45
-
46
-
47
-
48
-
49
-
50
-
51
-
52
-
53
-
54
-
55
-
56
-
57
-
58
-
59
-
60
-
61
-
62
-
63
-
64
-
65
-
66
-
67
-
68
-
69
-
70
 |
 |