HP Deskjet 340 HP DeskJet 340 Printer - (English) User's Guide - Page 4
Connecting the Printer to Your Computer, Connecting the Power Adapter, Installing the Print Cartridge - printers
 |
View all HP Deskjet 340 manuals
Add to My Manuals
Save this manual to your list of manuals |
Page 4 highlights
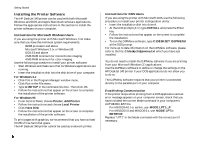
2 Getting Started Connecting the Printer to Your Computer You can use the HP DeskJet 340 printer with a PC or a Macintosh computer. You need to make sure, however, that you have the correct printer cable for your computer. Use a parallel printer cable (the cable is not supplied with the printer) to connect the printer to a PC. Connect one end of the printer cable to the port on the side of the printer and the other end to the printer port of your PC. Connecting the Power Adapter The multivoltage power adapter can be used throughout the world, with voltages that range from 100 to 240 volts AC, at either 50 or 60 Hz. 1 Attach the power cord to the power adapter. Plug the other end of the cord into an AC outlet. 2 Plug the power adapter connector firmly into the printer's power socket. You must use the special Mac Adapter cable to connect the HP DeskJet 340 printer to your Macintosh computer. If the cable has not been packaged with your printer, you must purchase one from Hewlett-Packard or an Apple reseller (see "Supplies and Accessories," for part numbers). Connect one end of the Mac Adapter cable to the printer and the other end to either a modem or printer port on the computer. Note You cannot connect the printer to an AppleTalk network. Installing the Print Cartridge You can install either a black print cartridge or a color print cartridge. 1 Press the Power button to turn the printer on. + 2 Open the access door and press the Change Cartridge button once. The Change Cartridge light blinks, and the print cartridge cradle moves to the center of the printer. 3 Remove the tape from the print cartridge. Be careful not to touch the ink nozzles and the copper ribbon. 2
-
 1
1 -
 2
2 -
 3
3 -
 4
4 -
 5
5 -
 6
6 -
 7
7 -
 8
8 -
 9
9 -
 10
10 -
11
-
12
-
13
-
14
-
15
-
16
-
17
-
18
-
19
-
20
 |
 |
