HP Deskjet 6620 HP Deskjet 6600 series printer - (Windows) Reference Guide - Page 269
Problems with the Auto Two-Sided Print Accessory with Small Paper Tray
 |
View all HP Deskjet 6620 manuals
Add to My Manuals
Save this manual to your list of manuals |
Page 269 highlights
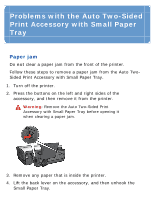
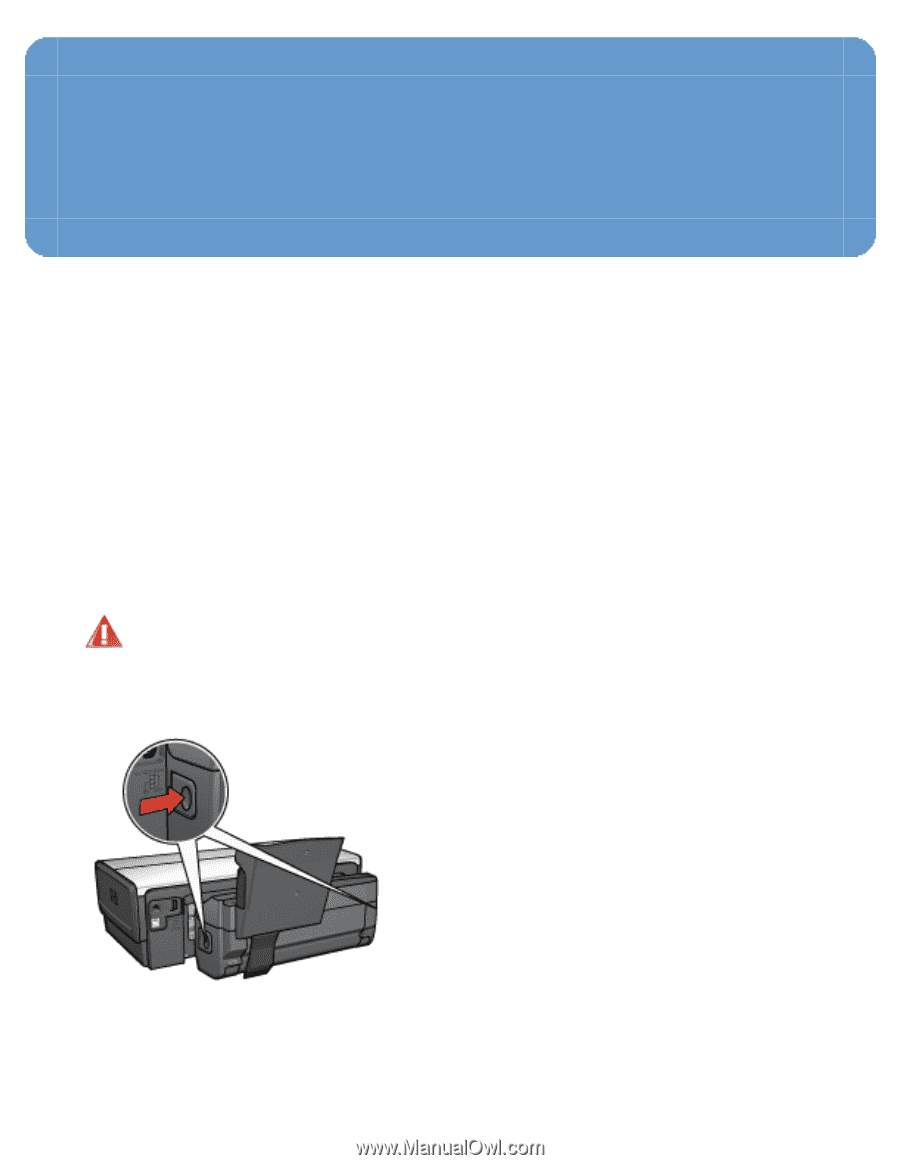
Problems with the Auto Two-Sided Print Accessory with Small Paper Tray Paper jam Do not clear a paper jam from the front of the printer. Follow these steps to remove a paper jam from the Auto TwoSided Print Accessory with Small Paper Tray. 1. Turn off the printer. 2. Press the buttons on the left and right sides of the accessory, and then remove it from the printer. Warning: Remove the Auto Two-Sided Print Accessory with Small Paper Tray before opening it when clearing a paper jam. 3. Remove any paper that is inside the printer. 4. Lift the back lever on the accessory, and then unhook the Small Paper Tray.
-
 1
1 -
2
-
3
-
4
-
5
-
6
-
7
-
8
-
9
-
10
-
11
-
12
-
13
-
14
-
15
-
16
-
17
-
18
-
19
-
20
-
21
-
22
-
23
-
24
-
25
-
26
-
27
-
28
-
29
-
30
-
31
-
32
-
33
-
34
-
35
-
36
-
37
-
38
-
39
-
40
-
41
-
42
-
43
-
44
-
45
-
46
-
47
-
48
-
49
-
50
-
51
-
52
-
53
-
54
-
55
-
56
-
57
-
58
-
59
-
60
-
61
-
62
-
63
-
64
-
65
-
66
-
67
-
68
-
69
-
70
-
71
-
72
-
73
-
74
-
75
-
76
-
77
-
78
-
79
-
80
-
81
-
82
-
83
-
84
-
85
-
86
-
87
-
88
-
89
-
90
-
91
-
92
-
93
-
94
-
95
-
96
-
97
-
98
-
99
-
100
-
101
-
102
-
103
-
104
-
105
-
106
-
107
-
108
-
109
-
110
-
111
-
112
-
113
-
114
-
115
-
116
-
117
-
118
-
119
-
120
-
121
-
122
-
123
-
124
-
125
-
126
-
127
-
128
-
129
-
130
-
131
-
132
-
133
-
134
-
135
-
136
-
137
-
138
-
139
-
140
-
141
-
142
-
143
-
144
-
145
-
146
-
147
-
148
-
149
-
150
-
151
-
152
-
153
-
154
-
155
-
156
-
157
-
158
-
159
-
160
-
161
-
162
-
163
-
164
-
165
-
166
-
167
-
168
-
169
-
170
-
171
-
172
-
173
-
174
-
175
-
176
-
177
-
178
-
179
-
180
-
181
-
182
-
183
-
184
-
185
-
186
-
187
-
188
-
189
-
190
-
191
-
192
-
193
-
194
-
195
-
196
-
197
-
198
-
199
-
200
-
201
-
202
-
203
-
204
-
205
-
206
-
207
-
208
-
209
-
210
-
211
-
212
-
213
-
214
-
215
-
216
-
217
-
218
-
219
-
220
-
221
-
222
-
223
-
224
-
225
-
226
-
227
-
228
-
229
-
230
-
231
-
232
-
233
-
234
-
235
-
236
-
237
-
238
-
239
-
240
-
241
-
242
-
243
-
244
-
245
-
246
-
247
-
248
-
249
-
250
-
251
-
252
-
253
-
254
-
255
-
256
-
257
-
258
-
259
-
260
-
261
-
262
-
263
-
 264
264 -
 265
265 -
 266
266 -
 267
267 -
 268
268 -
 269
269 -
 270
270 -
 271
271 -
 272
272 -
 273
273 -
 274
274 -
275
-
276
-
277
-
278
-
279
-
280
-
281
-
282
-
283
 |
 |
Problems with the Auto Two-Sided
Print Accessory with Small Paper
Tray
Paper jam
Do
not
clear a paper jam from the front of the printer.
Follow these steps to remove a paper jam from the Auto Two-
Sided Print Accessory with Small Paper Tray.
1.
Turn off the printer.
2.
Press the buttons on the left and right sides of the
accessory, and then remove it from the printer.
Warning:
Remove the Auto Two-Sided Print
Accessory with Small Paper Tray before opening it
when clearing a paper jam.
3.
Remove any paper that is inside the printer.
4.
Lift the back lever on the accessory, and then unhook the
Small Paper Tray.