HP Deskjet Ink Advantage 2510 User Guide - Page 36
Unable to print - download
 |
View all HP Deskjet Ink Advantage 2510 manuals
Add to My Manuals
Save this manual to your list of manuals |
Page 36 highlights
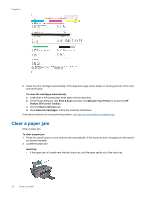
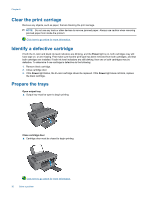
Chapter 8 If the above solutions do not resolve the problem, click here for more online troubleshooting. Prevent paper jams • Do not overfill the input tray. • Remove printed papers from the output tray frequently. • Ensure that paper loaded in the input tray lays flat and the edges are not bent or torn. • Do not combine different paper types and paper sizes in the input tray; the entire stack of paper in the input tray must be the same size and type. • Adjust the paper-width guide in the input tray to fit snugly against all paper. Make sure the paper-width guide does not bend the paper in the input tray. • Do not force paper too far forward in the input tray. If the above solutions do not resolve the problem, click here for more online troubleshooting. Unable to print If you're having trouble printing, you can download the HP Printing Diagnostic Utility, which can troubleshoot this issue for you automatically. To get the utility, click the appropriate link: NOTE: The HP Printing Diagnostic Utility may not be available in all languages. Take me to the HP Printing Diagnostic Utility download page (32-bit Windows). Take me to the HP Printing Diagnostic Utility download page (64-bit Windows). Resolve print issues NOTE: Make sure that the printer is turned on and that there is paper in the tray. If you are still unable to print, try the following in order: 1. Check for error messages and resolve. 2. Disconnect and reconnect the USB cable. 3. Verify that the product is not paused or offline. To verify that the product is not paused or offline a. Depending upon your operating system, do one of the following: • Windows 7: From the Windows Start menu, click Devices and Printers. • Windows Vista: From the Windows Start menu, click Control Panel, and then click Printers. • Windows XP: From the Windows Start menu, click Control Panel, and then click Printers and Faxes. b. Either double-click the icon for your product or right-click the icon for your product and select See what's printing to open the print queue. c. On the Printer menu, make sure there are no check marks next to Pause Printing or Use Printer Offline. d. If you made any changes, try to print again. 4. Verify that the product is set as the default printer. To verify that the product is set as the default printer a. Depending upon your operating system, do one of the following: • Windows 7: From the Windows Start menu, click Devices and Printers. • Windows Vista: From the Windows Start menu, click Control Panel, and then click Printers. • Windows XP: From the Windows Start menu, click Control Panel, and then click Printers and Faxes. b. Make sure the correct product is set as the default printer. The default printer has a check mark in a black or green circle next to it. 34 Solve a problem
-
 1
1 -
2
-
3
-
4
-
5
-
6
-
7
-
8
-
9
-
10
-
11
-
12
-
13
-
14
-
15
-
16
-
17
-
18
-
19
-
20
-
21
-
22
-
23
-
24
-
25
-
26
-
27
-
28
-
29
-
30
-
 31
31 -
 32
32 -
 33
33 -
 34
34 -
 35
35 -
 36
36 -
 37
37 -
 38
38 -
 39
39 -
 40
40 -
 41
41 -
42
-
43
-
44
-
45
-
46
-
47
-
48
-
49
-
50
-
51
-
52
 |
 |