HP ENVY 5640 User Guide - Page 68
Change network settings, Network Configuration Report
 |
View all HP ENVY 5640 manuals
Add to My Manuals
Save this manual to your list of manuals |
Page 68 highlights
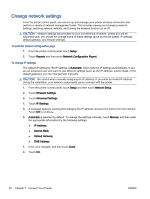
Change network settings From the printer control panel, you can set up and manage your printer wireless connection and perform a variety of network management tasks. This includes viewing and changing network settings, restoring network defaults, and turning the wireless function on or off. CAUTION: Network settings are provided for your convenience. However, unless you are an advanced user, you should not change some of these settings (such as the link speed, IP settings, default gateway, and firewall settings). To print the network configuration page 1. From the printer control panel, touch Setup. 2. Touch Reports and then touch Network Configuration Report. To change IP settings The default IP setting for the IP settings is Automatic, which sets the IP settings automatically. If you are an advanced user and want to use different settings (such as the IP address, subnet mask, or the default gateway), you can change them manually. CAUTION: Be careful when manually assigning an IP address. If you enter an invalid IP address during the installation, your network components cannot connect with the printer. 1. From the printer control panel, touch Setup and then touch Network Setup. 2. Touch Wireless Settings. 3. Touch Advanced Settings. 4. Touch IP Settings. 5. A message appears warning that changing the IP address removes the printer from the network. Touch OK to continue. 6. Automatic is selected by default. To change the settings manually, touch Manual, and then enter the appropriate information for the following settings: ● IP Address ● Subnet Mask ● Default Gateway ● DNS Address 7. Enter your changes, and then touch Done. 8. Touch OK. 62 Chapter 7 Connect Your Printer ENWW
-
 1
1 -
2
-
3
-
4
-
5
-
6
-
7
-
8
-
9
-
10
-
11
-
12
-
13
-
14
-
15
-
16
-
17
-
18
-
19
-
20
-
21
-
22
-
23
-
24
-
25
-
26
-
27
-
28
-
29
-
30
-
31
-
32
-
33
-
34
-
35
-
36
-
37
-
38
-
39
-
40
-
41
-
42
-
43
-
44
-
45
-
46
-
47
-
48
-
49
-
50
-
51
-
52
-
53
-
54
-
55
-
56
-
57
-
58
-
59
-
60
-
61
-
62
-
 63
63 -
 64
64 -
 65
65 -
 66
66 -
 67
67 -
 68
68 -
 69
69 -
 70
70 -
 71
71 -
 72
72 -
 73
73 -
74
-
75
-
76
-
77
-
78
-
79
-
80
-
81
-
82
-
83
-
84
-
85
-
86
-
87
-
88
-
89
-
90
-
91
-
92
-
93
-
94
-
95
-
96
-
97
-
98
-
99
-
100
-
101
-
102
-
103
-
104
-
105
-
106
-
107
-
108
-
109
-
110
-
111
-
112
-
113
-
114
-
115
-
116
-
117
-
118
-
119
-
120
-
121
-
122
-
123
-
124
-
125
-
126
-
127
-
128
-
129
-
130
-
131
-
132
-
133
-
134
-
135
 |
 |
