HP Integrity BL860c Errata: HP OpenVMS Support - HP Integrity BL860c Server Bl - Page 4
$dga2831:[patches]
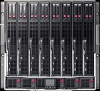 |
View all HP Integrity BL860c manuals
Add to My Manuals
Save this manual to your list of manuals |
Page 4 highlights
C. From the submenu, select option 1, as shown: This procedure can perform one of the following operations: 1) Install one or more patches 2) Undo recent patches for which there is recovery data 3) Show recovery data 4) Delete recovery data 5) Find patch kits Enter CHOICE or X to return to main men: (1/2/3/4/5/X) 1 D. When prompted for the target disk, enter the device name of your spare disk; for example: Enter device name for target disk: (? for choices) DKB0: E. When prompted for the location of the patch kits, enter the location to where you downloaded the patch kits in step 1; for example: Enter additional location, D, or just press Return: $1$DGA2831:[PATCHES] F. The procedure lists the patch kits you can install. Enter the menu item number of the update patch kit only (VMS83I_UPDATE-V0200) and respond to prompts as appropriate, continuing until you are returned to the submenu shown in step C. G. Select option 1 ("Install one or more patches") from the submenu and install all the other required patch kits listed in the section "Prerequisites." H. When all patches are installed and the submenu is displayed, enter X to return to the main menu. I. At the main menu, select option 9 to shut down the system. J. Reboot your boot server from its original system disk. The following step dedicates an entire disk for use as the installation device. If this is not convenient (for example, you are installing multiple Server Blades), skip to the section "Optional Alternative," which explains how to copy the disk to an LD device (virtual drive). 4. Enable the InfoServer utility on the boot server and create a service for the spare disk device, following the instructions provided in Section C.3 of the OpenVMS Upgrade and Installation Manual and observing the options provided in the following note. HP Part No. 5992-0787 4 June 2007
-
 1
1 -
 2
2 -
 3
3 -
 4
4 -
 5
5 -
 6
6 -
 7
7
 |
 |
