HP Integrity rx1600 Installation Guide, Second Edition - HP Integrity rx1600 - Page 47
Troubleshooting, Troubleshooting Tips, Troubleshooting Methodology
 |
View all HP Integrity rx1600 manuals
Add to My Manuals
Save this manual to your list of manuals |
Page 47 highlights
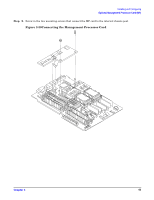
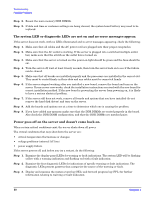
4 Troubleshooting This chapter provides troubleshooting instructions used in the maintenance of the hp Integrity rx1600 Server. Troubleshooting Tips WARNING Before removing a cover, always disconnect the AC power cord and unplug cables. Disconnect the AC power cord to avoid exposure to high energy levels that may cause burns when parts are short-circuited by metal objects such as tools or jewelry. CAUTION Do not operate the HP Server for more than 5 minutes with any cover (including disk drives) removed. Damage to system components may result due to improper cooling airflow. • For problems with an optional disk array controller board, refer to the appropriate manuals provided with the array controller. • For questions on the operation of HP e-DiagTools, refer to the HP e-DiagTools Administrator Guide on the HP Web Site at http://docs.hp.com. • For general information on HP Server products, refer to the HP Web Site and search for "management" at http://docs.hp.com. Troubleshooting Methodology Step 1. This is the entry point to the troubleshooting process. Here, you pick from a set of symptoms, ranging from very simple (System LED is blinking) to the most difficult Machine Check Abort (MCA) has occurred. The following is a list of symptom examples: • System LED blinking • System alert present on console • System will not power-up • System will not boot • Error/event message received • Machine check abort (MCA) occurred Step 2. This step narrows down the observed problem to the specific troubleshooting procedure required. Here, you isolate the failure to a specific part of the server so that you can perform more detailed troubleshooting. For example: • Problem-System LED blinking - System Alert on console? Chapter 4 47
-
 1
1 -
2
-
3
-
4
-
5
-
6
-
7
-
8
-
9
-
10
-
11
-
12
-
13
-
14
-
15
-
16
-
17
-
18
-
19
-
20
-
21
-
22
-
23
-
24
-
25
-
26
-
27
-
28
-
29
-
30
-
31
-
32
-
33
-
34
-
35
-
36
-
37
-
38
-
39
-
40
-
41
-
 42
42 -
 43
43 -
 44
44 -
 45
45 -
 46
46 -
 47
47 -
 48
48 -
 49
49 -
 50
50 -
 51
51 -
 52
52 -
53
-
54
-
55
-
56
-
57
-
58
-
59
-
60
-
61
-
62
-
63
-
64
-
65
-
66
-
67
-
68
-
69
-
70
-
71
-
72
-
73
-
74
-
75
-
76
-
77
-
78
-
79
-
80
-
81
-
82
-
83
-
84
-
85
-
86
-
87
-
88
-
89
-
90
 |
 |