HP LH4r Red Hat Linux 8.0 Professional Installation Guide for HP Servers - Page 4
boot loader configuration, Next., Firewall Configuration, Language Selection, Package group
 |
View all HP LH4r manuals
Add to My Manuals
Save this manual to your list of manuals |
Page 4 highlights
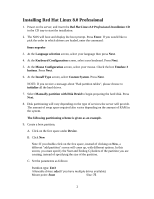
C. Click OK. Click Next. 12. At the boot loader configuration screen, you need to accomplish the following tasks: -- Choose "change boot loader" to change to LILO or NO BOOT LOADER, otherwise, leave the default of GRUB. -- Verify that "Red Hat Linux" is selected as the default operating system to boot. -- Choose whether to create a boot loader password or not. (The default is none). -- Choose "advanced boot loader options" to choose where to install boot loader to: MBR or the first sector of the boot partition. Click Next. 13. Configure your network interfaces. You can use DHCP (recommended) or static IP to configure the network interfaces. Click Next. 14. At the Firewall Configuration screen, configure the firewall to suit your requirements. Click Next. 15. At the Language Selection screen, select all the languages you would like support for. Click Next. 16. Select the appropriate timezone for your area. Click Next. 17. Enter the root password. On the next line, reconfirm the password. The password will not get displayed. Click Next. 18. Create any additional accounts required by clicking Add. 19. Set the Authentication schemes that apply to your network. Click Next. 20. At the Package group selection screen, select the software package that suits your need. You can customize the preset packages by clicking on Select individual packages. Click Next. 21. This is the last step before the install begins. If you would like to make a last minute change, click on Back, otherwise click Next. 22. The package installation process will now begin. The projected time for completion will be shown. 23. (Optional) After the package installation process, if you have installed the X Window System, you will have to configure your video hardware. 4
-
 1
1 -
 2
2 -
 3
3 -
 4
4 -
 5
5 -
 6
6
 |
 |
