HP LH4r Red Hat Linux 8.0 Professional Installation Guide for HP Servers - Page 5
If you are using an Intel 10/100 NIC D5013B, P2511A, P3492A or the Embedded
 |
View all HP LH4r manuals
Add to My Manuals
Save this manual to your list of manuals |
Page 5 highlights
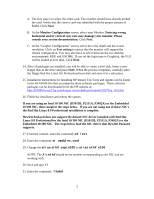
A. The first step is to select the video card. The installer should have already probed the card. Verify that the correct card was identified with the proper amount of RAM. Click Next. B. At the Monitor Configuration screen, select your Monitor. Entering wrong horizontal and/or vertical sync rate may damage your monitor. Please consult your system documentation. Click Next. C. At the "Graphic Configuration" screen, select the color depth and the screen resolution. Click on Test setting to ensure that the monitor will support the chosen configuration. You may also have to select between the two desktop environments: KDE and GNOME. If you set the login type to Graphical, the GUI will be loaded at boot time. Click Next. 24. After all packages are installed, you will be able to create a boot disk. Insert a new floppy disk in the drive and press Next. When the process completes, carefully label the floppy Red Hat Linux 8.0 Professional boot disk and store it in a safe place. 25. Installation instructions for installing HP Instant Top Tools and Agents can be found in the README file that accompanies those software packages. These software packages can be downloaded from the HP website at: http://h20004.www2.hp.com/keeper_rnotes/bsdmatrix/matrix70272en_US.html 26. Finish the installation and reboot the system. If you are using an Intel 10/100 NIC (D5013B, P2511A, P3492A) or the Embedded 10/100 NIC, then complete the steps below. If you are not using one of these NIC's the Red Hat Linux 8.0 Professional installation is complete. Hewlett Packard does not support the default NIC driver installed with Red Hat Linux 8.0 Professional for the Intel 10/100 NIC (D5013B, P2511A, P3492A) or the Embedded 10/100 NIC. The steps below load the NIC driver that Hewlett Packard supports. 27. From the console, enter the command: cd /etc 28. Enter the command: vi modules.conf 29. Change the alias ethX eepro100 to alias ethX e100 NOTE: The X in ethX should be the number corresponding to the NIC you are working with. 30. Save and quit VI. 31. Enter the command: lsmod 5
-
 1
1 -
 2
2 -
 3
3 -
 4
4 -
 5
5 -
 6
6
 |
 |
