HP LaserJet 3300 HP LaserJet 3300mfp Series - User Guide - Page 127
Cleaning the print cartridge area
 |
View all HP LaserJet 3300 manuals
Add to My Manuals
Save this manual to your list of manuals |
Page 127 highlights
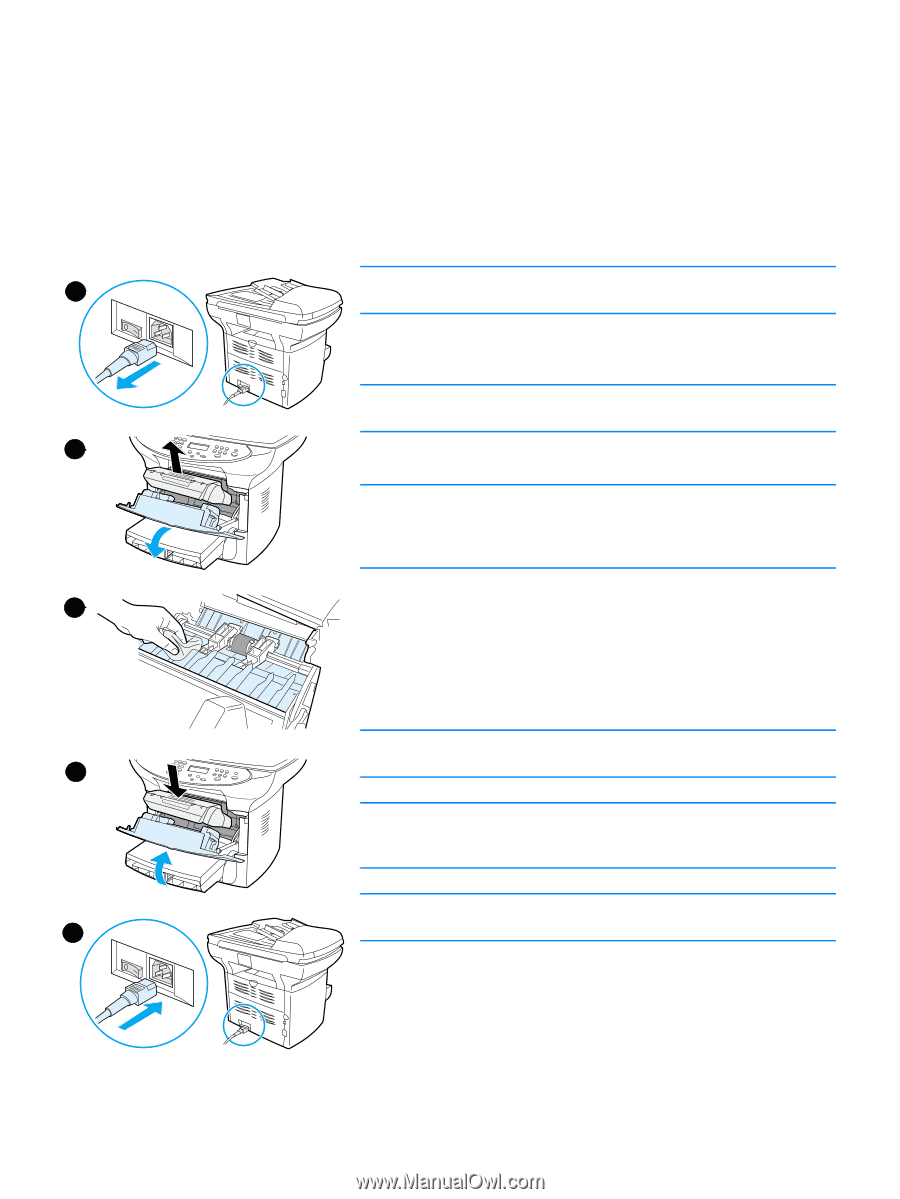
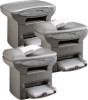
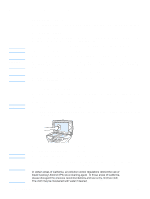
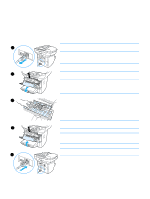
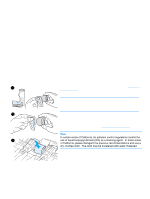
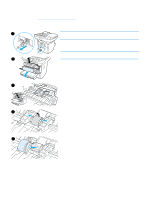
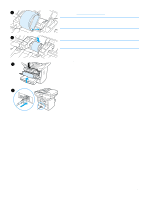
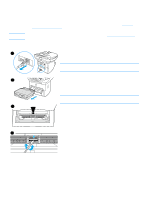
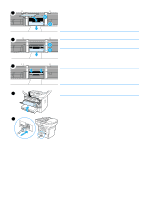
Cleaning the print cartridge area You do not need to clean the print cartridge area often. However, cleaning this area can improve the quality of your printed sheets. During the printing process, paper, toner, and dust particles can accumulate inside the printer. Over time, this buildup can cause print quality problems, such as toner specks or smearing. To correct and prevent these types of problems, you can clean the print cartridge area and the printer media path. To clean the print cartridge area 1 WARNING! Wait for the printer to cool before beginning this procedure. 1 Before cleaning the printer, turn the printer off by unplugging the power cord. Note If you have a 220V product, turn off the power switch. 2 2 Open the print cartridge door, and remove the print cartridge. CAUTION To prevent damage, do not expose the print cartridge to light. Cover the print cartridge if necessary. Also, do not touch the black sponge transfer roller inside the printer. By doing so, you can damage the printer. 3 With a dry, lint-free cloth, or an HP toner cloth (part number 3 5090-3379), wipe any residue from the media path area and the print cartridge cavity. 4 Replace the print cartridge, and close the print cartridge door. 5 Plug the printer in to turn it back on. If you have a 220V product, turn on the power switch. Note 4 Do not spray or use water inside the printer. Note If toner gets on your clothing or other fabric, wipe off the toner with a dry cloth. Wash the items in cold water and air dry. CAUTION 5 Hot water or heat from a dryer can set toner into fabric. EN Cleaning the print cartridge area 125
-
 1
1 -
2
-
3
-
4
-
5
-
6
-
7
-
8
-
9
-
10
-
11
-
12
-
13
-
14
-
15
-
16
-
17
-
18
-
19
-
20
-
21
-
22
-
23
-
24
-
25
-
26
-
27
-
28
-
29
-
30
-
31
-
32
-
33
-
34
-
35
-
36
-
37
-
38
-
39
-
40
-
41
-
42
-
43
-
44
-
45
-
46
-
47
-
48
-
49
-
50
-
51
-
52
-
53
-
54
-
55
-
56
-
57
-
58
-
59
-
60
-
61
-
62
-
63
-
64
-
65
-
66
-
67
-
68
-
69
-
70
-
71
-
72
-
73
-
74
-
75
-
76
-
77
-
78
-
79
-
80
-
81
-
82
-
83
-
84
-
85
-
86
-
87
-
88
-
89
-
90
-
91
-
92
-
93
-
94
-
95
-
96
-
97
-
98
-
99
-
100
-
101
-
102
-
103
-
104
-
105
-
106
-
107
-
108
-
109
-
110
-
111
-
112
-
113
-
114
-
115
-
116
-
117
-
118
-
119
-
120
-
121
-
 122
122 -
 123
123 -
 124
124 -
 125
125 -
 126
126 -
 127
127 -
 128
128 -
 129
129 -
 130
130 -
 131
131 -
 132
132 -
133
-
134
-
135
-
136
-
137
-
138
-
139
-
140
-
141
-
142
-
143
-
144
-
145
-
146
-
147
-
148
-
149
-
150
-
151
-
152
-
153
-
154
-
155
-
156
-
157
-
158
-
159
-
160
-
161
-
162
-
163
-
164
-
165
-
166
-
167
-
168
-
169
-
170
-
171
-
172
-
173
-
174
-
175
-
176
-
177
-
178
-
179
-
180
-
181
-
182
-
183
-
184
-
185
-
186
-
187
-
188
-
189
-
190
-
191
-
192
-
193
-
194
-
195
-
196
-
197
-
198
-
199
-
200
-
201
-
202
-
203
-
204
-
205
-
206
-
207
-
208
-
209
-
210
-
211
-
212
-
213
-
214
-
215
-
216
-
217
-
218
-
219
-
220
-
221
-
222
-
223
-
224
-
225
-
226
-
227
-
228
-
229
-
230
-
231
-
232
-
233
-
234
-
235
-
236
-
237
-
238
-
239
-
240
-
241
-
242
-
243
-
244
-
245
-
246
-
247
-
248
-
249
-
250
-
251
-
252
-
253
-
254
-
255
-
256
-
257
-
258
-
259
 |
 |