| Section |
Page |
| Getting to know your product |
15 |
| Identifying your product |
16 |
| HP LaserJet 3300mfp |
16 |
| HP LaserJet 3300se mfp |
17 |
| HP LaserJet 3310mfp |
18 |
| HP LaserJet 3320mfp |
19 |
| HP LaserJet 3320n mfp |
20 |
| HP LaserJet 3330mfp |
21 |
| Identifying your product’s hardware components |
22 |
| HP LaserJet 3300 series hardware components |
22 |
| Identifying your product’s control panel components |
23 |
| Fax controls |
23 |
| Alphanumeric buttons |
24 |
| Menu and cancel controls |
24 |
| Copy, scan, and start controls |
25 |
| Identifying HP�Jetdirect 310x print server components |
25 |
| Identifying your product’s software components |
26 |
| Getting started |
27 |
| Finding a location for your product |
28 |
| Connecting a printer cable to your product |
29 |
| Installing a print cartridge |
30 |
| Installing and loading the media input trays |
31 |
| Installing the ADF input tray |
32 |
| Connecting the power cord |
32 |
| Loading originals to copy or scan |
33 |
| To load originals onto the flatbed scanner |
33 |
| To load originals into the ADF input tray |
34 |
| Verifying your work |
35 |
| To self-test the printer |
35 |
| To self-test the copier using the ADF input tray |
35 |
| To self-test the copier using the flatbed scanner |
36 |
| To print a control panel menu map |
36 |
| Changing your product’s general default settings |
37 |
| HP�LaserJet 3300 series product settings |
38 |
| Printing a configuration page |
38 |
| To print a configuration page |
38 |
| Printing a control panel menu map |
38 |
| To print a control panel menu map |
38 |
| Restoring the factory default settings |
38 |
| To restore the factory default settings |
38 |
| Changing the display panel language |
39 |
| To change the display panel language |
39 |
| Changing the default paper size |
39 |
| To change the default paper size |
39 |
| Using the product’s volume controls |
39 |
| To change the alarm volume |
39 |
| To change the volume for the fax product |
40 |
| To change the ring volume of the fax product |
40 |
| To change the control panel key press volume |
40 |
| Changing settings from your computer |
40 |
| To change default settings across all applications (Windows) |
41 |
| To change default settings across all applications (Macintosh) |
41 |
| To temporarily change settings from a software application (Windows) |
41 |
| To temporarily change settings from a software application (Macintosh) |
41 |
| Printing |
43 |
| Printing with manual feed |
44 |
| To print using manual feed |
44 |
| Stopping or canceling a print job |
44 |
| Printer drivers |
44 |
| Understanding print quality settings |
44 |
| To temporarily change print quality settings |
45 |
| To change print quality settings for all future jobs |
45 |
| To enable EconoMode (save toner) |
45 |
| Optimizing print quality for media types |
46 |
| To access the optimizing feature |
46 |
| Printing envelopes |
47 |
| To print one envelope |
47 |
| To print multiple envelopes |
48 |
| Printing transparencies and labels |
49 |
| To print transparencies or labels |
49 |
| Printing letterhead or preprinted forms |
50 |
| To print letterhead or preprinted forms |
50 |
| Printing custom-sized media or card stock |
51 |
| To print custom-sized media or card stock |
51 |
| Printing on both sides of the media (manual duplexing) |
51 |
| To duplex manually on lightweight media |
52 |
| To duplex manually on heavy media or card stock (straight-through output path) |
53 |
| Printing multiple pages on a single sheet of media |
54 |
| To print multiple pages on a single sheet (Windows) |
54 |
| To print multiple pages on a single sheet (Macintosh) |
54 |
| Printing booklets |
55 |
| To print booklets |
55 |
| Printing watermarks |
56 |
| To access the watermark feature |
56 |
| Copying |
57 |
| Starting a copy job |
58 |
| Canceling a copy job |
58 |
| Adjusting copy quality for the current job |
58 |
| To adjust the copy quality for the current job |
58 |
| Adjusting the default copy quality |
59 |
| To adjust the copy quality |
59 |
| Adjusting the lighter/darker (contrast) setting for the current job |
59 |
| To adjust the lighter/darker setting for the current job |
59 |
| Adjusting the default lighter/darker (contrast) setting |
59 |
| To adjust the default lighter/darker setting |
59 |
| Reducing or enlarging copies for the current job |
60 |
| To reduce or enlarge copies for the current job |
60 |
| Adjusting the default copy size |
60 |
| To change the default copy size |
61 |
| Changing the copy collation setting |
61 |
| To change the copy collation setting for the current job |
61 |
| To change the default copy collation setting |
61 |
| Changing the number of copies |
62 |
| To change the number of copies for the current job |
62 |
| To change the default number of copies |
62 |
| Using HP LaserJet Copier software |
62 |
| To access HP LaserJet Copier (Windows or Macintosh) |
62 |
| Using HP LaserJet Copy Plus software |
63 |
| To access HP LaserJet Copy Plus (Windows) |
63 |
| To access HP�LaserJet Copy Plus (Macintosh) |
63 |
| Copying photos, two-sided originals, or books |
64 |
| To copy or scan a photo |
64 |
| To copy a multiple page stack of 2-sided originals |
64 |
| To copy a book |
65 |
| Scanning |
67 |
| Understanding scanning methods |
68 |
| Scanning from the product’s control panel |
68 |
| To scan from the product’s control panel using the start scan button |
68 |
| To use the scan to button via USB or parallel connection |
69 |
| To use the scan to button via network connection |
69 |
| To reprogram the scan to button destinations |
69 |
| To reprogram the start scan button |
70 |
| Canceling a scan job |
70 |
| Scanning with the product software |
70 |
| To scan using HP LaserJet Director (Windows) |
70 |
| To scan using HP LaserJet Director (Macintosh) |
71 |
| To use page-by-page scanning (Windows) |
71 |
| To use page-by-page scanning (Macintosh) |
72 |
| Scanning with TWAIN-compliant software |
72 |
| To use flatbed scanner preview scan |
72 |
| Archiving scanned text or images |
73 |
| To archive a scanned image |
73 |
| To use the archive feature (Macintosh) |
73 |
| Scanning with OCR |
74 |
| To edit scanned text (Windows and Macintosh) |
74 |
| To change the OCR word processing application |
74 |
| To use HP LaserJet Director’s OCR feature |
74 |
| Enhancing images with HP LaserJet Document Manager or HP�Photo Center |
76 |
| To access image enhancement features (Windows) |
76 |
| Adding annotations to HP documents |
76 |
| To access HP LaserJet Document Manager’s annotation features |
77 |
| To change the annotation settings |
77 |
| Adding annotations to scanned image files |
77 |
| Sending scanned items as e-mail attachments |
77 |
| To scan to e-mail (Windows) |
77 |
| To scan to e-mail (Macintosh) |
78 |
| To e-mail scanned files in an alternative mode |
78 |
| Scanner resolution and color |
78 |
| Resolution and color guidelines |
79 |
| Color |
80 |
| Faxing |
81 |
| Setting the information in the fax header |
82 |
| To set the fax header |
82 |
| Setting the answer mode |
82 |
| To set the answer mode |
82 |
| Loading originals to fax |
83 |
| To load fax documents into the ADF input tray |
83 |
| Sending faxes |
83 |
| To send a fax to one recipient |
83 |
| To send a fax to multiple recipients |
84 |
| To send a fax using a group-dial code |
84 |
| To send a fax to an ad hoc group |
84 |
| Canceling a fax job |
85 |
| To cancel the current fax job |
85 |
| To cancel a fax job using fax job status |
85 |
| Using manual dial |
85 |
| To use manual dial |
85 |
| Deleting faxes from memory |
86 |
| To delete faxes from memory |
86 |
| Redialing manually |
86 |
| To redial manually |
86 |
| Sending a fax at a future time |
86 |
| To send a fax at a future time |
87 |
| Receiving faxes |
87 |
| To receive faxes when you hear fax tones |
87 |
| To reprint a fax |
87 |
| To block or unblock fax numbers |
88 |
| Receiving faxes to your computer |
88 |
| To turn the receive to PC setting off from the control panel |
89 |
| About speed-dial codes, one-touch keys, and group-dial codes |
89 |
| To program speed-dial codes and one-touch keys |
89 |
| To delete speed-dial codes and one-touch keys |
90 |
| To quickly program speed-dial codes or one-touch keys |
90 |
| To program a one-touch key for alternate long distance |
91 |
| Managing group-dial codes |
91 |
| To program group-dial codes |
91 |
| To delete group-dial codes |
92 |
| To delete an individual from a group-dial code |
92 |
| Deleting all phone book entries |
93 |
| To delete all phone book entries |
93 |
| Using dialing characters |
93 |
| Dialing character table |
93 |
| To insert a pause or wait |
94 |
| Inserting a dial prefix |
94 |
| To set the dial prefix |
94 |
| Using fax forwarding |
95 |
| To use fax forwarding |
95 |
| Using fax polling |
95 |
| To poll (request a fax from) another fax machine |
95 |
| Enabling an extension phone |
95 |
| To enable an extension phone |
95 |
| Sending a fax by dialing from a telephone |
96 |
| To send a fax by dialing from a telephone |
96 |
| Changing the HP�LaserJet 3330 product’s volume settings |
96 |
| To change the fax sounds (line monitor) volume |
96 |
| To change the ring volume |
96 |
| Changing the default resolution |
97 |
| To change the default resolution |
97 |
| Changing the default contrast |
97 |
| To change the default contrast |
97 |
| Changing the detect dial tone setting |
97 |
| To change detect dial tone |
97 |
| Changing how the product answers incoming faxes |
98 |
| To set the answer mode to automatic or manual |
98 |
| Changing rings-to-answer |
98 |
| To set the number of rings-to-answer |
98 |
| Changing answer ring patterns |
99 |
| What is ring pattern service? |
99 |
| How do I get the service? |
99 |
| How will I know if it is working? |
99 |
| To change answer ring patterns |
99 |
| Changing the silence-detect mode |
99 |
| To change the silence detect mode |
100 |
| Changing autoreduction settings for incoming faxes |
100 |
| To change autoreduction for incoming faxes |
100 |
| Enabling stamp received faxes |
100 |
| To enable stamp received faxes |
100 |
| Setting the fax error correction |
101 |
| To change the error correction setting |
101 |
| Selecting tone- or pulse-dialing mode |
101 |
| To select tone- or pulse-dialing |
101 |
| Changing redial settings |
101 |
| To turn the redial on busy option on or off |
102 |
| To turn the redial on no answer on or off |
102 |
| Using billing codes |
102 |
| To turn billing codes on or off |
102 |
| Changing the V.34 setting |
102 |
| To turn the V.34 setting on or off |
102 |
| Managing fax logs and reports |
103 |
| Printing the fax activity log |
103 |
| To print the fax activity log |
103 |
| Setting the fax activity log to print automatically |
104 |
| To set the fax activity log to print automatically |
104 |
| Printing a fax call report |
104 |
| To print a fax call report |
104 |
| Setting fax call report print times |
104 |
| To set fax call report print times |
105 |
| Including the first page of each fax on the fax call report |
105 |
| To include the first page of each fax on the fax call report |
105 |
| Printing a phone book report |
105 |
| To print a phone book report |
105 |
| Printing the billing codes report |
105 |
| To print the billing codes report |
106 |
| Printing a T.30 protocol trace report |
106 |
| To print a T.30 protocol trace report |
106 |
| To set T.30 protocol trace report print times |
106 |
| Printing the block fax list |
106 |
| To print the block fax list |
106 |
| Printing all fax reports |
107 |
| To print all fax reports |
107 |
| Networking |
109 |
| Understanding the print server’s features and benefits |
110 |
| Using network protocols |
110 |
| Printing protocols |
110 |
| Scanning protocols |
110 |
| Software installation |
110 |
| Network connection requirements |
111 |
| Installing the 310x print server |
113 |
| To connect the product to a network |
113 |
| Installing the network software |
115 |
| Using the embedded web server |
115 |
| Prerequisites |
115 |
| Compatible web browsers |
115 |
| To start the embedded web server |
116 |
| Using HP Web JetAdmin |
116 |
| Using BOOTP |
116 |
| Setting up the BOOTP server |
117 |
| Windows 2000 or NT servers: |
117 |
| UNIX servers: |
117 |
| NetWare BOOTP servers: |
117 |
| Bootptab file entries |
117 |
| Using DHCP |
120 |
| UNIX servers: |
120 |
| Windows NT 4.0 servers: |
120 |
| Windows NT Procedure |
120 |
| Windows 2000 servers: |
121 |
| Windows 2000 Procedure |
122 |
| Configuring the print server for DHCP configuration |
123 |
| Changing the BOOTP/DHCP configuration method |
123 |
| Returning to factory defaults |
123 |
| Moving to another network |
124 |
| Printing a print server configuration page |
124 |
| To print a Jetdirect configuration page |
124 |
| For more information |
124 |
| Cleaning and maintenance |
125 |
| Cleaning the outside of the product |
126 |
| To clean the exterior |
126 |
| To clean the glass |
126 |
| To clean the lid backing |
126 |
| Cleaning the print cartridge area |
127 |
| To clean the print cartridge area |
127 |
| Cleaning the printer media path |
128 |
| To clean the printer media path |
128 |
| Cleaning the pickup roller |
128 |
| To clean the pickup roller |
128 |
| Changing the pickup roller |
129 |
| To change the pickup roller |
129 |
| Changing the printer separation pad |
131 |
| To change the printer separation pad |
131 |
| Installing a new ADF |
133 |
| To install a new or replacement ADF |
133 |
| Changing an ADF pickup roller assembly |
135 |
| Removing and replacing the control panel bezel |
137 |
| Media |
139 |
| Product media specifications |
140 |
| Supported media sizes (printer) |
140 |
| Guidelines for using media |
140 |
| Paper |
140 |
| Common media problems table |
141 |
| Labels |
141 |
| Transparencies |
141 |
| Envelopes |
142 |
| Envelope construction |
142 |
| Envelopes with double-side seams |
142 |
| Envelopes with adhesive strips or flaps |
142 |
| Envelope storage |
142 |
| Card stock and heavy media |
142 |
| Card stock construction |
143 |
| Card stock guidelines |
143 |
| Selecting media for the ADF |
143 |
| ADF specifications |
143 |
| HP parts and accessories |
145 |
| Ordering HP�parts and accessories |
146 |
| HP parts and accessories chart |
146 |
| Power modules (network model only) |
147 |
| HP�LaserJet print cartridges |
148 |
| HP policy on non-HP print cartridges |
148 |
| To install a print cartridge |
149 |
| Storing print cartridges |
149 |
| Print cartridge life expectancy |
150 |
| Recycling print cartridges |
150 |
| Saving toner |
150 |
| DIMMs (memory or font) |
150 |
| To test a DIMM installation or removal |
150 |
| To install a DIMM |
151 |
| To remove a DIMM |
153 |
| Troubleshooting printing problems |
155 |
| Product will not turn on or print |
156 |
| Is the parallel or USB cable working and connected correctly? |
156 |
| Are other devices running on your computer? |
156 |
| Is the product getting power? |
156 |
| Pages print but are totally blank |
156 |
| Is the sealing tape still in the print cartridge? |
156 |
| Does the file have blank pages? |
156 |
| Is the original loaded correctly? |
156 |
| Pages did not print |
157 |
| Is there a message on your computer screen? |
157 |
| Is media being pulled into the printer correctly? |
157 |
| Are there media jams? |
157 |
| Pages printed, but there was a problem |
157 |
| Is the print quality poor? |
157 |
| Is the printed page different than what appeared onscreen? |
157 |
| Are the printer settings appropriate for the media? |
157 |
| Onscreen error messages |
157 |
| Printer not responding/error writing to LPT1 |
157 |
| Cannot access port (in use by another application) |
157 |
| Paper handling problems |
158 |
| Print is skewed (crooked) |
158 |
| Are the media guides adjusted properly? |
158 |
| More than one sheet feeds at one time |
158 |
| Is the media input tray too full? |
158 |
| Is the media wrinkled, folded, or damaged? |
158 |
| Is the printer separation pad worn? |
158 |
| Product does not pull media from the media input tray |
158 |
| Is the product in manual feed mode? |
158 |
| Is the pickup roller dirty or damaged? |
158 |
| Media curls when fed through product |
158 |
| Printed page is different from what appeared onscreen |
158 |
| Is the text garbled, incorrect, or incomplete? |
158 |
| Are graphics or text missing? Are there blank pages? |
159 |
| Is the page format different than on another printer? |
159 |
| Is graphics quality poor? |
159 |
| Clearing media jams |
160 |
| To clear a media jam |
160 |
| To clear other media jams |
161 |
| Tips to avoid media jams |
161 |
| Improving print quality |
162 |
| Light print or fade |
162 |
| Toner specks |
162 |
| Dropouts |
162 |
| Vertical lines |
163 |
| Gray background |
163 |
| Toner smear |
164 |
| Loose toner |
164 |
| Vertical repetitive defects |
164 |
| Misformed characters |
165 |
| Page skew |
165 |
| Curl or wave |
166 |
| Wrinkles or creases |
166 |
| Toner scatter outline |
167 |
| Control panel error messages |
167 |
| Door Open or No Print Cartridge |
167 |
| Printer Tray is Empty, Add Paper |
167 |
| Critical error messages |
167 |
| Alert messages |
168 |
| Warning messages |
168 |
| Troubleshooting copy problems |
169 |
| No copy came out |
170 |
| Is media loaded in the input tray? |
170 |
| Is the original loaded correctly? |
170 |
| Is the wrong device selected? |
170 |
| Copies are blank, or images are missing or faded |
170 |
| Is the sealing tape still in the printer print cartridge? |
170 |
| Is the print cartridge low on toner? |
170 |
| Is the original of poor quality? |
170 |
| Does the original have a colored background? |
170 |
| Improving copy quality |
170 |
| Preventing problems |
170 |
| Clearing ADF media jams |
171 |
| To clear a media jam from the ADF |
171 |
| Typical ADF jam locations |
171 |
| Removing a jammed ADF page |
172 |
| Identifying and correcting copy defects |
173 |
| Vertical white or faded stripes |
173 |
| Blank pages |
174 |
| Too light or dark |
174 |
| Unwanted lines |
174 |
| Black dots or streaks |
174 |
| Unclear text |
174 |
| Reduced size |
175 |
| Troubleshooting scanning problems |
177 |
| Scanned image is of poor quality |
178 |
| Is the original a second generation photo or picture? |
178 |
| Is the image quality better when printed? |
178 |
| Is the image skewed (crooked)? |
178 |
| Does the scanned image have blots, lines, vertical white stripes, or any other defect? |
178 |
| Is the scanner dirty? |
178 |
| Do graphics appear different from the original? |
178 |
| Part of the image did not scan or text is missing |
178 |
| Was the original loaded correctly? |
178 |
| Does the original have a colored background? |
179 |
| Is the original longer than 381 mm (15 inches)? |
179 |
| Is the original too small? |
179 |
| Are you using HP LaserJet Director? |
179 |
| Is the paper size correct? |
179 |
| Did you check for missing text in selected regions? |
179 |
| The text cannot be edited |
179 |
| Was the original loaded correctly? |
179 |
| Are you using the correct word processing application? |
179 |
| Does the original have tightly spaced text? |
180 |
| Is the original of poor quality? |
180 |
| Does the original have a colored background? |
180 |
| The scan takes too long |
180 |
| Is your resolution or color level set too high? |
180 |
| Is your software set to scan in color? |
180 |
| Did you send a print or copy job before you tried to scan? |
180 |
| Is your computer set for bi-directional communication? |
180 |
| Error messages appear on the screen |
180 |
| Unable to activate TWAIN source |
180 |
| The scanner did nothing |
181 |
| Is the original loaded correctly? |
181 |
| Improving scan quality |
181 |
| Preventing problems |
181 |
| Identifying and correcting scan defects |
182 |
| Blank pages |
182 |
| Too light or dark |
182 |
| Unwanted lines |
182 |
| Black dots or streaks |
182 |
| Unclear text |
182 |
| Reduced size |
182 |
| Troubleshooting faxing problems |
183 |
| Fax phone problems |
184 |
| Are you using the phone cord supplied with the product? |
184 |
| Is the fax/phone line connector installed in the correct socket on the product? |
184 |
| Is the fax/phone line connector seated into the socket on the product? |
184 |
| Is the phone wall jack working properly? |
184 |
| Can you hear a dial tone and can you make a phone call? |
184 |
| What type of phone line are you using? |
184 |
| Are you using a phone line splitter? |
185 |
| Are you using a surge protection device? |
185 |
| Are you using a phone company’s voice messaging service? |
185 |
| Are you using an answering machine? |
185 |
| The document stops feeding during faxing |
185 |
| Is the document too large or too small for the ADF? |
185 |
| Are there problems with the fax machine you are sending to? |
186 |
| Are there problems with the phone line? |
186 |
| The product is receiving faxes but not sending them |
186 |
| Is your product on a PBX system? |
186 |
| Is there a poor phone connection? |
186 |
| Outgoing fax calls keep dialing |
186 |
| Faxes you send are not arriving |
186 |
| Is the receiving fax machine off or does it have an error condition? |
186 |
| Is the fax still waiting in memory? |
186 |
| All of the numbers in a long fax number cannot be dialed |
187 |
| Unable to start receiving faxes from an extension phone |
187 |
| Is the extension phone setting disabled? |
187 |
| Is the telephone cord securely connected? |
187 |
| Voice calls are not being received by the phone or answering machine connected to the line |
187 |
| Is the phone cord connected properly? |
187 |
| Are the answer mode and rings-to-answer settings set properly? |
187 |
| Is the answering machine or phone functioning? |
187 |
| Incoming fax calls are not being answered |
187 |
| Is the answer mode set to manual? |
187 |
| Is the rings-to-answer setting set correctly? |
187 |
| Is the answer ring pattern feature turned on? |
188 |
| Is the phone cord connected properly? |
188 |
| Is there a voice message being played by an answering machine? |
188 |
| Are there too many devices connected to the phone line? |
188 |
| Is the phone line working? |
188 |
| Is a voice messaging service interfering with the product answering calls? |
188 |
| Is the product out of paper? |
188 |
| Faxes are transmitting or being received very slowly |
189 |
| Are you sending or receiving a very complex fax? |
189 |
| Does the receiving fax machine have a slow modem speed? |
189 |
| Is the resolution at which the fax was sent or received very high? |
189 |
| Is there a poor phone line connection? |
189 |
| Faxes are not printing or are printing incorrectly |
189 |
| Is there media in the media input tray? |
189 |
| Is the receive to PC option selected? |
189 |
| Faxes are printing on two pages instead of one |
189 |
| Is the autoreduction setting set correctly? |
189 |
| Received faxes are too light or are printing only on half of the page |
189 |
| Did the product run out of toner while printing a fax? |
189 |
| Fax activity logs or call reports are not printing correctly |
190 |
| Are the activity log and call report settings correct? |
190 |
| The volume is too high or low |
190 |
| Do the volume settings need to be adjusted? |
190 |
| Troubleshooting network problems |
191 |
| Troubleshooting overview |
192 |
| ON and READY |
192 |
| Is your printer ON and READY? |
192 |
| USB OK? (USB light ON solid green?) |
192 |
| What is the state of the USB light? |
193 |
| Is the USB light ON solid green? |
193 |
| USB light OFF |
193 |
| Is the USB light now ON solid green? |
193 |
| USB light blinking green |
193 |
| Is the USB light now ON solid green? |
193 |
| USB light blinking amber |
194 |
| Is the USB light now ON solid green? |
194 |
| Power/Status OK? (Power/Status light ON solid green?) |
194 |
| Is the Power/Status light ON solid green? |
194 |
| What is the state of the Power/Status light? |
195 |
| Power/Status light OFF |
195 |
| Power/Status light blinking green |
195 |
| Is the Power/Status light now ON solid green? |
195 |
| Power/Status light blinking amber |
195 |
| 10/100 link OK? (10 light or 100 light ON solid green?) |
195 |
| Is one of the link lights ON (solid green)? |
196 |
| Link lights OFF |
196 |
| Did these steps turn ON one of the link lights? |
196 |
| Check the print server’s I/O status |
196 |
| Can you print a Jetdirect configuration page? |
196 |
| Configuration page prints? |
196 |
| Configuration page does not print |
197 |
| Error messages |
197 |
| 03 LAN Error: EXTERNAL LOOPBACK |
198 |
| 08 LAN Error: INFINITE DEFERRAL |
198 |
| 11 LAN Error: RETRY FAULTS |
198 |
| 12 LAN Error: NO LINKBEAT |
198 |
| Resetting the 310x print server to factory defaults (cold reset) |
198 |
| Interpreting the configuration page |
199 |
| General information |
200 |
| USB port information |
201 |
| Network statistics |
201 |
| TCP/IP protocol information |
202 |
| IPX/SPX protocol information |
205 |
| Novell/NetWare protocol information |
206 |
| AppleTalk protocol information |
207 |
| DLC/LLC protocol information |
207 |
| Error messages |
208 |
| Browse hp.com |
216 |
| Glossary |
217 |
| Appendix A Specifications and regulatory information |
225 |
| HP LaserJet 3300 series product |
226 |
| HP LaserJet 3300 series product specifications |
226 |
| Laser safety statement |
229 |
| Declaration of Conformity |
230 |
| Canada DOC regulations |
231 |
| Laser statement for Finland |
231 |
| Korean EMI statement |
232 |
| Japan VCCI Class B regulations |
232 |
| HP LaserJet 3330 fax |
232 |
| HP LaserJet 3330 product fax specifications |
232 |
| FCC Part 68 Requirements (US) |
233 |
| Telephone consumer protection act (US) |
233 |
| IC CS-03 requirements |
234 |
| Regulatory information for EU countries |
234 |
| HP Jetdirect 310x print server |
234 |
| HP Jetdirect 310x print server specifications |
235 |
| FCC compliance |
237 |
| Declaration of Conformity |
238 |
| Australia |
239 |
| Canada |
239 |
| Japan VCCI Class 1 regulations |
239 |
| Korean EMI statement |
239 |
| Chinese safety statement |
240 |
| Environmental product stewardship program |
241 |
| Protecting the environment |
241 |
| Ozone production |
241 |
| Energy consumption |
241 |
| Toner consumption |
241 |
| Paper use |
241 |
| Plastics |
241 |
| HP LaserJet printing supplies |
241 |
| HP printing supplies returns and recycling program information |
242 |
| US returns |
242 |
| Non-US returns |
242 |
| Paper |
242 |
| Material restrictions |
242 |
| Material safety data sheets |
242 |
| Extended warranty |
243 |
| Spare parts and consumables availability |
243 |
| For more information |
243 |
| HP LaserJet 3300 series product battery |
243 |
| Appendix B Warranties and licensing |
245 |
| HP software license agreement |
245 |
| HP limited warranty statement |
246 |
| Appendix C Service and support |
249 |
| Obtaining hardware service |
249 |
| To obtain hardware service |
249 |
| Returning the unit |
249 |
| Repackaging guidelines |
249 |
| Extended warranty |
250 |
| Service information form |
250 |
 1
1 130
130 131
131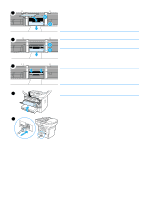 132
132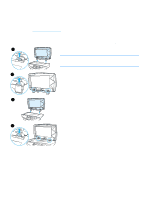 133
133 134
134 135
135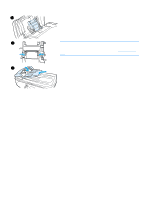 136
136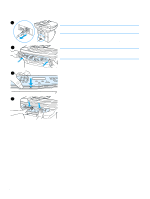 137
137 138
138 139
139 140
140