HP Latex 3100 Users Guide - Page 274
Grease the carriage beam screws, Maintenance Kit 1HA07-67008 or 1VT19A.
 |
View all HP Latex 3100 manuals
Add to My Manuals
Save this manual to your list of manuals |
Page 274 highlights
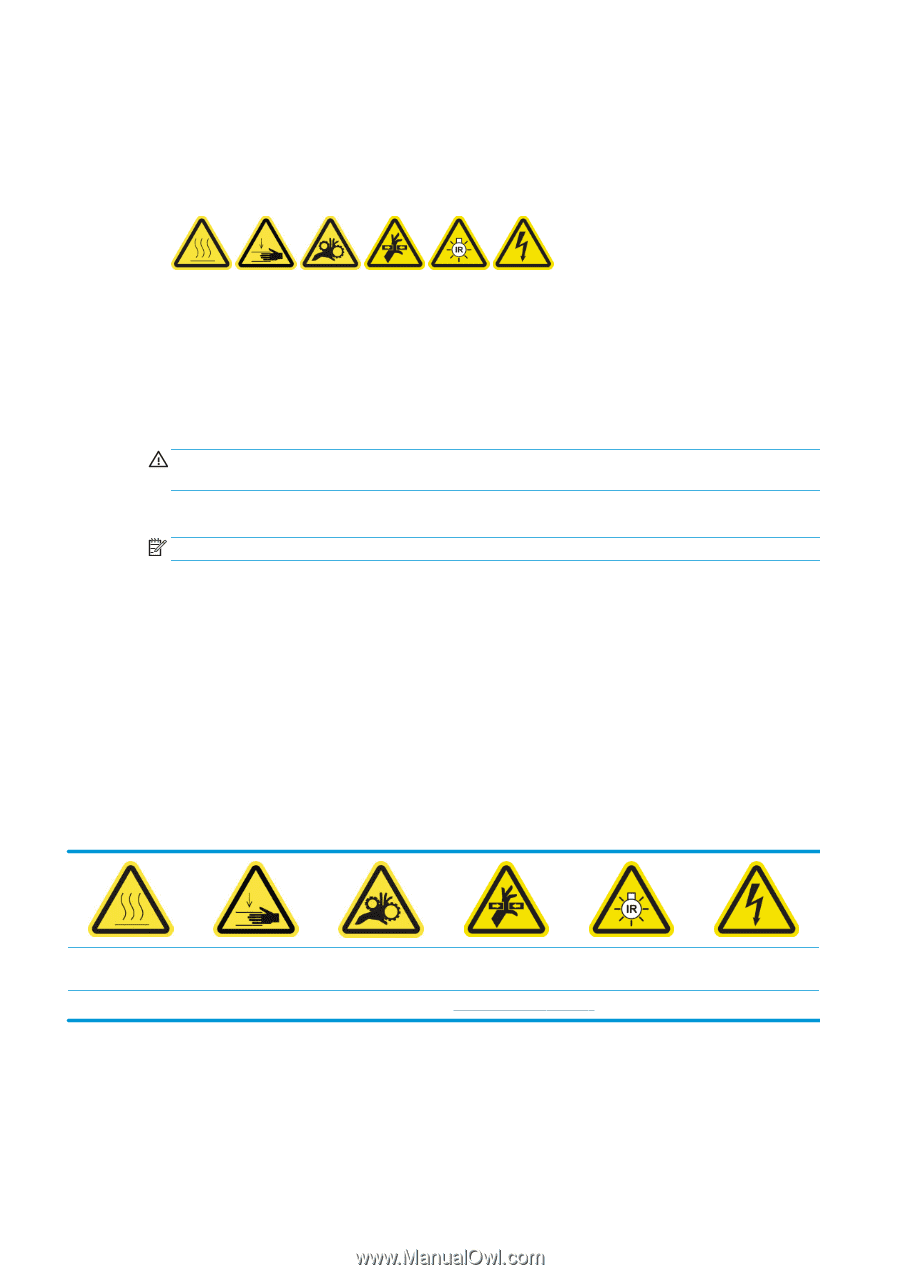
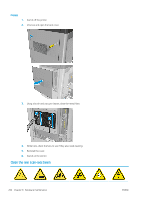
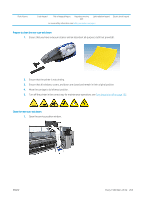
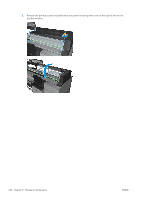
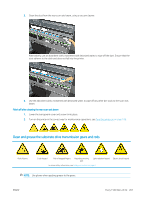
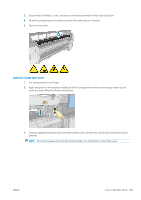
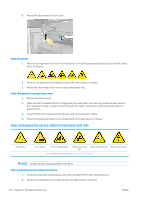
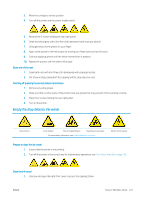
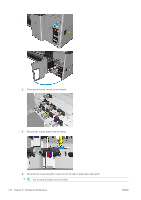
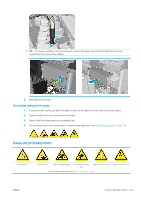
Clean and grease the substrate drive transmission gears 1. Ensure you have the machine grease and oil kit, included in the Printer Maintenance kit. 2. Unload the substrate. 3. Turn off the printer and the power-enable switch. 4. Open the pinch clamps. 5. Clean the exposed part of the substrate drive roller gear with a lint-free cloth dampened with isopropyl alcohol. 6. Using gloves put some grease on your finger. 7. Apply some grease to the exposed part of the substrate drive roller gear by moving your finger up and down the gear, filling the threads with grease. WARNING! Do not remove the gear's plastic cover to grease it, as it would uncover the encoder disc too, allowing it to get dirty. 8. Hand spin drive roller motor coupling, applying grease to all the gear threads. NOTE: Do not put grease on the outside of the threads or on the bottom or top of the screw. Clean and oil the rods 1. Clean both rods with a lint-free cloth dampened with isopropyl alcohol. 2. Put a few oil drops along both the capping and the drop detector rods. Finishing off greasing the substrate drive transmission gears 1. Remove any extra grease. 2. Make sure that no other parts of the printer have any grease that may prevent it from working correctly. 3. Turn on the printer. Grease the carriage beam screws Risk of burns Crush hazard Risk of trapped fingers Hazardous moving part Light radiation hazard For more safety information, see Safety precautions on page 2 Electric shock hazard Prepare to grease the carriage beam screws 1. Ensure that you have the Machine Grease and Oil Kit (Q6702-60546), which is included in the Printer Maintenance Kit (1HA07-67008 or 1VT19A). 2. Ensure that the printer is not printing. 268 Chapter 9 Hardware maintenance ENWW
-
 1
1 -
2
-
3
-
4
-
5
-
6
-
7
-
8
-
9
-
10
-
11
-
12
-
13
-
14
-
15
-
16
-
17
-
18
-
19
-
20
-
21
-
22
-
23
-
24
-
25
-
26
-
27
-
28
-
29
-
30
-
31
-
32
-
33
-
34
-
35
-
36
-
37
-
38
-
39
-
40
-
41
-
42
-
43
-
44
-
45
-
46
-
47
-
48
-
49
-
50
-
51
-
52
-
53
-
54
-
55
-
56
-
57
-
58
-
59
-
60
-
61
-
62
-
63
-
64
-
65
-
66
-
67
-
68
-
69
-
70
-
71
-
72
-
73
-
74
-
75
-
76
-
77
-
78
-
79
-
80
-
81
-
82
-
83
-
84
-
85
-
86
-
87
-
88
-
89
-
90
-
91
-
92
-
93
-
94
-
95
-
96
-
97
-
98
-
99
-
100
-
101
-
102
-
103
-
104
-
105
-
106
-
107
-
108
-
109
-
110
-
111
-
112
-
113
-
114
-
115
-
116
-
117
-
118
-
119
-
120
-
121
-
122
-
123
-
124
-
125
-
126
-
127
-
128
-
129
-
130
-
131
-
132
-
133
-
134
-
135
-
136
-
137
-
138
-
139
-
140
-
141
-
142
-
143
-
144
-
145
-
146
-
147
-
148
-
149
-
150
-
151
-
152
-
153
-
154
-
155
-
156
-
157
-
158
-
159
-
160
-
161
-
162
-
163
-
164
-
165
-
166
-
167
-
168
-
169
-
170
-
171
-
172
-
173
-
174
-
175
-
176
-
177
-
178
-
179
-
180
-
181
-
182
-
183
-
184
-
185
-
186
-
187
-
188
-
189
-
190
-
191
-
192
-
193
-
194
-
195
-
196
-
197
-
198
-
199
-
200
-
201
-
202
-
203
-
204
-
205
-
206
-
207
-
208
-
209
-
210
-
211
-
212
-
213
-
214
-
215
-
216
-
217
-
218
-
219
-
220
-
221
-
222
-
223
-
224
-
225
-
226
-
227
-
228
-
229
-
230
-
231
-
232
-
233
-
234
-
235
-
236
-
237
-
238
-
239
-
240
-
241
-
242
-
243
-
244
-
245
-
246
-
247
-
248
-
249
-
250
-
251
-
252
-
253
-
254
-
255
-
256
-
257
-
258
-
259
-
260
-
261
-
262
-
263
-
264
-
265
-
266
-
267
-
268
-
 269
269 -
 270
270 -
 271
271 -
 272
272 -
 273
273 -
 274
274 -
 275
275 -
 276
276 -
 277
277 -
 278
278 -
 279
279 -
280
-
281
-
282
-
283
-
284
-
285
-
286
-
287
-
288
-
289
-
290
-
291
-
292
-
293
-
294
-
295
-
296
-
297
-
298
-
299
-
300
-
301
-
302
-
303
-
304
-
305
-
306
-
307
-
308
-
309
-
310
-
311
-
312
-
313
-
314
-
315
-
316
-
317
-
318
-
319
-
320
-
321
-
322
-
323
-
324
-
325
-
326
-
327
-
328
-
329
-
330
-
331
-
332
-
333
-
334
-
335
-
336
-
337
-
338
-
339
-
340
-
341
-
342
-
343
-
344
-
345
-
346
-
347
-
348
-
349
-
350
-
351
-
352
-
353
-
354
-
355
-
356
-
357
-
358
-
359
-
360
-
361
-
362
-
363
-
364
-
365
-
366
-
367
-
368
-
369
-
370
-
371
-
372
-
373
-
374
-
375
-
376
-
377
-
378
-
379
-
380
-
381
-
382
-
383
-
384
-
385
-
386
-
387
-
388
-
389
-
390
-
391
-
392
-
393
-
394
-
395
-
396
-
397
-
398
-
399
-
400
-
401
-
402
-
403
-
404
-
405
-
406
-
407
-
408
-
409
-
410
-
411
-
412
-
413
-
414
-
415
-
416
-
417
-
418
-
419
-
420
-
421
-
422
-
423
-
424
-
425
-
426
-
427
-
428
-
429
 |
 |