HP Latex 3600 Users Guide
HP Latex 3600 Manual
 |
View all HP Latex 3600 manuals
Add to My Manuals
Save this manual to your list of manuals |
HP Latex 3600 manual content summary:
- HP Latex 3600 | Users Guide - Page 1
HP Latex 3000 Printer Series User Guide - HP Latex 3600 | Users Guide - Page 2
such products and services. Nothing herein should be construed as constituting an additional warranty. HP shall not be liable for technical or editorial errors or omissions contained herein. Safety notice Read and follow the operating and safety instructions before starting the printer. Trademarks - HP Latex 3600 | Users Guide - Page 3
manual ...1 Welcome to your printer ...1 Documentation ...2 Safety precautions ...2 Main components ...10 Printer software ...15 Turn on the printer for the first time ...16 Turn the printer on and off ...16 Move the printer ...17 Printer Status Beacon ...18 Output platen light (HP Latex 3200/3600 - HP Latex 3600 | Users Guide - Page 4
with printhead alignment ...174 Color calibration ...178 Color consistency between different HP Latex 3000 printers 180 Color profiles ...180 Substrate-advance compensation ...181 Calibrations specific to one substrate preset ...183 Recommended calibrations after particular events ...184 - HP Latex 3600 | Users Guide - Page 5
HP Print Care ...185 Print Care diagnostics ...186 Update the Print Care software ...188 Reinstall the Print Care software ...188 9 Hardware maintenance ...189 Safety precautions ...189 User maintenance kits ...189 How to perform maintenance operations ...192 How to turn the printer Troubleshoot - HP Latex 3600 | Users Guide - Page 6
need help ...408 HP Proactive Support ...408 HP Customer Care ...409 Service information ...409 15 Printer specifications ...411 Functional specifications HP Latex 3100/3200/3500/3600 411 Physical specifications ...412 Memory specifications ...413 Power specifications ...413 Air supply requirements - HP Latex 3600 | Users Guide - Page 7
1 Introduction How to use this manual This document is a user guide for the following printers: ● HP Latex 3000 ● HP Latex 3100 ● HP Latex 3200 ● HP Latex 3500 ● HP Latex 3600 NOTE: The information contained in this document may be printer-specific, and may not always apply to all models. NOTE: - HP Latex 3600 | Users Guide - Page 8
the printer HP Latex 3200/3600 only ● Print-zone lights ● Substrate saver Documentation The following documents can be downloaded from http://www.hp.com/go/latex3000/manuals/: ● Site preparation guide ● Site preparation checklist ● Installation guide ● Introductory information ● User's guide ● Legal - HP Latex 3600 | Users Guide - Page 9
, and they prevail over any status indicated by the printer status beacon. Turn off the printer, using the Branch Circuit Breakers located in the building's Power Distribution Unit (PDU), and call your service representative (see HP Customer Care Centers on page 409) in any of the following cases - HP Latex 3600 | Users Guide - Page 10
modify LED array supports, beam and enclosures. ● Remember to let the printer cool down before performing some maintenance operations. Fire hazard The drying and curing subsystems and vapor removal thermal blanket of the printer operate at high temperatures. Call your service representative if the - HP Latex 3600 | Users Guide - Page 11
type thermocouple. ● Proper maintenance and genuine HP consumables are required to ensure that the printer operates safely as designed. The use of non-HP consumables (foams, filters, printhead cleaner roll, and inks) may present a risk of fire. LED array supports, beam and enclosures can reach high - HP Latex 3600 | Users Guide - Page 12
Dual roll center support uses a Laser guide, available from http://www.hp.com/go/latex3000/manuals specifications on page 414, to avoid operator discomfort and equipment malfunction. Air conditioning in the work area should take into account that the equipment produces heat. Typically, the printer - HP Latex 3600 | Users Guide - Page 13
and keys ● Users: Daily operations including printer settings, printing, . ● Service personnel: Any repair or maintenance operation, running diagnostics, and troubleshooting. Required manual to ensure the proper use of the printer and to prevent the printer from being damaged. Follow the instructions - HP Latex 3600 | Users Guide - Page 14
printer that remain energized may represent a hazard during servicing. Before servicing, turn off the printer instructions before starting the printer. Risk of burns. Do not touch the internal enclosures of the printer's drying and curing modules, vapor removal thermal blankets, universal support - HP Latex 3600 | Users Guide - Page 15
the substrate. Located internally on the substrate path and internally on the right cover; for maintenance/service personnel only Light radiation hazard. Infrared (IR) radiation is emitted from this printer. Do not modify the dryer enclosure. You are recommended not to look directly at the lamps - HP Latex 3600 | Users Guide - Page 16
(PE) terminal for qualified electricians, and bonding terminals for maintenance/service personnel only. Earth connection essential before connecting supply. Emergency stop buttons There are four emergency stop buttons distributed around the printer. If an emergency occurs, simply push one of the - HP Latex 3600 | Users Guide - Page 17
Front view HP Latex 3000 Printer 1. Condensation collector bottle 2. Ink cartridges 3. Emergency stop buttons 4. Service position window 5. Built-in computer 6. E-cabinet 7. Power switches, lights, and circuit breakers 8. Printhead cleaner roll door 9. Curing module latches, one on each side 10. - HP Latex 3600 | Users Guide - Page 18
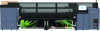
HP Latex 3100/3200/3500/3600 Printer 1. HP Latex 3500/3600 only: Dual roll split spindle center support 2. HP Latex 3200/3600 only: Printzone lights 3. Universal Mounting Beam 4. (Also optional for 3100/3200) Slitters 5. HP Latex 3500/3600 only: Split spindles 6. LED proofing lights 7. HP Latex - HP Latex 3600 | Users Guide - Page 19
Rear view HP Latex 3000 Printer 1. Emergency stop buttons 2. Ink cartridges 3. Loading table latches, one on each side 4. Loading table 5. Drive roller 6. Substrate input spindle ENWW Main components 13 - HP Latex 3600 | Users Guide - Page 20
Rear view HP Latex 3100/3200/3500/3600 Printer 1. Printer status Beacon 2. HP Latex 3500/3600 only: Dual roll split spindle center support 3. HP Latex 3500/3600 only: Roll ejector lever 4. HP Latex 3500/3600 only: Split spindles 5. HP Latex 3500/3600 only: Diverter 14 Chapter 1 Introduction ENWW - HP Latex 3600 | Users Guide - Page 21
Print Server on page 20. ● The HP Print Care program is provided with your printer and is already installed in the printer's built-in computer. It displays printer status and history in detail, and helps you to maintain the printer and solve any problems that may arise. See HP Print Care on page 185 - HP Latex 3600 | Users Guide - Page 22
initialization is complete, the Internal Print Server displays a Ready message. If a system error message is displayed, see Printer messages on page 415. Turn the printer on and off The printer has three power-off levels. Each of them goes deeper, until you reach complete shutdown at level 3. 16 - HP Latex 3600 | Users Guide - Page 23
adhesive tape. 4. If your printer is an HP Latex 3500/3600, raise the secondary feet before moving the printer. 5. Is your printer is an HP Latex 3500/3600, unload the split spindles and remove both center support split spindles from their base (see HP Latex 3500/3600 dual-roll split spindles center - HP Latex 3600 | Users Guide - Page 24
Rotate the nut manually down the bolt. HP Latex 3500/3600, it is possible that you have to adjust the center support split spindles after moving the printer (see HP Latex 3500/3600 dual-roll split spindles center support on page 63). If the printer needs to be reinstalled, see the installation guide - HP Latex 3600 | Users Guide - Page 25
state of the printer. Alert present in the IPS (Warnings) Idle Printing Output platen light (HP Latex 3200/3600 only) The output platen light illuminates both the platen and the job that is being printed. It can be switched on and off manually ENWW Output platen light (HP Latex 3200/3600 only) 19 - HP Latex 3600 | Users Guide - Page 26
screen appears. IMPORTANT: The screen captures shown below are for reference, be sure to have latest firmware version installed. See Update the firmware on page 26. In the main screen: ● You can shut down the printer by pressing the Shut down button at the top left. ● The top central pane shows the - HP Latex 3600 | Users Guide - Page 27
● To the right of the thermometer, you can see a summary of the status of the ink cartridges, the printheads, and the printhead cleaning roll. ● The Printing pane occupies most of the window, and includes: - The Print, Cancel, and Print adjustment buttons - The job queue - The print preview and job - HP Latex 3600 | Users Guide - Page 28
● Action when job fails ● Action when job has been printed ● Action when job is removed from the queue ● Action when fiducials are missing 22 Chapter 2 HP Internal Print Server ENWW - HP Latex 3600 | Users Guide - Page 29
Additional Settings tab ● Maximum roll length ● Gap between jobs ● Nesting gap between images ● Margins: - RIP: Margins are set as defined in the RIP. - Center: The image is horizontally centered on the loaded substrate. - Default: The default margins are set to 5.0 mm (0.02 in). You can define the - HP Latex 3600 | Users Guide - Page 30
Remote Assistance tab ● Enable remote assistance ● Subscribe to services Internal Print Server menus The Internal Print Server provides the following menus. 24 Chapter 2 HP Internal Print Server ENWW - HP Latex 3600 | Users Guide - Page 31
roll kit ● Advance calibration ● Enable/Disable collector The Help menu ● About ● User's guide ● Contact HP ● HP Remote Support Printer status and alerts The Internal Print Server displays the general status of the printer, the maintenance status, the loaded substrate, and the ink system. The - HP Latex 3600 | Users Guide - Page 32
IMPORTANT: It is mandatory to remove the HP Info Retriever, the HP IPS Services and the HP Internal Printer Server software from the built-in printer computer before installing the new IPS version. 1. Download the latest version IPS package available from the HP support web site onto the IPS PC hard - HP Latex 3600 | Users Guide - Page 33
5. Install the Internal Printer Server. Run the Setup.exe file inside the IPS folder and follow the onscreen instructions until the new software is installed. 6. Install IPS Services. Run the Setup.exe file inside the HP IPS Services folder and follow the onscreen instructions until the new software - HP Latex 3600 | Users Guide - Page 34
computer supplied with the printer. In that operating Print Server. ● The user account should be a Standard computer except the software initially provided by HP (which includes antivirus software). ● Free that all available updates (including Windows Service Packs) have been installed successfully. - HP Latex 3600 | Users Guide - Page 35
that ticket information to production milestones. What information is captured by the HP latex 3000 printer series and what can be communicated by JMF to an MIS? The printer implements a subset of the JDF 1.5 specification, using JMF. This allows it to communicate printerstatus, and notifications - HP Latex 3600 | Users Guide - Page 36
report back to MIS. Guidelines for Integration How to integrate the HP Latex 3000 printer series into CALDERA RIP From CALDERA RIP 10.1, the RIP can take advantage of the JDF interface in the printer by selecting the option on the printer driver setup. Once the JDF interface is enabled, the RIP will - HP Latex 3600 | Users Guide - Page 37
If there are problems using the printer's hostname, switch to the printer's IP using the HP Latex 3000 System Configuration Tool. For more details refer to the Service Manual or talk to your network administrator to solve hostname resolution. How to integrate the HP Latex 3000 printer series into - HP Latex 3600 | Users Guide - Page 38
are problems using the printer's hostname, switch to the printer's IP using the HP Latex 3000 System Configuration Tool. For more details refer to the Service Manual or talk to your network administrator to solve hostname resolution. Job submission methods The HP Latex 3000 printer series supports - HP Latex 3600 | Users Guide - Page 39
manually in the IPS File>Open. Removing a queued job from the RIP: Remove a job from the IPS/printer queue directly via the RIP interface, but only if it was submitted using the JMF method. How to integrate the HP Latex 3000 printer series into an MIS system or production control software Specific - HP Latex 3600 | Users Guide - Page 40
guidelines. MIS vendors or customers that would like to integrate the printer with a solution directly, can obtain the HP specifically supported JDF Software Development Kit from the HP Solutions Portal: https://developers.hp.com/ lfp-enroll. 34 Chapter 3 Printing workflows integration ENWW - HP Latex 3600 | Users Guide - Page 41
substrate types The following substrate types are compatible with your printer. For specific substrate settings and profiles, see the Online substrate manager on page 117. NOTE: Porous substrates and substrates with porous liners are supported only when using the ink collector kit (see The ink - HP Latex 3600 | Users Guide - Page 42
● Pre-pasted wall covering ● Non-woven wall covering ● Textile wall covering ● Self-adhesive wall covering Check the porosity of your substrate 1. If the printer has any substrate loaded, unload it. 2. Cut a piece of self-adhesive vinyl white gloss 15 × 50 mm (0.6 × 2 in) in size. 36 Chapter - HP Latex 3600 | Users Guide - Page 43
printer's built-in computer: C:\Users\hplatex\Documents\HP IPS \InkTrespassingCheck\Ink_trespassing_check.pdf used for printing as described in this guide. ● If the strip is non-white zone on page 202. Supported HP substrates Category Substrate Self-adhesive vinyl HP Air Release Adhesive Gloss - HP Latex 3600 | Users Guide - Page 44
mil) • 120 g/m² • 30,5 m (100 ft) With liner: 215 microns (8.5 mil) • 168 g/m² • 30,5 m (100 ft) HP DuPont Tyvek Banner PET film 304 microns (12 mil) • 135 g/m2 (4 oz) • 30,5 m (100 ft) HP Backlit Polyester Film 304 microns (12 mil) • 135 g/m² • 30,5 m (100 ft) 38 Chapter 4 Handle the substrate - HP Latex 3600 | Users Guide - Page 45
de polluants volatils posant des problèmes en cas d'inhalation - sur une échelle de A+ (émission très basses) à C (émission élevée). ● HP PVC-free Wall Paper printed with HP Latex Inks is rated A+ according to Émissions dans l'air intérieur, which provides a statement of the level of emission of - HP Latex 3600 | Users Guide - Page 46
within the recommended ranges for the printer. See Environmental specifications on page 414. ● Check . - More than 2 mm (0.079 in): Not supported. While loading a roll, ensure that the leading edge HP substrates are optimized to provide the best out-of-the-box printing experience with your printer - HP Latex 3600 | Users Guide - Page 47
in the USA, see the HP recycling services site, http://www.hp.com/go/recycleLFmedia/. HP offers to recycle some other substrates same batch, and stored under correct conditions according to the manufacturer's specifications. ● Operating conditions (temperature and humidity) should be kept constant - HP Latex 3600 | Users Guide - Page 48
-to-free-fall configuration is suitable when you want to cut and remove one or more prints as soon as they come out of the printer. The substrate is kept under tension between the input roll and the tension roller; but it can be cut after the tension roller because then - HP Latex 3600 | Users Guide - Page 49
restart the printer. 3. Load the substrate. Substrate loading instructions are displayed in the Internal Print Server window. For more detailed instructions, see Load up and jamming while printing. If you experience this kind of problem while printing, you can try using the edge holders to overcome - HP Latex 3600 | Users Guide - Page 50
deployed without raising the carriage beam. Substrate edge holders for HP Latex 3000, 3100 and 3500 The correct position is illustrated below specific edge holders are also needed. Install an edge holder on the HP Latex 3000, 3100 and 3500 To install an edge holder, stand at the front of the printer - HP Latex 3600 | Users Guide - Page 51
Then go to the rear of the printer, open the loading table, pull the rear of the edge holder towards you, and attach it to the rear of the platen. A built-in magnet - HP Latex 3600 | Users Guide - Page 52
(for example, by accumulated ink). 1. If it is installed in the printer, remove the edge holder from the platen, disengaging it from the back and Substrate edge holders for HP Latex 3200, 3600 and 3000/3100/3500 with Doublesided Day Night Kit 1. Standing in front of the printer, place the edge holder - HP Latex 3600 | Users Guide - Page 53
2. Attach other side of the edge holder in the space between the platen and diverter wheels, cover the edge of the substrate with it. Make sure that each edge holder is properly positioned and not bent as this could cause a carriage crash. 3. Turn the screw at the front part of the edge holder to - HP Latex 3600 | Users Guide - Page 54
be used at an operating temperature above 125°C (257°F). CAUTION: Proper maintenance and genuine HP consumables are required to ensure that the printer operates safely as designed. The use of non-HP consumables (foams, filters, printhead cleaner roll, or inks) may present a risk of fire. CAUTION - HP Latex 3600 | Users Guide - Page 55
Kit components 1. Ink-collector container 2. Six ink collectors with two replaceable foams 3. Four ink-collector substrate-edge holders 4. Protector NOTE: Keep the ink-collector container and protector core to protect and store the ink-collector parts when not in use. Install the kit Risk of burns - HP Latex 3600 | Users Guide - Page 56
Install the six ink-collector modules 1. Ensure that the printer is not printing. 2. Ensure that all windows, covers, ink collector button in the main window. 5. Follow the instructions in the Internal Print Server to complete the installation. If guide (2). 50 Chapter 4 Handle the substrate ENWW - HP Latex 3600 | Users Guide - Page 57
10. Slide the module to the middle until it reaches the stop. 11. Insert all the ink collector modules on either side of the central one. 12. Attach each one that you insert to a module that is already in place. ENWW The ink collector kit 51 - HP Latex 3600 | Users Guide - Page 58
13. Go to the rear of the printer, lower the pinchwheel latches (1), and pull down the pinchwheel module to its lowest position. 14. Close the latches of all modules (turn to the right). - HP Latex 3600 | Users Guide - Page 59
17. Lift the pinchwheel module (1) and the pinchwheel latches (2). Install the protector 1. Take the rolled protector and ensure that it is completely clean and dry. 2. Place the rolled protector on the curing module. Do not open the curing module yet. ENWW The ink collector kit 53 - HP Latex 3600 | Users Guide - Page 60
3. Slide or clip a barrier onto each end of the protector tab. 4. Place the tab of the protector (1) onto the slot (2). The black side should be face up. 54 Chapter 4 Handle the substrate ENWW - HP Latex 3600 | Users Guide - Page 61
the gap under the curing module. 7. Close the curing module and the latches. 8. Hook the clips from the protector to the bottom part of the printer. 9. Close the front door. NOTE: If you plan to load substrates thicker than the value shown on the main screen, set the thickness value appropriately - HP Latex 3600 | Users Guide - Page 62
Unload the substrate (see Unload a roll on page 92) and remove the output spindle. To facilitate module uninstallation, we recommend raising the carriage beam to the installation position, by pressing the Raise carriage beam to install position button. Uninstall the protector 1. Go to the Internal - HP Latex 3600 | Users Guide - Page 63
4. Open the curing module latches and curing module and leave the protector to slide down softly. WARNING! Do not touch the internal enclosures of the printer's curing module: they can be hot enough to cause burns. 5. Remove the protector by the bottom part. 6. Remove the barriers, one on each side. - HP Latex 3600 | Users Guide - Page 64
each module. First, slowly lift the back part of the ink collector module, then, take out the guide from the platen, moving the ink collector module forward towards the front of the printer. 4. Press Finish to complete the removal process. The carriage beam moves down and the carriage moves along - HP Latex 3600 | Users Guide - Page 65
Load a roll onto the spindle NOTE: Contact HP to know the recommended third party solutions for substrate lifter and core adaptors. Single-roll printing The spindle has a pneumatic connector at one end and a - HP Latex 3600 | Users Guide - Page 66
TIP: Before inflating, use the pneumatic gun to blow air around the valve area to remove any dirt. WARNING! The air gun provided with the printer is only intended to inflate the spindle. When recommended to use for cleaning purposes, make sure to do so according to local regulations since additional - HP Latex 3600 | Users Guide - Page 67
TIP: If you are a regular user of different substrate types, you can change rolls more quickly if you preload rolls of different substrate types on different spindles. Extra spindles are available for purchase. HP Latex 3000/3100/3200 dual roll If your printer is an HP Latex 3000/3100/3200, you can - HP Latex 3600 | Users Guide - Page 68
into the printer. 11. Once the substrate is aligned, automatic substrate-edge detection can be run. If this automatic process fails, or if you are using a roll width not within the dual-roll spindle specifications shown below, introduce the substrate edge values manually. Physically measure - HP Latex 3600 | Users Guide - Page 69
use the dual roll, it has to be installed and calibrated. See the Installation Guide for more information. HP Latex 3500/3600 dual-roll split spindles center support Risk of trapped fingers If your printer is an HP Latex 3500/3600, you can print on two rolls at the same time by using the dual-roll - HP Latex 3600 | Users Guide - Page 70
Loading the rolls on the split spindles 1. Insert the first roll on one of the split spindles. 2. Insert the second roll on the other split spindle. 3. Load the split spindles in the printer. 64 Chapter 4 Handle the substrate ENWW - HP Latex 3600 | Users Guide - Page 71
remove any dirt. WARNING! The air gun provided with the printer is only intended to inflate the spindle. When recommended to Minimum gap between rolls Maximum roll diameter Maximum total weight of both rolls Latex 3500/3600 dual-roll split spindles specifications 635 mm (25 in) 2 × 1.55 m (2 × 61 in - HP Latex 3600 | Users Guide - Page 72
is not recommended with dual rolls. If your printer is an HP Latex 3500/3600, you have a diverter in the input side of the printer to help to homogenize the tension of the paper. We strongly recommend to print with it installed. Check the Installation Guide in case you need to uninstall it. 66 - HP Latex 3600 | Users Guide - Page 73
) HP Latex 3000/3100/3200 and HP Latex 3500/3600 have different dual roll options. For HP Latex 3000/3100/3200 you can use a spindle with two rolls, but for HP Latex 3500/3600, a split spindle system can be used. See HP Latex 3500/3600 dual-roll split spindles center support on page 63/3600 for - HP Latex 3600 | Users Guide - Page 74
or more shorter cores on the same spindle, which could cause substrate-advance problems. TIP: The spindle and a roll of substrate can be heavy. You of the printer. In this case, the geared end of the spindle should be on the right. 7. All substrates can be loaded with the manual loading procedure - HP Latex 3600 | Users Guide - Page 75
2. Open the curing module latches. 3. Open the curing module. ENWW Load a roll into the printer 69 - HP Latex 3600 | Users Guide - Page 76
4. Open the loading table latches. 5. Open the loading table. 6. Unwind a length of substrate. 70 Chapter 4 Handle the substrate ENWW - HP Latex 3600 | Users Guide - Page 77
7. Place it on the loading table. If your printer is an HP Latex 3500/3600, you have to load the paper making sure it is loaded behind the diverter. 8. Close the loading table. 9. Rewind the substrate manually until the leading edge is close to the pinchwheels. ENWW Load a roll into the printer 71 - HP Latex 3600 | Users Guide - Page 78
10. Close the loading table latches. 11. Go to the Internal Print Server and use the large blue button to advance the substrate until it reaches the output spindle. Ensure that the substrate advances smoothly and is not trapped by any obstruction. If necessary, help the substrate to advance and to - HP Latex 3600 | Users Guide - Page 79
NOTE: Some substrates (such as transparent substrates) cannot be measured by the printer in this way. In such cases, you will be asked to enter the want to change the carriage beam position, see Substrate tips on page 39. Manual loading 1. Use the Internal Print Server to raise the carriage beam to - HP Latex 3600 | Users Guide - Page 80
3. Open the curing module latches. 4. Open the curing module. 74 Chapter 4 Handle the substrate ENWW - HP Latex 3600 | Users Guide - Page 81
5. Open the loading table latches. 6. Open the loading table. ENWW Load a roll into the printer 75 - HP Latex 3600 | Users Guide - Page 82
7. Unwind a length of substrate. If your printer is an HP Latex 3500/3600, you have to load the paper making sure it is loaded behind the diverter. 8. Place it in the print zone. 9. Push the substrate through the printer until it reaches the output spindle. 10. Align the substrate by checking that - HP Latex 3600 | Users Guide - Page 83
configuration) HP Latex 3000/3100/3200 and HP Latex 3500/3600 have different dual roll options. For the HP Latex 3000/3100/3200 you can use a spindle with two rolls, but for HP Latex 3500/3600, a split spindle system can be used. See HP Latex 3500/3600 dual-roll split spindles center support on - HP Latex 3600 | Users Guide - Page 84
printer; on the left as seen from the rear. That way, when the shorter rolls runs out, you can continue printing on the other roll. NOTE: When one roll runs out, you should lock the differential in the middle of the spindle, using the lever on the left-hand side. HP Latex 3500/3600 - HP Latex 3600 | Users Guide - Page 85
printer. In this case, the geared end of the spindle should be on the right. 7. HP Latex 3000/3100/3200 with a single spindle only: If you intend to use the Dual Roll Center Supports set following the instructions provided with the accessory (see Calibrate the dual-roll center support on page 370). - HP Latex 3600 | Users Guide - Page 86
it wrinkled. 12. If you are using them, place the three or four substrate edge holders into position and attach them at the front. TIP: HP Latex 3000/3100/3200 only: When aligning the roll edges with the marks on the dual-roll spindle, the center edge holder (if needed) is shared - HP Latex 3600 | Users Guide - Page 87
Internal Print Server to lower the carriage beam to its printing position. 18. Go to the Internal Print Server and press the Finish button. The printer rotates the rolls to check their diameters, and it also checks the width of the roll, the winding direction, the vacuum, and the substrate advance - HP Latex 3600 | Users Guide - Page 88
can be much heavier. You are recommended to use a forklift or some other equipment to move it into position; otherwise, lift one end into the printer, and then the other end. To load the substrate, follow the same procedure as in the roll-to-roll configuration, except that the output spindle - HP Latex 3600 | Users Guide - Page 89
and push the roller backwards, taking care not to trap your fingers between the roller and the black substrate guide lying underneath and behind. 5. Close the latches at both sides. 6. Align the substrate by checking that as in the roll-to-roll configuration. ENWW Load a roll into the printer 83 - HP Latex 3600 | Users Guide - Page 90
Load a roll (roll-to-collector configuration) This configuration is similar to the roll-to-free-fall configuration, but with the addition of a collector roller and loop shaper. TIP: Do not try to load or unload the collector while printing. Before starting to load the substrate, select a loop - HP Latex 3600 | Users Guide - Page 91
between the tension roller and the collector. 6. Place the loop shaper into the substrate loop. NOTE: Loop detection is done in the center of the printer; so avoid putting your foot or any other object under the collector in the center. 7. Go to the Internal Print Server and press the Enable - HP Latex 3600 | Users Guide - Page 92
movement during the load. You can set a threshold for each substrate type. Additional notes ● When this option is selected, while loading, the printer moves the substrate backwards and forwards several times in order to measure the skew at different points. ● During this phase Calibrating advance - HP Latex 3600 | Users Guide - Page 93
a window appears with the skew test result. Double-sided printing Selecting the double-sided printing option will provide you with guidance and help specific to double-sided printing during the load process. The roll-to-roll configuration is recommended for double-sided printing. You cannot perform - HP Latex 3600 | Users Guide - Page 94
Before unloading the substrate, select the Substrate load/unload button in the IPS, select How to unload side A, and follow the on-screen instructions. NOTE: Jobs must be defined for double-sided printing, side A and side B, this information is available while a job is printing in Print Properties - HP Latex 3600 | Users Guide - Page 95
Side A: Unload 1. Cut the substrate close to the input roll. 2. Collect the substrate onto the output spindle. Check the substrate is collecting correctly on to the spindle to avoid telescoping. 3. Remove the input spindle. 4. Remove the output spindle (1), carry it around to the input side with the - HP Latex 3600 | Users Guide - Page 96
Side B: Load and print 1. Load roll-to-roll configuration: see Load a roll (roll-to-roll configuration) on page 67. NOTE: By default the left edge of the substrate is detected to minimize registration errors along the scan axis when printing double-sided. When printing on translucent substrates or - HP Latex 3600 | Users Guide - Page 97
Double-sided on page 135) and press the Print button. NOTE: Before pressing Print, ensure that the correct side is selected. The printer will automatically detect the registration line and the Side B image will be positioned to minimize registration errors. This detection occurs automatically after - HP Latex 3600 | Users Guide - Page 98
bottom of the main screen of the Internal Print Server. To see more information, select the Substrate menu and then Settings. Unload a roll NOTE: Contact HP to know the recommended third party solutions for substrate lifter and core adaptors. 92 Chapter 4 Handle the substrate ENWW - HP Latex 3600 | Users Guide - Page 99
at the front. b. Go to the rear of the printer and pull the substrate over the loading table. c. Cut the substrate again. 6. Wind the substrate manually onto the output roll. 7. Open the two latches at each side of the spindles. IMPORTANT: HP Latex 3500/3600 only: Be sure the latches are open before - HP Latex 3600 | Users Guide - Page 100
applies to HP Latex 1500 and HP Latex 3000 Series Printers. Substrate saver IMPORTANT: To use Substrate saver kit with HP Latex 3100 and 3500, an upgrade kit is needed (1HA07-67014), contact HP Support. NOTE: This video applies to HP Latex 1500 and HP Latex 3000 Series Printers. IMPORTANT: Before - HP Latex 3600 | Users Guide - Page 101
IMPORTANT: If your printer is an HP Latex 3000, 3100 or 3500, make sure you place the substrate saver on the installed metallic parts. 2. Use the curing top plate tool and the marks - HP Latex 3600 | Users Guide - Page 102
4. Advance the substrate manually or automatically but do not surpass the red line inside the flaps. Make sure to advance enough paper to reach the substrate saver. 5. Grip the - HP Latex 3600 | Users Guide - Page 103
Push the substrate saver through the curing module. 8. Go to the Internal Print Server to start the loading process. Use the move the substrate buttons manually or in the IPS to move the substrate backwards to detach the substrate saver magnets from the curing module and up to the platen. IMPORTANT - HP Latex 3600 | Users Guide - Page 104
11. Open the loading table. 12. Pull the edge of the tool and center it on the core. 13. Attach the tool to the core with tape. Make sure to put the tape on the blue edge of the substrate saver. 14. Roll the tool on the core until the tool's upper edge lies beyond the platen. 98 Chapter 4 Handle - HP Latex 3600 | Users Guide - Page 105
. Risk of cutting your fingers. Risk of trapped fingers For more safety information, see Safety precautions on page 2 Risk of burns If you have an HP Latex 3500/3600 you can install the in-line slitters provided with your printer. ENWW In-line slitters 99 - HP Latex 3600 | Users Guide - Page 106
accessory for the HP Latex 3100/3200 printer. NOTE: Two in mounting beam; the position on it is decided and fixed by the user. They can be used all at the same time or individually, hooks have to be inserted into the mounting beam guides. To move the hooks, untighten the top blue labeled thumb - HP Latex 3600 | Users Guide - Page 107
in Slitter poor cutting quality on page 376. LED proofing lights Risk of burns For more safety information, see Safety precautions on page 2 If your Printer is an HP Latex 3100/3200/3500/3600, you have a set of LED lights at the output side of the - HP Latex 3600 | Users Guide - Page 108
description is called a substrate preset. The printer is supplied with substrate presets for some specific substrate types, and also with presets for Export label. NOTE: The maximum number of substrate presets supported by the printer is 126. Export multiple presets Multiple substrate presets can - HP Latex 3600 | Users Guide - Page 109
click Update. 3. When the .oms file has been imported, the following information is displayed: Use a new substrate Whenever you load a new substrate type into your printer, you must choose a substrate preset for it. ENWW Use a new substrate 103 - HP Latex 3600 | Users Guide - Page 110
users only. 5. Tiling optimization for a new substrate. To optimize tiling performance, create a new substrate via the IPS (Substrate > Optimize for tiling). Optimize for tiling Optimize for tiling improves color consistency, specifically for tiling applications within a printer list. Supported types - HP Latex 3600 | Users Guide - Page 111
NOTE: A Tiling suffix is added to the name of the substrate, you edit the name, but you cannot erase the suffix. 2. A warning about the solution space change in the new substrate appears, click OK. 3. A window appears to recommend the CLC to select before the first time the substrate is used. 4. - HP Latex 3600 | Users Guide - Page 112
5. During creation, the CLC color reference is reset and the status appears as Color reference not set in the IPS. NOTE: After creation, a CLC is required to create the reference for future color calibration. A warning window appears straight after substrate creation. You can create an ICC profile - HP Latex 3600 | Users Guide - Page 113
added. NOTE: When tiling optimized substrate is loaded, the specific workflow changes and beginning of job preparation plot and sideway color the latest firmware. See Update the firmware on page 26. Prepare the printer for a new substrate 1. Whenever possible, try to ensure that your printer is in - HP Latex 3600 | Users Guide - Page 114
ensure that the roll width is specified, either automatically by the printer or by yourself. You may not experience the best possible results a new substrate preset with the Add New Substrate wizard The Add New Substrate guides you to work out the best settings for your substrate. It first requests - HP Latex 3600 | Users Guide - Page 115
are an advanced user and the suggested settings do not meet your expectations, you can select Advanced settings at any time and make manual changes. However, preset, following the guidelines provided in Troubleshoot substrate issues on page 359 and Troubleshoot print-quality issues on page 378. - HP Latex 3600 | Users Guide - Page 116
Internal Print Server and select Substrate > Edit. This allows you to change all the important settings in the substrate preset. It is recommended for advanced users only. NOTE: You can change only the presets that you have created yourself. The presets supplied by - HP Latex 3600 | Users Guide - Page 117
stable color consistency over long runs. When enabled, the printer automatically runs a warm-up routine immediately prior to the ● 10p 80% - 120% In order to achieve a highly optimized preset for one specific purpose and substrate, you may need to adjust other settings to compensate. To achieve a - HP Latex 3600 | Users Guide - Page 118
Printing masks The concept of printing masks refers to the relative positions of the ink drops on the substrate. The mask uses a randomization algorithm to avoid visual patterns, and the result is a visually smooth surface, with minimal graininess, and no banding. Inaccurate alignment or substrate - HP Latex 3600 | Users Guide - Page 119
By default, all the generic print modes use the Large mask. Consider the Optimize for Tiling option to get the best color consistency when printing tiles. On-the-fly adjustments You can modify the substrate settings while printing. In the Internal Print Server main window, press the Print adjustment - HP Latex 3600 | Users Guide - Page 120
To apply and save the values, press the Apply button in the dialog box before closing it. The new settings are saved for that particular substrate type for the current and future prints. They are not applied to all substrate types. Optimize the preset for higher print speed Action Reduce the - HP Latex 3600 | Users Guide - Page 121
● Use a 14- or 18-pass print mode for best print quality with backlit substrates and textiles. ● When using a high number of passes, substrates can be saturated above 100% ink (example: 130% frontlit, 300% backlit). Higher ink densities may increase gamut and color saturation, and, in backlit - HP Latex 3600 | Users Guide - Page 122
calibration on page 172. 2. Create ICC profiles for your substrate; see your RIP documentation for instructions. Remove a substrate preset To remove a substrate preset from your printer, go to the Internal Print Server and select Substrate > Remove. Then select the category and type of the substrate - HP Latex 3600 | Users Guide - Page 123
Search substrate online, or click the Search online button in the Load printer configuration dialog. This screen is shown: Sorting To sort, click - Select a manufacturer to find specific manufacturer substrate. - Select a category and grade to find specific type substrate. - Select applications to - HP Latex 3600 | Users Guide - Page 124
new substrate To install a new substrate preset, go to the Internal Print Server and select Substrate > Search substrate online, then search for the specific substrate file and click the. Down arrow in the status column. This agreement dialog is shown: The agreement dialog must be accepted to - HP Latex 3600 | Users Guide - Page 125
substrate online, then click on the substrate update icon in the status column. Substrate synchronization Onyx and Caldera RIP drivers contain all the default substrate presets and ICC profiles the HP Latex 3000 printer series comes with. If you carry out any substrate management action in the - HP Latex 3600 | Users Guide - Page 126
Synchronize substrates with the Caldera RIP 1. Go to the Caldera RIP software and click the Easy Media tool. 2. Click on the printer icon, then click Next. 3. Select the printer to retrieve the substrate, then click Next. 120 Chapter 4 Handle the substrate ENWW - HP Latex 3600 | Users Guide - Page 127
4. Click Import. 5. Click Autosync. 6. Click Missing presets only. ENWW All your custom substrates from the machine are downloaded to the RIP and added to the end of the substrate list. Online substrate manager 121 - HP Latex 3600 | Users Guide - Page 128
with the ONYX RIP 1. For retrieving your custom substrates from the machine, click on Configure Printer. 2. Click the Device tab, select the machine, then click Features. 3. A new window appears, select Global Printer Options, then click Configure. 122 Chapter 4 Handle the substrate ENWW - HP Latex 3600 | Users Guide - Page 129
4. Another window appears, click From Printer. 5. A new window appears, select the custom substrates you want to import, and click OK. The selected substrates are now added to the Media Manager library. - HP Latex 3600 | Users Guide - Page 130
beam position, go to the Internal Print Server and select the appropriate position from the drop-down list. WARNING! Keep away from the printer's moving parts until the carriage beam has reached its new position. CAUTION: Do not change the carriage beam position while the printhead cleaning - HP Latex 3600 | Users Guide - Page 131
containing the image to be printed The output folder should be the shared folder on the Internal Print Server computer that was created during printer installation. The Internal Print Server cannot take files directly from the network because access would not be fast enough. 1. Go to the Internal - HP Latex 3600 | Users Guide - Page 132
2. Select the Add New Job icon or File > Add New Job. Navigate to the folder containing the print job files, and click Open to import the job into the Internal Print Server. TIP: You can sort the list by any column. 3. The next dialog box displays information about the job. You can change the - HP Latex 3600 | Users Guide - Page 133
Although the substrate and print mode can be changed from this dialog window using the change button, it is recommended not to do so because it may adversely affect print quality. It is better to make such changes from the RIP. The drop-down list at the top of the preview field allows to choose all - HP Latex 3600 | Users Guide - Page 134
4. To see more job options, click the Advanced settings button in the Job Properties dialog. In this dialog, although the substrate and print mode can be changed from this window by using the Change button, it is recommended not to do so, because it may adversely affect print quality. It is better - HP Latex 3600 | Users Guide - Page 135
substrate waste without altering the The closed padlock icon indicates jobs that cannot be moved when you click the icon. The closed padlock appears when a manual update to the job has been made. To lock or unlock a job, just click the padlock. ENWW Add a new print job 129 - HP Latex 3600 | Users Guide - Page 136
influence when printing on a single roll, but there can have in dual-roll if the queues are not balanced enough. Layout preview indicates the service routines the printer needs to perform, it shows how the waste is distributed between the actual job set-up, and makes it easier the rearrange jobs in - HP Latex 3600 | Users Guide - Page 137
has printed more than 100 meters uninterrupted. ● Printer starts the next job, and when finished, it would have printed more than 100 meters uninterrupted. Rotate a print job A job can be rotated by 90 - HP Latex 3600 | Users Guide - Page 138
NOTE: Rotation is available only when the printer is not printing. Press the Save button to store the current image rotation or Cancel to discard the changes and return to main dialog of - HP Latex 3600 | Users Guide - Page 139
Return a job to the queue that has been printed already. Printed jobs remain available unless deleted manually. ● Edit Job : Edit the properties of a job in the queue. ● Proof : in this way, the files may or may not be left on the printer's hard disk, and the file may or may not still be available - HP Latex 3600 | Users Guide - Page 140
after the other, across the width of the substrate if there is room. You can use the Advanced Nesting Arrangement window to alter the layout manually. See Introduction to JDF on page 29. ● Double Sided: Block Out. All image compositions can be used with dual-roll printing, when so, the software - HP Latex 3600 | Users Guide - Page 141
to be printed. Double-sided Double-sided printing helps you to print rows of images on both sides of the substrate. ● There is a process to guide you when printing a substrate on both sides. ● Double-sided printing can be used to print the same image or different images on each side. ● The - HP Latex 3600 | Users Guide - Page 142
3. In the Advanced settings section, the following options are recommended when printing double sided block out: ● Side B calibration space: When selected, the printer leaves an area of substrate empty after the images have been printed (the substrate is warmed-up). This is to give space to perform - HP Latex 3600 | Users Guide - Page 143
enables you to choose which registration lines are scanned by the printer, if you select 1 (the default), the printer stops printing and checks every registration line, if you select a higher number, for example 2, the printer only scans every second registration line. This increases the speed of - HP Latex 3600 | Users Guide - Page 144
the horizontal gap between copies Preview (Image/Layout/Preview both) There are three different previews: 1. Main dialog of the job properties and preview how the printer will print each side. 138 Chapter 5 Create and manage print jobs ENWW - HP Latex 3600 | Users Guide - Page 145
2. Click the Image composition button to see the image that contains the job on each side. 3. Click the Preview both button to see a simulation of how both images will print on side A and on side B. You can use this simulation preview to check that the orientation of the images relative to each - HP Latex 3600 | Users Guide - Page 146
position the substrate during the side B loading process. ● When side A has been printed, after the last continuous black registration line, the printer automatically provides an area in which to perform the side B calibration (c) and side B loading (d) area. 140 Chapter 5 Create and manage print - HP Latex 3600 | Users Guide - Page 147
NOTE: The area dedicated to calibration, between the continuous registration line and the dotted line (c), must be advanced at the same speed as the printed area, and at the same temperature, to ensure an effective calibration. 4. When Side A has finished printing, unload side A. See Side A: Unload - HP Latex 3600 | Users Guide - Page 148
print the selected image. While printing Side B the printer will automatically read each registration line and Side B side A and side B, a second specific substrate could be used based on double side block out Double side block out supports Multijobs functionality which allows to print differently - HP Latex 3600 | Users Guide - Page 149
job is added to the print queue, Advanced Settings>Side B loading space is enabled by default. 2. When selected, at the end of each job, the printer advances the substrate about 1.5 meters in order to load side B. ENWW Image composition 143 - HP Latex 3600 | Users Guide - Page 150
3. The Side B loading space option is used to leave an empty area of substrate after the images have been printed. This is done to leave space to perform substrate advance compensation on side B. It must be unchecked on each job in the print queue except the last one, if not there will be about 1.5 - HP Latex 3600 | Users Guide - Page 151
NOTE: To be nested together, jobs must be of the same resolution and printed on the same substrate. Any incompatible job is added to the queue as a separate, non-nested job, and an explanatory message is displayed. When you press the Open button with nesting enabled, the Advanced Nesting Arrangement - HP Latex 3600 | Users Guide - Page 152
From the current dialog, press the Image composition button to access another dialog where the Arrange button can be selected. If you press the Arrange button in this section, the Advanced Nesting Arrangement window opens. If you use advanced nesting, the number of passes used for all jobs will be - HP Latex 3600 | Users Guide - Page 153
margin. When you are satisfied with the layout, press the OK button. Restart and Print If the printer suddenly shut downs and the Internal Print Server goes offline, you can ready the printer to continue rapidly To use this feature, via the Internal Print Server, go to Tools>Restart and Print - HP Latex 3600 | Users Guide - Page 154
which deposit the ink on the substrate. Each cartridge contains HP Latex ink, and consists of a bag within a recyclable cardboard and circuitry. If pressure is put on a cartridge while it is connected to the printer, the pressure is transmitted to the ink pressure sensor, which may break; in which - HP Latex 3600 | Users Guide - Page 155
devices (see the Glossary on page 418). Avoid touching pins, leads and circuitry. The printer's six-color writing system uses six dual-color printheads with a total of 63,360 nozzles, and an HP Latex Optimizer printhead with 10,560 nozzles. WARNING! Printheads should be stored vertically: if boxed - HP Latex 3600 | Users Guide - Page 156
cleaning roll is replaced. The foam is provided with the HP 881 Latex Cleaning Roll. Condensation collector bottle The printer has a system that collects most of the vapor generated which to dispose of wastes. The waste-profile datasheet contains the required information for correct disposal. This - HP Latex 3600 | Users Guide - Page 157
mixed before use. 3. Tear off the square and fold it inside the handle as illustrated. 4. Put the new cartridge into its correct place on the printer. TIP: Use both hands: the cartridge is quite heavy. 5. Check that the rubber part around the needle in the cartridge connector is clean. Clean gently - HP Latex 3600 | Users Guide - Page 158
ink level or status of used, refilled, or counterfeit ink cartridges. Any service or repair required as a result is not covered under the warranty. problems, HP recommends changing to Original HP inks. Maintain the ink cartridges During the normal lifetime of a cartridge, no specific maintenance - HP Latex 3600 | Users Guide - Page 159
cartridge not connected, or unknown problem The level of ink remaining in recovers and is marked as using valid HP ink. The user can now proceed with printhead replacement. IMPORTANT reverted. ● Ink supply marked as Non-HP and considered as used. ● The printer enters Safe Mode and the drying lamps - HP Latex 3600 | Users Guide - Page 160
expired or if you feel that its performance is not adequate. 1. Ensure that the printer is not trying to print: stop the job queue. 2. In the Internal Print Server, select Printer > Replace printheads. 3. If the service position window is open, you are asked to close it. 154 Chapter 6 Handle the - HP Latex 3600 | Users Guide - Page 161
4. The carriage moves automatically. Open the service position window to access it. 5. The Internal Print Server tells you which printhead to remove. Release the latch that secures the printhead, and lift it. ENWW How to work with ink system components 155 - HP Latex 3600 | Users Guide - Page 162
to disconnect the printhead from the carriage. 7. Remove the printhead from the printer. The original packaging materials can be used to discard the old printhead or in case there is a need to return it to HP. When removing the optimizer printhead 1. Locate the optimizer printhead. 2. Push the latch - HP Latex 3600 | Users Guide - Page 163
caps are labeled as shown below. NOTE: Remember which printhead came from which slot; the printer will report an error if you later replace a printhead in a different slot. Insert 2. Shake the printhead according to the instructions on the packaging. ENWW How to work with ink system components 157 - HP Latex 3600 | Users Guide - Page 164
You may wish to keep the protective caps for later reuse, in case you ever want to remove a printhead from the printer. 4. Put the new printhead into its correct place in the printer, and lower its handle. CAUTION: Insert the printhead slowly. It is recommended to insert it as vertically as possible - HP Latex 3600 | Users Guide - Page 165
6. Press with two fingers on the primer to ensure the primer ports are well inserted. 7. Secure the latch. 8. Close the service position window and press OK. The printer checks that the new printhead has been correctly inserted (the status is shown in the Internal Print Server), and recommends - HP Latex 3600 | Users Guide - Page 166
way to protect it is by replacing the protective caps that you removed before inserting it into the printer. CAUTION: It is important to use the HP Latex Optimizer sealing cap for the HP Latex Optimizer printhead. Check and clean the printheads This procedure should be followed daily. 1. Go to the - HP Latex 3600 | Users Guide - Page 167
the printer will operate in 'safe' mode. HP is unable to warrant the performance of the printing system when operated outside of environmental specifications or the printer's computer. For optimal performance, use Original HP ink cartridges. HP Latex printing systems, including Original HP inks - HP Latex 3600 | Users Guide - Page 168
1. Printhead cleaning roll 2. Aerosol filters 3. Drying filters 4. Left spittoon The Internal Print Server provides instructions for all replacements. Go to the Internal Print Server and select Printer > Replace cleaner roll. A wizard appears summarizing all the operations to be done: ● Replace the - HP Latex 3600 | Users Guide - Page 169
3. Open the service position window. 4. Open one latch on the left side of each aerosol filter module. 5. Open the lid of each filter. 6. Remove both aerosol filters, using their handles. ENWW How to work with ink system components 163 - HP Latex 3600 | Users Guide - Page 170
7. Insert the two new filters. There is only one way to insert them that works. If you feel resistance, try to insert the filter the other way round. 8. Close the lids. 9. Close the latches. 10. Click Next at the bottom of the wizard window to start the replacement of the drying filters. Replace - HP Latex 3600 | Users Guide - Page 171
2. Insert the new filters. 3. Attach the two plastic flaps to each filter. 4. Close the service position window. 5. Click Next at the bottom of the wizard window to start the replacement of the left spittoon. ENWW How to work with ink system components 165 - HP Latex 3600 | Users Guide - Page 172
left spittoon at the left side of the print area. 3. Slide out the left spittoon foam with its frame. IMPORTANT: HP Latex 3000/3600 Printers only: Depending on the serial number of your printer, there is no need to put the foam on the spittoon frame because the housing has been designed to insert - HP Latex 3600 | Users Guide - Page 173
5. Insert the new foam into the frame, making sure it is flat, and without wrinkles. 6. Insert the frame into place in the left spittoon housing. Ensure that it is flat. 7. Click Next at the bottom of the wizard window to start the replacement of the printhead cleaning roll. Replace the printhead - HP Latex 3600 | Users Guide - Page 174
2. In order to replace the printhead cleaning roll, unlock and open the door on the front right of the printer. 3. Grip the handle and pull the whole printhead cleaning roll assembly out through the door. 168 Chapter 6 Handle the ink system ENWW - HP Latex 3600 | Users Guide - Page 175
with the end of the roll. 6. Slide both rolls off their axles and dispose of the roll with the used cleaning material according to the instructions provided with the new roll. Also consult your local authorities to determine the correct manner in which to dispose of wastes. Keep the empty core - HP Latex 3600 | Users Guide - Page 176
a message about clearing a printhead cleaning roll jam. Pull the whole assembly out, wind a little of the roll forward, then slide it back in again. The printer will check the roll again. NOTE: Do not cut the cleaning material in order to reattach it to the lower roller. An unexpected roll radius - HP Latex 3600 | Users Guide - Page 177
again. 13. Grip the handle and push the whole printhead cleaning roll assembly back into the printer. Ensure that you push it as far as it will go. 14. Close and lock the container: this is done by a service engineer during preventive maintenance. ENWW How to work with ink system components 171 - HP Latex 3600 | Users Guide - Page 178
print-quality problems that could be caused by printhead misalignment. To align the printheads, go to the Internal Print Server and select Printer > Printhead .1 × 14.6 in). NOTE: Depending on the firmware version, this pattern could be slightly different. 172 Chapter 7 Printer calibration ENWW - HP Latex 3600 | Users Guide - Page 179
The picture below shows the distribution of printheads in the carriage. It also shows the correspondence between printhead and patterns, with guidance on the direction of the corrections (0-40) applied. The following table summarizes the correction type controlled by each pattern. Pattern A B C D - HP Latex 3600 | Users Guide - Page 180
, but occasionally, with some substrates, there is not enough contrast to highlight the optimizer ink. In these cases there are two possible solutions: 174 Chapter 7 Printer calibration ENWW - HP Latex 3600 | Users Guide - Page 181
Printer > Printhead alignment > Verify alignment > Print. NOTE: You can use the diagnostics plot to check printhead alignment, then fine-tune the values by following the instructions . Each part is described following the terminology of the manual alignment. Row0 is the row of printheads closer to - HP Latex 3600 | Users Guide - Page 182
should be aligned with the outer cross. In case of misalignment the arrows indicate the pattern of the manual alignment that will correct the misalignment. Also, the '20' label indicates the direction towards where the line . But, since the vertical c0 line 176 Chapter 7 Printer calibration ENWW - HP Latex 3600 | Users Guide - Page 183
step is detected in any direction. As in the description of the previous area, in case of misalignment the arrows indicate the pattern of the manual alignment that will correct the misalignment. Also, the '20' label indicates the direction in which the line will be moved if a '20' value is applied - HP Latex 3600 | Users Guide - Page 184
, in case of misalignment the bottom arrows indicate the pattern of the manual alignment that will correct the misalignment (I, J patterns). Also, the '20 the wrong direction. Color calibration Color calibration enables your printer to produce consistent colors with a particular substrate type, even - HP Latex 3600 | Users Guide - Page 185
weight of the printhead. This calibration has been designed to provide consistency as the printhead ages (drop-weight degradation) and from one printer to another. For example, to reach a maximum cyan density of 0.6, one printhead may require 3 drops while another one may require 3.5 drops (lower - HP Latex 3600 | Users Guide - Page 186
, you can later recalibrate without needing to recreate the color profile. Color consistency between different HP Latex 3000 printers It is possible to print consistent colors on different HP Latex 3000 printers by exporting a calibrated substrate preset (see Substrate presets on page 102) from one - HP Latex 3600 | Users Guide - Page 187
printer Troubleshoot printquality issues on page 378 for steps to determine whether substrate-advance compensation will help you. In general, substrate-advance calibration is recommended when you see print-quality problems related to substrate advance, or when you define a new substrate. NOTE: Manual - HP Latex 3600 | Users Guide - Page 188
the value selected is the average of both values. For example, if the test says the value could be +2.0/+3.0, then +2.5 is selected. 2. Via IPS > Printer > Printing adjustments, look for the current advance value set and add to this number the value chosen in step number 1. For example, if the value - HP Latex 3600 | Users Guide - Page 189
the printer compensates for the substrate advance error, and provides good substrate feed. NOTE: The manual substrate ‰ 1000 µm (39.4 mil) −6.8 ‰ Calibrations specific to one substrate preset Some calibrations that the printer performs are specific to the substrate preset in use at the time the - HP Latex 3600 | Users Guide - Page 190
long as the substrateadvance sensor is working Not needed Not needed Poor print quality Recommended if relevant Recommended if relevant Recommended if relevant 184 Chapter 7 Printer calibration ENWW - HP Latex 3600 | Users Guide - Page 191
been displayed in the past. ● Diagnostics can run functional tests on printer systems and components to check for failures and malfunctions. Each diagnostics run generates a report that provides detailed results and troubleshooting instructions. It can also list the tests that have been run in the - HP Latex 3600 | Users Guide - Page 192
not selectable: the whole series of tests is run automatically. ● Printer Tools help you to perform maintenance operations without an Internet connection. you to minimize downtime. When you call your support representative to report an issue, pass on the results of any diagnostics that you ran. - HP Latex 3600 | Users Guide - Page 193
NOTE: Read the descriptions of the diagnostics and follow the instructions. IMPORTANT: When the printer is started in diagnostic mode, it is unable to print. of these subsystems may be available only to service engineers, because they require specific knowledge or for safety reasons. NOTE: In - HP Latex 3600 | Users Guide - Page 194
updated as soon as the content in the cloud is updated. Reinstall the Print Care software If Print Care needs to be reinstalled, contact your service representative. NOTE: Print Care needs to be reinstalled whenever the printer changes ownership. 188 Chapter 8 HP Print Care ENWW - HP Latex 3600 | Users Guide - Page 195
maintenance of the printer. It is not allowed to use the printer without this support rep. Dual side User clean Ink collector User daily maintenance Ink collector User 40 liter maintenance Cleaning kit User maintenance kit Service maintenance kit Textile service maintenance kit User - HP Latex 3600 | Users Guide - Page 196
. maintenance User repair User Service repair Contact your support rep. Full printer inspection Contact your support rep. Cleaning kit User maintenance kit Service maintenance kit Textile service maintenance kit User up-time kit Reseller uptime kit X X X X HP Latex 3x00 Printer Series - HP Latex 3600 | Users Guide - Page 197
of 2 Fan filters replacement (see Replace the e-cabinet fan filters on page 256) HP Latex 3x00 Printer Maintenance Kit contents Content Cabinet Ebox filters assembly Printhead cleaning rubber assembly HP Latex 3x00 Cleaning Kit Upgrade 5 printhead cleaning rubber blades Machine Grease and Oil kit - HP Latex 3600 | Users Guide - Page 198
maintenance operations The Maintenance section of the Print Care program (see HP Print Care on page 185) reminds you when routine hardware maintenance should be done. Perform maintenance with Print Care wizards If your printer is connected to the Internet, Print Care provides guidance (wizards - HP Latex 3600 | Users Guide - Page 199
list of maintenances. HP strongly recommends an Internet connection as it makes it much easier to deal with the maintenance tasks of the printer, in addition to providing auto-update of the maintenance procedure and automatic notification of firmware upgrades. Contact your service representative for - HP Latex 3600 | Users Guide - Page 200
page 2 Electric shock hazard ● To move the carriage beam, select Printer tools > Move the carriage beam. - Move up - Move down ● To move the printhead carriage, select Printer tools > Move the printhead carriage. - Move to the service position - Move to the leftmost position - Move to the normal - HP Latex 3600 | Users Guide - Page 201
recommended steps, for safety reasons. NOTE: If your printer is connected to the Internet, you do not need to remember these instructions, because they are included in the maintenance wizards. Turn the printer off 1. In Print Care, select Printer tools > Power options > Shutdown. ENWW How to turn - HP Latex 3600 | Users Guide - Page 202
process takes some time to complete. Wait until the green power light is off before proceeding. 2. Turn off the printer using the main switch at the front right of the printer. CAUTION: With this procedure, the printhead carriage will not return to the normal position, and therefore the printheads - HP Latex 3600 | Users Guide - Page 203
2. Pay attention to the Internal Print Server and rearm the printer when requested, as usual. CAUTION: In some maintenance procedures, the carriage beam is up when you turn on the printer, and the carriage moves during initialization. Avoid putting any part of your body in the print area. ENWW How - HP Latex 3600 | Users Guide - Page 204
and replace of ink the oiler foams Clean the carriage rails and replace the oiler foams on page 216 HP Latex 3x00 Printer Cleaning Kit and Carriage Rail Cleaning Tool, provided with your printer Empty the oil collector caps Empty the oil collector caps on page 229 Clean the bottom of the - HP Latex 3600 | Users Guide - Page 205
HP Latex 3x00 Printer Cleaning Kit and Carriage Rail Cleaning Tool, provided with your printer be done by a service engineer. Call your service representative (see HP Customer Care Centers on page HP Latex 3000/3100/3500. 1HA07-67018 for HP Latex 3200/3600: Primer and latch, included in the HP Latex - HP Latex 3600 | Users Guide - Page 206
caps Clean the service station caps on page 340 Clean the vapor removal external filter Clean the vapor removal external filter on page 263 Brush Clean the bottom of the carriage, the drying glasses, and the line sensor Clean the bottom of the carriage, the HP Latex 3x00 Printer Cleaning Kit - HP Latex 3600 | Users Guide - Page 207
zone Clean the print zone on page 202 HP Latex 3x00 Printer Cleaning Kit, provided with your printer Clean the substrate-advance sensor Clean the substrate-advance sensor HP Latex 3x00 Printer Cleaning Kit, on page 204 provided with your printer Ink collector 40 Replace the ink collector foams - HP Latex 3600 | Users Guide - Page 208
protector and textile substrate edge holder on page 358 Ink collector 1500 liter maintenance To be done by a service engineer. Call your service representative (see HP Customer Care Centers on page 409). Part number and/or description Mandatory You must perform an automatic printhead check - HP Latex 3600 | Users Guide - Page 209
an edge holder strip on page 46. Prepare to clean the print zone 1. Ensure that you have the HP Latex 3x00 Printer Cleaning Kit, provided with your printer. 2. Ensure that the printer is not printing. 3. Unload the substrate. 4. Ensure that all windows, covers, and doors are closed and remain in - HP Latex 3600 | Users Guide - Page 210
or substrates with porous liners, are not supported and should not be used with your printer. However, under normal printing conditions with non sensor 1. Ensure that you have the HP Latex 3x00 Printer Cleaning Kit, provided with your printer. 2. Ensure that the printer is not printing. 3. Unload the - HP Latex 3600 | Users Guide - Page 211
6. Open the front door. Clean the substrate-advance sensor 1. Find the sensor in the middle of the platen. 2. Clean the platen area around the sensor thoroughly with a clean cloth dampened with distilled water. ENWW Weekly 205 - HP Latex 3600 | Users Guide - Page 212
3. Wipe the sensor window with one of the cotton swabs provided in the Printer Cleaning Kit, slightly dampened (not soaked) with isopropyl alcohol, to remove dried ink. If the sensor window is heavily coated with dry ink, you may - HP Latex 3600 | Users Guide - Page 213
1. Ensure that the printer is not printing. 2. Ensure that all windows, covers, and doors are closed and remain in their original positions. 3. Open the service position window. 4. Open one latch on the left side of each aerosol filter module. ENWW Weekly 207 - HP Latex 3600 | Users Guide - Page 214
5. Open the lid of each filter. 6. Remove both aerosol filters, using their handles. 7. Use a flat screwdriver to remove the dry aerosol and then a brush to remove any remaining dirt. Try to avoid loose dirt falling into the filter. 208 Chapter 9 Hardware maintenance ENWW - HP Latex 3600 | Users Guide - Page 215
round. 9. Close the lids. 10. Close the latches. 11. Close the service position window. Clean the pinchwheels and drive roller Risk of burns Crush hazard Risk of pinchwheels and drive roller 1. Ensure that the printer is not printing. 2. Unload the substrate. Clean the pinchwheels 1. Open the - HP Latex 3600 | Users Guide - Page 216
2. Pull the pinchwheel module to its lowest position. 3. Clean the pinchwheels carefully with a cloth dampened with water; do not use petroleum-based cleaning liquids. Clean the drive roller 1. Start the drive roller moving slowly backwards. 210 Chapter 9 Hardware maintenance ENWW - HP Latex 3600 | Users Guide - Page 217
with two rows of plastic ramps. Prepare to clean the output platen 1. Ensure that the printer is not printing. 2. Unload the substrate. 3. Turn off the printer in the correct manner for maintenance operations: see Turn the printer off on page 195. 4. Wait for the curing modules to cool down (approx - HP Latex 3600 | Users Guide - Page 218
2. Open the curing module latches. 3. Pull out the curing assembly. Clean the output platen ▲ In order to clean the output platen, access it from the top of the curing module. 212 Chapter 9 Hardware maintenance ENWW - HP Latex 3600 | Users Guide - Page 219
plate sides, or the paper path. 2. Check that the window rubber is not broken. 3. Clean the underneath part of the printer. Sitting or lying on the floor, clean the printer with a lint-free cloth dampened with distilled water. 4. Make sure there is no condensation or dirt in the following parts - HP Latex 3600 | Users Guide - Page 220
will typically be after about 60-70 liters of ink have been used. You should check the bottle periodically, depending on your usage of the printer. Empty the bottle 1. To remove the bottle, first open the two locks on the left, then open the cover; the hinges are on the right - HP Latex 3600 | Users Guide - Page 221
NOTE: The bottle collects a mixture of ink additives and water. Dispose of it according to local regulations. The waste-profile datasheet contains the required information for correct disposal. This document is located here: https://hplatexknowledgecenter.com/applications/wasteprofiles/. 4. Put back - HP Latex 3600 | Users Guide - Page 222
Before any cleaning maintenance, ensure that you have turned the printer off, and be careful to follow the appropriate safety precautions 2 Electric shock hazard For the latest information, see http://www.hp.com/go/latex3000/manuals/. Prepare to clean the carriage rails 1. Ensure that you have the - HP Latex 3600 | Users Guide - Page 223
you have the cleaning wicks (one bag of 20) and a 10 ml bottle of lubricant oil from the HP Latex 3x00 Printer Cleaning Kit, also provided with your printer. 3. Ensure that the printer is not printing. 4. You are recommended to wear gloves. 5. Ensure that all windows, covers, and doors are closed - HP Latex 3600 | Users Guide - Page 224
for all 20 wicks. 3. Run the diagnostic test to clean the carriage rail. The carriage will perform a series of movements and will stop at the service position. 218 Chapter 9 Hardware maintenance ENWW - HP Latex 3600 | Users Guide - Page 225
4. Open the service position window. 5. Insert the Carriage Rail Cleaning Tool front section. CAUTION: If you cancel the process before completion, remember to remove the tool from inside the printer. ENWW Every 125 liters of ink 219 - HP Latex 3600 | Users Guide - Page 226
6. Insert the Carriage Rail Cleaning Tool rear sections. 7. Close the service position window and click Continue. 8. When prompted, open the service position window. 9. Remove the three Carriage Rail Cleaning Tool sections. 220 Chapter 9 Hardware maintenance ENWW - HP Latex 3600 | Users Guide - Page 227
carriage rails manually on page 334. Prepare to replace the oiler foams 1. Ensure that you have the Oiler Foams Kit included in the HP Latex 3x00 Printer Cleaning Kit, provided with your printer. 2. Take the replacement oiler foams and wicks from the kit. 3. Move the carriage to the service position - HP Latex 3600 | Users Guide - Page 228
2. Slide off the cover of the front oiler foam. 3. Remove the old foam. 222 Chapter 9 Hardware maintenance ENWW - HP Latex 3600 | Users Guide - Page 229
4. Remove the old wicks. 5. Insert the new wicks. 6. Insert the new foam. ENWW Every 125 liters of ink 223 - HP Latex 3600 | Users Guide - Page 230
7. Put back the cover. Replace the rear oiler foam and wicks 1. Locate the rear oiler foam in the carriage. 2. Slide off the cover of the rear oiler foam. 224 Chapter 9 Hardware maintenance ENWW - HP Latex 3600 | Users Guide - Page 231
3. Remove the old foam. 4. Loosen the two screws that attach the black oiler holder to the carriage, and pull the holder out of the carriage ENWW Every 125 liters of ink 225 - HP Latex 3600 | Users Guide - Page 232
5. If the oiler also has a felt retainer fitted, remove it, and the 2 used felts. If not, skip this step. 6. Remove the used wicks. 226 Chapter 9 Hardware maintenance ENWW - HP Latex 3600 | Users Guide - Page 233
7. Insert the new wicks. Check that the wicks are inserted correctly. 8. If the oiler had the felt retainer fitted, insert 2 new felts, one on each side. If not, go to step 10. ENWW Every 125 liters of ink 227 - HP Latex 3600 | Users Guide - Page 234
9. Insert the felt retainer. Check that the wicks and retainer are inserted and fitted correctly. 10. Put the black oiler holder back into position. The holder has two pins to locate it properly. 11. Check again that the new wicks are inserted correctly. 228 Chapter 9 Hardware maintenance ENWW - HP Latex 3600 | Users Guide - Page 235
Insert the new foam. 14. Slide in the cover. 15. Close the service position window. Finish off replacing the oiler foams 1. Ensure that all windows, covers, and doors are closed and remain in their original position. 2. Turn on the printer in the correct way for maintenance operations: see Turn the - HP Latex 3600 | Users Guide - Page 236
windows, covers, and doors are closed and remain in their original position. 4. Move the carriage to the service position. 5. Turn off the printer in the correct way for maintenance operations: see Turn the printer off on page 195. Empty the oil collector caps 1. Open the front door. 2. Check all of - HP Latex 3600 | Users Guide - Page 237
3. Open the loading table latches. 4. Open the loading table. 5. Check all of the back collectors at the center of the printer. ENWW Every 125 liters of ink 231 - HP Latex 3600 | Users Guide - Page 238
6. Open the printhead cleaning roll door at the front right of the printer. 7. Check the front and back collectors visible from the door. 232 Chapter 9 Hardware maintenance ENWW - HP Latex 3600 | Users Guide - Page 239
8. Unscrew and remove the cover to access the capping station. ENWW Every 125 liters of ink 233 - HP Latex 3600 | Users Guide - Page 240
9. Check the front and back collectors visible from the opened cover. Also check the trays on the right; clean them if necessary by absorbing the oil with a cloth or other absorbent material. 234 Chapter 9 Hardware maintenance ENWW - HP Latex 3600 | Users Guide - Page 241
10. Unscrew the pointed screws and remove the left cover. ENWW Every 125 liters of ink 235 - HP Latex 3600 | Users Guide - Page 242
11. Check the front and back collectors visible from the opened cover. One of the back screws has no collector, as indicated below. Also check the tray on the left; clean it if necessary by absorbing the oil with a cloth or other absorbent material. 236 Chapter 9 Hardware maintenance ENWW - HP Latex 3600 | Users Guide - Page 243
12. In each case, remove and empty the collectors that are full, as shown below, and dispose of the oil according to local regulations. Maximum oil level Remove collector ENWW Every 125 liters of ink 237 - HP Latex 3600 | Users Guide - Page 244
door. 3. Put back the covers and screw them into place. 4. Close the printhead cleaning roll door. 5. Turn on the printer in the correct way for maintenance operations: see Turn the printer on on page 196. Clean the bottom of the carriage, the drying glasses, and the line and crash sensors Risk of - HP Latex 3600 | Users Guide - Page 245
Prepare to clean the carriage bottom 1. Ensure that you have the HP Latex 3x00 Printer Cleaning Kit, provided with your printer. NOTE: A steel scourer is not provided but will also be needed. 2. Ensure that the printer is not printing. 3. Unload the substrate. 4. Wait for the drying modules to cool - HP Latex 3600 | Users Guide - Page 246
Clean the aerosol nozzles ▲ Clean the aerosol nozzles with a dampened cloth. Clean the drying glasses 1. Clean the drying glasses with a dampened cloth. 240 Chapter 9 Hardware maintenance ENWW - HP Latex 3600 | Users Guide - Page 247
Wipe the crash sensor emitter and receiver lenses located at both sides of the carriage with one of the cotton swabs (provided in the Printer Cleaning Kit) slightly dampened with water. Once cleaned, ensure the parts are completely dry. Finish off cleaning the carriage bottom 1. Close the front door - HP Latex 3600 | Users Guide - Page 248
clean the ink deposits 1. Ensure that you have a steel scourer (not provided). 2. Ensure that the printer is not printing. 3. Turn off the printer in the correct way for maintenance operations: see Turn the printer off on page 195. Clean the ink deposits 1. Unscrew and open the right front cover to - HP Latex 3600 | Users Guide - Page 249
2. There are seven ink deposits to be cleaned. 3. Dampen the surface of each ink deposit with a cloth dampened with isopropyl alcohol. NOTE: If you are in an area (such as California) that regulates VOC cleaning and maintenance fluids, instead of isopropyl alcohol use a VOC-certified cleaner such as - HP Latex 3600 | Users Guide - Page 250
4. Scrub the surface of each ink deposit with the steel scourer, taking care to move it from the inside of the printer towards the outside, to avoid pushing dirt into the drop detector. TIP: If access or visibility is not good enough, remove the upper section of - HP Latex 3600 | Users Guide - Page 251
Clean the e-cabinet fan filters Prepare to clean the e-cabinet fan filters 1. Ensure that the printer is not printing. 2. Locate the fan filters on the printer. Clean the e-cabinet fan filters 1. Pull off the plastic fan filter cover. ENWW Every 125 liters of ink 245 - HP Latex 3600 | Users Guide - Page 252
with the air gun. Be careful to locate it back correctly: it must cover the fan's square surface. WARNING! The air gun provided with the printer is only intended to inflate the spindle. When recommended to use for cleaning purposes, make sure to do so according to local regulations since additional - HP Latex 3600 | Users Guide - Page 253
Hazardous moving part Electric shock hazard For more safety information, see Safety precautions on page 2 Prepare to clean the e-box fan filter 1. Turn off the printer and the power-enable switch. Moving fan blades 2. Locate the rear right panel assembly. ENWW Every 125 liters of ink 247 - HP Latex 3600 | Users Guide - Page 254
3. Remove the two pointed T-20 screws that attach the rear right panel assembly. 4. Remove the rear right panel assembly. 5. Remove the two T-20 screws from the e-box support and pull it out carefully. 248 Chapter 9 Hardware maintenance ENWW - HP Latex 3600 | Users Guide - Page 255
with the air gun. Be careful to locate it back correctly: it must cover the fan's square surface. WARNING! The air gun provided with the printer is only intended to inflate the spindle. When recommended to use for cleaning purposes, make sure to do so according to local regulations since additional - HP Latex 3600 | Users Guide - Page 256
moving part Light radiation hazard For more safety information, see Safety precautions on page 2 Electric shock hazard 1. Turn off the printer in the correct way for maintenance operations: see Turn the printer off on page 195. 2. Remove the spindle. 250 Chapter 9 Hardware maintenance ENWW - HP Latex 3600 | Users Guide - Page 257
3. Clean any metal debris from the bearings with a brush. ENWW Every 125 liters of ink 251 - HP Latex 3600 | Users Guide - Page 258
ink Before any cleaning maintenance, ensure that you have turned the printer off, and be careful to follow the appropriate safety precautions. Risk Blade Kit (CZ056-67046), which is included in the Printer Maintenance Kit (1HA07-67008 or 1VT19A) but can also be purchased separately. 2. Ensure that - HP Latex 3600 | Users Guide - Page 259
3. Unlock and open the printhead cleaning roll door. 4. Pull out the printhead cleaning roll carriage. 5. Put on gloves to protect your hands. ENWW Every 500 liters of ink 253 - HP Latex 3600 | Users Guide - Page 260
6. Open the pinchwheel (pull out and rotate the black plastic knob). 7. Move the printhead cleaning material aside in order to uncover the rubber blade. Replace the rubber blade 1. Move the rubber blade to the replacement position. 254 Chapter 9 Hardware maintenance ENWW - HP Latex 3600 | Users Guide - Page 261
2. Use a torx 15 screwdriver to remove the two screws shown below. While you unscrew them, you must hold the two spacers shown on the right (otherwise, they will fall and might get lost). 3. Remove the spacers. 4. Remove the rubber blade and place the new one in position. 5. Replace the screws. - HP Latex 3600 | Users Guide - Page 262
● Grease the carriage beam screws on page 268 ● Clean and grease the service station transmission and rods on page 270 ● Empty the drop detector ink vessel filters 1. E-cabinet fan filters are provided with your printer in the HP Latex 3x00 Printer Cleaning Kit: the necessary sets of two filters are - HP Latex 3600 | Users Guide - Page 263
2. Ensure that the printer is not printing. 3. Locate the fan filters on the printer. Replace the e-cabinet fan filters 1. Pull off the plastic fan filter cover. ENWW Every 1500 liters of ink 257 - HP Latex 3600 | Users Guide - Page 264
2. For each fan, change the fan filter for the new one provided. Be careful to locate it correctly: it must cover the fan's square surface. 3. Put back the fan cover. Replace e-box fan filter Crush hazard Risk of trapped fingers Hazardous moving part Electric shock hazard For more safety - HP Latex 3600 | Users Guide - Page 265
Prepare to replace the e-box fan filter The e-box fan filter is provided with your printer in the HP Latex 3x00 Printer Cleaning Kit. 1. Turn off the printer and the power-enable switch. 2. Locate the rear right panel assembly. 3. Remove the two pointed T-20 screws that attach the rear right panel - HP Latex 3600 | Users Guide - Page 266
5. Remove the two T-20 screws from the e-box support and pull it out carefully. Replace the e-box fan filter 1. Pull off the plastic fan filter cover. 260 Chapter 9 Hardware maintenance ENWW - HP Latex 3600 | Users Guide - Page 267
2. Change the fan filter for the new one provided. Be careful to locate it correctly: it must cover the fan's square surface. 3. Put back the fan cover. Clean the impinging plate Risk of burns Crush hazard Risk of trapped fingers Hazardous moving part For more safety information, see Safety - HP Latex 3600 | Users Guide - Page 268
Prepare to clean the impinging plate 1. Ensure that the printer is not printing. 2. Unload the substrate. 3. Turn off the printer in the correct way for maintenance operations: see Turn the printer off on page 195. 4. Wait for the curing modules to cool down (approx. 5 min). 5. Remove the spindle. - HP Latex 3600 | Users Guide - Page 269
Ensure that the cleaned parts are completely dry and all vapor has completely evaporated. 5. Turn on the printer in the correct way for maintenance operations: see Turn the printer on on page 196. Clean the vapor removal external filter Crush hazard Risk of trapped fingers Hazardous moving part - HP Latex 3600 | Users Guide - Page 270
Process 1. Switch off the printer. 2. Unscrew and open the back cover. 3. Using a brush and vacuum cleaner, clean the metal filter. 4. While here, check the fans to see if they also need cleaning. 5. Reinstall the cover. 6. Switch on the printer. Clean the rear scan-axis beam 264 Chapter 9 - HP Latex 3600 | Users Guide - Page 271
and remain in their original position. 4. Move the carriage to its leftmost position. 5. Turn off the printer in the correct way for maintenance operations: see Turn the printer off on page 195. Clean the rear scan-axis beam 1. Open the service position window. ENWW Every 1500 liters of ink 265 - HP Latex 3600 | Users Guide - Page 272
2. Remove the pointed screws indicated below and open the transparent cover at the right of the service position window. 266 Chapter 9 Hardware maintenance ENWW - HP Latex 3600 | Users Guide - Page 273
absorbent cloth, moistened with deionized water, to wipe off the dust. Ensure that the dust adheres to the cloth and does not fall into the printer. 4. Use the absorbent cloth, moistened with deionized water, to wipe off any other dirt stuck to the scan-axis beam. Finish off after cleaning the - HP Latex 3600 | Users Guide - Page 274
grease the substrate drive transmission gears 1. Ensure you have the machine grease and oil kit, included in the Printer Maintenance kit. 2. Unload the substrate. 3. Turn off the printer and the power-enable switch. 4. Open the pinch clamps. 5. Clean the exposed part of the substrate drive roller - HP Latex 3600 | Users Guide - Page 275
3. Ensure that all windows, covers, and doors are closed and remain in their original position. 4. Move the carriage beam to its highest position (this takes about 2 minutes). 5. Open the front door. Grease the carriage beam screws 1. Put some grease on your finger. 2. Apply the grease to the - HP Latex 3600 | Users Guide - Page 276
Electric shock hazard NOTE: Use gloves when applying grease to the gears. Clean and grease the service station transmission 1. Ensure you have the machine grease and oil kit, included in the Printer Maintenance kit. 2. Move the carriage beam to its highest position (it takes around 2 minutes). 270 - HP Latex 3600 | Users Guide - Page 277
a few oil drops along both the capping and the drop detector rods. Finishing off greasing the service station transmission 1. Remove any extra grease. 2. Make sure that no other parts of the printer have any grease that may prevent it from working correctly. 3. Place the 2 screws holding the rear - HP Latex 3600 | Users Guide - Page 278
2. There are seven ink vessels to be cleaned. 3. Remove the screws that fix the ink vessel. 4. Move the ink vessel enough to clean the dry ink that is deposited underneath. TIP: Use a vacuum cleaner to do so easily. 272 Chapter 9 Hardware maintenance ENWW - HP Latex 3600 | Users Guide - Page 279
front cover and screw it into place. 3. Ensure that the cleaned parts are completely dry. 4. Turn on the printer in the correct way for maintenance operations: see Turn the printer on on page 196. Grease the printhead primers Risk of burns Crush hazard Risk of trapped fingers Hazardous moving - HP Latex 3600 | Users Guide - Page 280
Ensure that all windows, covers, and doors are closed and remain in their original position. 3. Move the printhead carriage to the service position. 4. Turn off the printer in the correct way for maintenance operations: see Turn the printer off on page 195. 5. Stand on the folding steps and open the - HP Latex 3600 | Users Guide - Page 281
2. With a finger, apply a little grease to the 'O' rings to improve their performance. A suitable grease is available in a syringe from the cleaning kit. The grease should be applied to the black rubber part only. If grease gets into the central hole, remove it with a toothpick or similar tool. 3. - HP Latex 3600 | Users Guide - Page 282
on page 160 ● Check the printer for dust and aerosol on page curing fan and resistor module on page 315 ● Replace a service station cap on page 319 ● Replace an intermediate tank on and pinchwheels on page 333 ● Clean the carriage rails manually on page 334 ● Grease the printhead primers on page - HP Latex 3600 | Users Guide - Page 283
the curing module side rubber on page 339 ● Clean the service station caps on page 340 ● Clean the vapor removal external on. If you see condensation on the inside of the transparent cover over the middle of the printer, wipe it with a dry cloth. To reach the inside of the cover, unscrew the pointed - HP Latex 3600 | Users Guide - Page 284
ensure all doors are closed before turning on the printer. Replace a pinchwheel submodule Prepare to replace a pinchwheel submodule ▲ Ensure that you have the Pinchwheel Assembly (CZ056-67097), which is included in the HP Latex 3000 Series Standard Uptime Kit (D4J02A). Replace a pinchwheel submodule - HP Latex 3600 | Users Guide - Page 285
3. Remove the screws shown below. 4. Remove the pinchwheel cover. ENWW When required 279 - HP Latex 3600 | Users Guide - Page 286
5. Remove the screws that attach the pinchwheel submodule. 6. Remove the broken submodule. 7. Place the new submodule and attach the screws. 8. Place the cover and insert the screws. 9. Close the loading table. Replace a primer 280 Chapter 9 Hardware maintenance ENWW - HP Latex 3600 | Users Guide - Page 287
67018 for HP Latex 3200/3600), which is included in the HP Latex 3000 Series Standard Uptime Kit (D4J02A). 2. Ensure that the printer is not printing. 3. Ensure that all windows, covers, and doors are closed and remain in their original position. 4. Move the carriage to the service position. 5. Turn - HP Latex 3600 | Users Guide - Page 288
with the orientation. 5. Install the new latch with primer. 6. Replace the printhead, if it was removed, and close the latch. Replace a primer (HP Latex 3200, 3600 only) 1. Disconnect the two primer cable connectors at the back of the printhead that needs the primer replaced. 282 Chapter 9 Hardware - HP Latex 3600 | Users Guide - Page 289
2. Release the handle. It is not usually necessary to remove the printhead. 3. Loosen the T10 screw (do not remove the screw, just loosen it) and release the sheet metal tab. ENWW When required 283 - HP Latex 3600 | Users Guide - Page 290
4. Remove the latch. 5. Stick the corresponding printhead color label on the latch. Be careful with the orientation. 6. Install the new latch with primer. Do not close the handle yet. 284 Chapter 9 Hardware maintenance ENWW - HP Latex 3600 | Users Guide - Page 291
7. Close the sheet metal tab and tighten the T10 screw. 8. Close the handle. 9. Connect the two primer cable connectors. ENWW When required 285 - HP Latex 3600 | Users Guide - Page 292
is included in the HP Latex 3000 Series Standard Uptime Kit (D4J02A). 2. Ensure that the printer is not printing. 3. Ensure that all windows, covers, and doors are closed and remain in their original position. 4. Move the carriage to the service position. 5. Turn off the printer in the correct way - HP Latex 3600 | Users Guide - Page 293
Replace the aerosol fan module 1. Open the aerosol fan cover, as if you were going to replace the filters. ENWW When required 287 - HP Latex 3600 | Users Guide - Page 294
2. Remove the three screws that attach the cover, and remove the cover. 3. Disconnect the two aerosol fan cable connectors. 288 Chapter 9 Hardware maintenance ENWW - HP Latex 3600 | Users Guide - Page 295
4. Remove the main cable harness from the cover slot. 5. Close the cover. 6. Remove the nuts from the hinges. You must hold the nuts to prevent them from falling and get lost inside the carriage. ENWW When required 289 - HP Latex 3600 | Users Guide - Page 296
the cover. Finish off replacing the aerosol fan module 1. Close the service position window. CAUTION: Do not leave anything in the way of the carriage. 2. Turn on the printer in the correct way for maintenance operations: see Turn the printer on on page 196. 3. Run a diagnostic test to check that - HP Latex 3600 | Users Guide - Page 297
HP Latex 3000 Series Standard Uptime Kit (D4J02A). 2. Ensure that the printer is not printing. 3. Ensure that all windows, covers, and doors are closed and remain in their original position. 4. Move the carriage to the service position. 5. Turn off the printer specific operating instructions for - HP Latex 3600 | Users Guide - Page 298
2. Unplug the connector. 292 Chapter 9 Hardware maintenance ENWW - HP Latex 3600 | Users Guide - Page 299
3. Unscrew the three screws shown below in order to remove the drying module (the left module is shown). 4. Pull the drying module carefully out of the carriage and lay it gently on a table. Replace the drying fans array 1. Remove the drying filter. ENWW When required 293 - HP Latex 3600 | Users Guide - Page 300
2. Disconnect the drying fans array connector. 3. Remove the screw attaching the drying fans array to the drying module. 4. Remove the drying fans array and place the new array. There are two pins on each side of the drying module to ensure that it is placed in the correct position. 294 Chapter 9 - HP Latex 3600 | Users Guide - Page 301
the latches. Finish off replacing the drying fans array 1. Close the service position window. CAUTION: Do not leave anything in the way of the carriage. 2. Turn on the printer in the correct way for maintenance operations: see Turn the printer on on page 196. 3. Dispose of the old drying fans array - HP Latex 3600 | Users Guide - Page 302
is included in the HP Latex 3000 Series Standard Uptime Kit (D4J02A). 2. Ensure that the printer is not printing. 3. Ensure that all windows, covers, and doors are closed and remain in their original position. 4. Move the carriage to the service position. 5. Turn off the printer in the correct way - HP Latex 3600 | Users Guide - Page 303
2. Unplug the connector. 3. Unscrew the three screws shown below in order to remove the drying module (the left module is shown). ENWW When required 297 - HP Latex 3600 | Users Guide - Page 304
. CAUTION: The IR heating device must be operated only by specialists or trained personnel. The operator of the system must compile specific operating instructions for the training of operating personnel. CAUTION: The safety and functional reliability of the IR heating device are guaranteed only in - HP Latex 3600 | Users Guide - Page 305
Replace the drying lamps 1. To separate the drying glass and air outlet from the rest of the module, remove the three screws shown below. 2. Take out the drying lamps section of the drying module. ENWW When required 299 - HP Latex 3600 | Users Guide - Page 306
3. Remove the two screws shown below. 4. Pull out the two clamps. 5. Disconnect the four dryer lamp cables. 6. Locate the lamp latches. 300 Chapter 9 Hardware maintenance ENWW - HP Latex 3600 | Users Guide - Page 307
7. Release the screws that secure the lamp latches, and rotate the latches 180° to set the lamp free. 8. Rotate and pull out the old lamp. ENWW When required 301 - HP Latex 3600 | Users Guide - Page 308
9. Carefully install the new lamp. Leave the golden side down towards the interior of the module; when correctly installed, the internal wires of the lamp are visible. NOTE: The lamp is symmetrical lengthwise and both orientations are correct. 10. Rotate the latches back to the normal position and - HP Latex 3600 | Users Guide - Page 309
2. Moisten both sides of the glass with a lint-free cloth dampened with distilled water. 3. Scrub both sides of the glass with the steel scourer. 4. Repeat the above two steps as many times as needed to remove any visible ink stains on the glass. ENWW When required 303 - HP Latex 3600 | Users Guide - Page 310
cleaned parts are completely dry and all vapor has completely evaporated before turning on the printer. Reinstall the drying module 1. Install the drying module into the carriage and tighten the replacing the drying lamps 1. Close the service position window. 304 Chapter 9 Hardware maintenance ENWW - HP Latex 3600 | Users Guide - Page 311
. 2. Ensure that all windows, covers, and doors are closed and remain in their original position. 3. Move the carriage to the service position. 4. Turn off the printer in the correct way for maintenance operations: see Turn the printer off on page 195. 5. Stand on the folding steps and open the - HP Latex 3600 | Users Guide - Page 312
2. Unplug the connector. 306 Chapter 9 Hardware maintenance ENWW - HP Latex 3600 | Users Guide - Page 313
. CAUTION: The IR heating device must be operated only by specialists or trained personnel. The operator of the system must compile specific operating instructions for the training of operating personnel. CAUTION: The safety and functional reliability of the IR heating device are guaranteed only in - HP Latex 3600 | Users Guide - Page 314
Remove the drying quartz 1. To separate the drying glass and air outlet from the rest of the module, remove the three screws shown below. 2. Take out the drying lamps section of the drying module. Clean the drying quartz glass and the air outlet 1. Take the drying quartz glass and air outlet, - HP Latex 3600 | Users Guide - Page 315
2. Moisten both sides of the glass with a lint-free cloth dampened with distilled water. 3. Scrub both sides of the glass with the steel scourer. 4. Repeat the above two steps as many times as needed to remove any visible ink stains on the glass. ENWW When required 309 - HP Latex 3600 | Users Guide - Page 316
cleaned parts are completely dry and all vapor has completely evaporated before turning on the printer. Reinstall the drying module 1. Install the drying module into the carriage and tighten the replacing the drying lamps 1. Close the service position window. 310 Chapter 9 Hardware maintenance ENWW - HP Latex 3600 | Users Guide - Page 317
are included in the HP Latex 3000 Series Standard Uptime Kit (D4J02A). 2. Ensure that the printer is not printing. 3. Ensure that all windows, covers, and doors are closed and remain in their original position. 4. Move the carriage to the service position. 5. Turn off the printer in the correct way - HP Latex 3600 | Users Guide - Page 318
2. Unplug the connector. 312 Chapter 9 Hardware maintenance ENWW - HP Latex 3600 | Users Guide - Page 319
3. Unscrew the three screws shown below in order to remove the drying module (the left module is shown). 4. Pull the drying module carefully out of the carriage and lay it gently on a table. Replace the drying quartz glass 1. To separate the drying glass and air outlet from the rest of the module, - HP Latex 3600 | Users Guide - Page 320
2. Assemble the drying lamps section and the new drying glass and air outlet. 3. Insert the three screws. Reinstall the drying module 1. Reinstall the drying module into the carriage and tighten the three screws that attach it to the carriage. 314 Chapter 9 Hardware maintenance ENWW - HP Latex 3600 | Users Guide - Page 321
the latches. Finish off replacing the drying quartz glass 1. Close the service position window. CAUTION: Do not leave anything in the way of the carriage. 2. Turn on the printer in the correct way for maintenance operations: see Turn the printer on on page 196. 3. Dispose of the old quartz glass - HP Latex 3600 | Users Guide - Page 322
and Fan Module Kit (CZ056-67054), which is included in the HP Latex 3000 Series Standard Uptime Kit (D4J02A). 2. Ensure that the printer is not printing. 3. Turn off the printer in the correct way for maintenance operations: see Turn the printer off on page 195. 4. Wait for the curing modules to - HP Latex 3600 | Users Guide - Page 323
3. Raise the metal sheet in order to reach the interior of the module. 4. Disconnect the two cables shown in the picture. You have to press the retention clip on each of the two connectors, and gently pull the cable. The black one is for the DC fans supply and the white one is for AC power to the - HP Latex 3600 | Users Guide - Page 324
6. Remove the fan-resistor module. 7. Put the new fan-resistor module into position. 8. Screw in the screw and connect the two cables to each fan-resistor module. 9. Close the metal sheet and replace the screws to secure it. 318 Chapter 9 Hardware maintenance ENWW - HP Latex 3600 | Users Guide - Page 325
on page 2 Electric shock hazard Prepare to replace a service station cap 1. Ensure that you have the Service Station Caps Kit (CZ056-67036), which is included in the HP Latex 3000 Series Standard Uptime Kit (D4J02A). 2. Ensure that the printer is not printing. 3. Ensure that all windows, covers - HP Latex 3600 | Users Guide - Page 326
320 Chapter 9 Hardware maintenance ENWW - HP Latex 3600 | Users Guide - Page 327
2. Remove the service station cap, using three movements as shown below. ENWW When required 321 - HP Latex 3600 | Users Guide - Page 328
Tank Kit (CZ056-67073), which is included in the HP Latex 3000 Series Standard Uptime Kit (D4J02A). 2. Ensure that the printer is not printing. 3. Turn off the printer in the correct way for maintenance operations: see Turn the printer off on page 195. Replace an intermediate tank 1. Unscrew - HP Latex 3600 | Users Guide - Page 329
2. Remove the intermediate tank with the broken bag. 3. Put a piece of cloth in its place. ENWW When required 323 - HP Latex 3600 | Users Guide - Page 330
after replacing an intermediate tank 1. Turn on the printer in the correct way for maintenance operations: see Turn the printer on on page 196. 2. Run a diagnostic those in this specific area of the e-cabinet. These are the only ones you are allowed to replace. Call your service representative in all - HP Latex 3600 | Users Guide - Page 331
you have the E-cabinet PCA Fuses Kit (CZ056-67136), which is included in the HP Latex 3000 Series Standard Uptime Kit (D4J02A). 2. Check the Print Care error message log to find out which fuse needs to be replaced. 3. Turn off the printer in the correct way for maintenance operations: see Turn the - HP Latex 3600 | Users Guide - Page 332
circuits within the system. If a fuse trips repeatedly, call your service representative and do not attempt to replace the fuse with one with screw it into place. 9. Turn on the printer in the correct way for maintenance operations: see Turn the printer on on page 196. Clean the printhead contacts - HP Latex 3600 | Users Guide - Page 333
that you have the HP Latex 3x00 Printer Cleaning Kit, which is provided with your printer. 2. Ensure that the printer is not printing. the printhead carriage to the service position. 6. Turn off the printer in the correct way for maintenance operations: see Turn the printer off on page 195. 7. - HP Latex 3600 | Users Guide - Page 334
: Remember which printhead came from which slot; the printer will report an error if you later replace a printhead dirt. 3. Clean the dirty connections gently but thoroughly using the brush provided in the HP Latex 3x00 Printer Cleaning Kit. A piece of paper or cloth can be used to collect the dirt - HP Latex 3600 | Users Guide - Page 335
to dislodge any remaining dirt. WARNING! The air gun provided with the printer is only intended to inflate the spindle. When recommended to use for printhead) 1. Take the printhead interconnect wiper provided in the HP Latex 3x00 Printer Cleaning Kit. Prepare the handle and one pre-moistened sponge - HP Latex 3600 | Users Guide - Page 336
3. Open the handle. 4. Load the sponge and close the handle as shown below. 5. Remove the printhead cap and locate the contacts. 330 Chapter 9 Hardware maintenance ENWW - HP Latex 3600 | Users Guide - Page 337
dry. 2. Put back the printheads, each in the same slot from which it came. 3. Close the service position window. 4. Turn on the printer in the correct way for maintenance operations: see Turn the printer on on page 196. Replace a spindle valve Risk of trapped fingers For more safety information, see - HP Latex 3600 | Users Guide - Page 338
you have the Spindle Air Valve (Q6702-67025), which is included in the HP Latex 3000 Series Standard Uptime Kit (D4J02A). 2. Ensure that you have an 11 mm (7/16 inch) tube wrench key and the pneumatic gun. 3. Ensure that the printer is not printing. 4. Press the valve to deflate the spindle. Replace - HP Latex 3600 | Users Guide - Page 339
clean the roll-to-free-fall roller and pinchwheels 1. Check that the printer is not printing. 2. Unload the substrate. 3. Raise the pressure roller , but do not use petroleum-based cleaning liquids). 2. Turn the roller manually and keep cleaning to make sure the rubber surface of the roller is - HP Latex 3600 | Users Guide - Page 340
when moving the roller backwards not to hit your fingers against the black substrate guide behind and under the roller. 6. Once the roller is in position, close the vapors have completely evaporated. Clean the carriage rails manually Risk of burns Crush hazard Risk of trapped fingers Hazardous - HP Latex 3600 | Users Guide - Page 341
NOTE: Perform this procedure only if the automatic cleaning procedure fails. Prepare to clean the carriage rails manually 1. Ensure that the printer is not printing. 2. You are recommended to wear gloves. 3. Ensure that all windows, covers, and doors are closed and remain in their original position. - HP Latex 3600 | Users Guide - Page 342
the loading table. Finish off cleaning the carriage rails manually 1. Ensure that all windows, covers, and doors are closed and remain in their original position. 2. Turn on the printer in the correct way for maintenance operations: see Turn the printer on on page 196. Pinch clamp replacement Crush - HP Latex 3600 | Users Guide - Page 343
For more safety information, see Safety precautions on page 2 Removal (same for all four sides) 1. Unload all the spindles from both sides of the printer. 2. Open the latch. 3. Unscrew the 2 hexagonal cap screws with a wrench and remove the rocker pad. Installation ▲ Install the new rocker pad and - HP Latex 3600 | Users Guide - Page 344
shock hazard NOTE: Perform this procedure only if the automatic cleaning procedure fails. Prepare to clean the scan axis encoder 1. Ensure that the printer is not printing. 2. You are recommended to wear gloves. 3. Ensure that all windows, covers, and doors are closed and remain in their original - HP Latex 3600 | Users Guide - Page 345
Ensure that all windows, covers, and doors are closed and remain in their original position. 2. Turn on the printer in the correct way for maintenance operations: see Turn the printer on on page 196. Replace the curing module side rubber Crush hazard Risk of trapped fingers Hazardous moving part - HP Latex 3600 | Users Guide - Page 346
Light radiation hazard For more safety information, see Safety precautions on page 2 Electric shock hazard Prepare to clean the service station caps 1. Ensure that the printer is not printing. 2. Ensure that all windows, covers, and doors are closed and remain in their original position. 3. Move - HP Latex 3600 | Users Guide - Page 347
2. Clean the zone around the service station caps. ENWW When required 341 - HP Latex 3600 | Users Guide - Page 348
Finish off after cleaning a service station cap 1. Put back the cover and screw it into place. 2. Turn on the printer in the correct way for maintenance operations: see Turn the printer on on page 196. Empty the printhead cleaning waste bottle Risk of burns Crush hazard Risk of trapped fingers - HP Latex 3600 | Users Guide - Page 349
can find the Material Safety Data Sheets (MSDS) for the ink at http://www.hp.com/go/ msds. Installation 1. Put the empty bottle back in place. 2. cleaning roll door. 5. Turn on the printer in the correct way for maintenance operations: see Turn the printer on on page 196. Clean the perforated - HP Latex 3600 | Users Guide - Page 350
hot air onto the substrate. Prepare to clean the perforated plate 1. Ensure that the printer is not printing. 2. Unload the substrate. 3. Turn off the printer in the correct way for maintenance operations: see Turn the printer off on page 195. 4. Wait for the curing modules to cool down (approx - HP Latex 3600 | Users Guide - Page 351
2. Open the curing module latches. 3. Pull out the curing assembly. Clean the perforated plate ▲ Lying on the floor as shown in the picture, clean the perforated plate of the curing modules with a lint-free cloth dampened with distilled water. ENWW When required 345 - HP Latex 3600 | Users Guide - Page 352
curing latches. 3. Put the spindle back in position. 4. Ensure that the cleaned parts are completely dry and all vapor has completely evaporated. 5. Turn on the printer in the correct way for maintenance operations: see Turn the printer on on page 196. 346 Chapter 9 Hardware maintenance ENWW - HP Latex 3600 | Users Guide - Page 353
Before any cleaning maintenance, ensure that you have turned the printer off, and be careful to follow the appropriate safety precautions. be kept clean for optimal performance and reliability. 1. Ensure that the printer is not printing. 2. Unload the substrate. 3. Open the front door. ENWW - HP Latex 3600 | Users Guide - Page 354
4. Open the curing module latches. 5. Open the curing module. CAUTION: Wait for the curing modules to cool down. 6. Wipe both the visible part of the protector and the underneath with a lint-free cloth dampened with distilled water. 7. Close the curing module and latches. Wipe the ribs of the ink - HP Latex 3600 | Users Guide - Page 355
foams: see Replace the ink collector foams on page 353. CAUTION: Proper maintenance and genuine HP consumables are required to ensure that the printer operates safely as designed. The use of non-HP consumables (foams, filters, printhead cleaner roll, or inks) may present a risk of fire. ENWW Ink - HP Latex 3600 | Users Guide - Page 356
module and airlet plates First ensure that you have turned the printer off, and be careful to follow the appropriate safety precautions Electric shock hazard After using the ink collector kit, the following parts of the printer may be dirty. Check them as follows. Curing lip 1. Open the front door. - HP Latex 3600 | Users Guide - Page 357
2. Open the curing module latches. 3. Open the curing module. CAUTION: Wait for the curing modules to cool down. 4. Wipe the curing lip with a lint-free cloth dampened with isopropyl alcohol, and make sure that the platen is dry before printing. NOTE: If you are in an area (such as California) that - HP Latex 3600 | Users Guide - Page 358
Diverter interwheels 1. Wipe the diverter interwheels with a lint-free cloth dampened with distilled water, and make sure that the platen is dry before printing. 2. Close the curing module and the front door. 352 Chapter 9 Hardware maintenance ENWW - HP Latex 3600 | Users Guide - Page 359
condensation from the output platen and output beams on page 213 Replace the ink collector foams TIP: Do this away from the printer to avoid ink dripping on the printer. 1. Slide out the dirty old foams. NOTE: Consult your local authorities to determine the correct manner in which to dispose of - HP Latex 3600 | Users Guide - Page 360
2. Slide in the new foams. CAUTION: Proper maintenance and genuine HP consumables are required to ensure that the printer operates safely as designed. The use of non-HP consumables (foams, filters, printhead cleaner roll, or inks) may present a risk of fire. 354 Chapter 9 Hardware maintenance ENWW - HP Latex 3600 | Users Guide - Page 361
and Fan Module Kit (CZ056-67054), which is included in the HP Latex 3000 Series Standard Uptime Kit (D4J02A). 2. Ensure that the printer is not printing. 3. Turn off the printer in the correct way for maintenance operations: see Turn the printer off on page 195. 4. Wait for the curing modules to - HP Latex 3600 | Users Guide - Page 362
2. Use a flat screwdriver to remove the screws of the curing module. 356 Chapter 9 Hardware maintenance ENWW - HP Latex 3600 | Users Guide - Page 363
3. Raise the metal sheet in order to reach the interior of the module. 4. Remove the grid from the fan. 5. Clean the dirt with a brush or with the air supply gun. 6. Place the grid back into place and fix it with the four screws. ENWW Ink collector 500 liter maintenance 357 - HP Latex 3600 | Users Guide - Page 364
it. Finish off after cleaning the curing fan grid and internal foams 1. Close the front door. 2. Turn on the printer in the correct way for maintenance operations: see Turn the printer on on page 196. Replace protector and textile substrate edge holder After using 500 liters with the ink collector - HP Latex 3600 | Users Guide - Page 365
10 Troubleshoot substrate issues Loading issues The substrate cannot be loaded successfully ● A substrate cannot be loaded unless all printer subsystems , call your service representative (see HP Customer Care Centers on page 409). 5. Use Print Care to start the printer in service mode. 6. - HP Latex 3600 | Users Guide - Page 366
roll. The substrate is not flat If the substrate does not lie flat when it comes out of the printer, but has shallow waves in it, you are likely to see defects in the printed image, such as and vacuum pressure that is applied to the substrate. 360 Chapter 10 Troubleshoot substrate issues ENWW - HP Latex 3600 | Users Guide - Page 367
the amount of ink. Printing issues A spindle latch suddenly opens during printer operation If a spindle latch is not closed before starting the substrate load the outer sides of both rolls, you are recommended to use the center support with both spindles. Once installed, you can try to move it up - HP Latex 3600 | Users Guide - Page 368
printer. This could mean that the support has been calibrated above the correct position. NOTE: Although the center support problems and, generally, this problem Check center support alignment problem, see HP Latex 3500/3600 dual-roll split spindles center support center support for potential problem. - HP Latex 3600 | Users Guide - Page 369
Incorrect loading of the substrate ● Incorrect routing of the substrate through the printer ● Incorrectly positioned edge holders ● Drying and curing temperatures too high for its two ends. ● Wrong alignment of the center support split spindles (HP Latex 3500/3600 only). ENWW Printing issues 363 - HP Latex 3600 | Users Guide - Page 370
roll-to-floor configuration, and using the substrate collector if required. If you still see some problems, try to increase tension by following the recommendations below. TIP: When suffering from wrinkles and the knob and turn it as shown below. 364 Chapter 10 Troubleshoot substrate issues ENWW - HP Latex 3600 | Users Guide - Page 371
5. Reload the substrate and try to minimize skew while loading. Check that you are loading the substrate using the correct procedure. 6. If you have experienced a substrate crash because the lateral edge of the substrate in the print zone is not flat enough, and is raised or even partially cut - HP Latex 3600 | Users Guide - Page 372
the substrate. For information on how to adjust printer settings, see Edit a substrate preset on page 110. There are ink marks on the substrate This problem can occur if any component in contact with the the substrate using the correct procedure. 366 Chapter 10 Troubleshoot substrate issues ENWW - HP Latex 3600 | Users Guide - Page 373
marks are usually seen in isolated areas and mainly caused by high curing temperature or substrate tensions. Here are some suggested ways to correct the problem: 1. Check that the substrate you are using is the same type as the one you have selected in the Internal Print Server. 2. Check that you - HP Latex 3600 | Users Guide - Page 374
printhead slots. 3. Clean the electrical connections to the printheads. See The Internal Print Server recommends replacing or reseating a printhead on page 401. 368 Chapter 10 Troubleshoot substrate issues ENWW - HP Latex 3600 | Users Guide - Page 375
Dual roll printing issues When printing with an HP Latex 3500/3600 and its dual roll center support, the following issues could appear if misalignment of the center support Split spindles occurs: ● Wrinkles ● Ink smears ● Uneven performance between the two rolls ● Telescoping due to Skew convergence - HP Latex 3600 | Users Guide - Page 376
the height of the dual-roll center support accurately. Do not use the dual-roll spindle, as it is heavier and it may not be level along its length. 2. Place the dual-roll center support under the center of the spindle. 3. Pull the lever down. 370 Chapter 10 Troubleshoot substrate issues ENWW - HP Latex 3600 | Users Guide - Page 377
by turning it counterclockwise. The bearings at the top of the dual-roll center support must touch the spindle. 5. Manually turn the spindle 360 degrees. Make sure there is full contact between the bearings on the support and the face of the spindle except along the ruler groove and pneumatic groove - HP Latex 3600 | Users Guide - Page 378
in the central shaft for your reference. 8. Tighten the base nut. 9. Tighten the two screws to fix the final position of the dual-roll center support. NOTE: Hold the support shaft firmly in position when tightening the screws. 372 Chapter 10 Troubleshoot substrate issues ENWW - HP Latex 3600 | Users Guide - Page 379
base, the misalignment has to be fixed following the installation process. Contact HP. Periodic noise on the center support latch when the substrate is moving To solve this problem, readjust the center support latch on the spindle. To do this it is important to check the following requirements - HP Latex 3600 | Users Guide - Page 380
reduce the contraction. How to achieve better consistency between jobs of the same length The printer has been designed to maximize consistency in the length of the printed substrate. However, need to print on a substrate susceptible to expansion: 374 Chapter 10 Troubleshoot substrate issues ENWW - HP Latex 3600 | Users Guide - Page 381
ensure that you send all the tiles within the same jobs sent to the printer/Internal Print Server. The objective is to make sure that there is no jobs: ● Make sure that the substrate and also the ambient temperature of the printer are the same as when the previous job was printed. ● Add a top - HP Latex 3600 | Users Guide - Page 382
recommended to follow the loading instructions; in particular, align the you cannot resolve the problem satisfactorily, you are in-line-slitters, provided with the printer are standard slotted 2.25 inch (57mm) Based on the specific application; please take Troubleshoot substrate issues ENWW - HP Latex 3600 | Users Guide - Page 383
To adjust the cutter blade positions, untighten the two lateral screws with an Allen key, then adjust the position as shown in the image. To fix the correct position; tighten the screws. ENWW Slitter poor cutting quality 377 - HP Latex 3600 | Users Guide - Page 384
11 Troubleshoot print-quality issues General advice The HP Latex 3000 printer series has been designed and qualified to in the recommended range. See Environmental specifications on page 414. Before troubleshooting, check the following points: 378 Chapter 11 Troubleshoot print-quality issues ENWW - HP Latex 3600 | Users Guide - Page 385
and print mode. ● Check whether there are any outstanding printer alerts in the Internal Print Server. React to the alert as instructed in this guide. In particular: ● Make sure the substrate is flat and has no wrinkles. See Troubleshoot substrate issues on page 359. ● Check that the substrate - HP Latex 3600 | Users Guide - Page 386
guided troubleshooting process for users facing banding issues, especially horizontal banding. The tool consists of two parts: an image to print, and a guide for the troubleshooting Printer menu. When facing banding issues, print the Image Quality Inspection Plot from the Printer menu: go to Printer - HP Latex 3600 | Users Guide - Page 387
and calibrate if necessary. (Printer menu > Advance calibration ...) the one with most nozzles clogged). e. If the problem persists after replacing the printhead, consider it may and replace it. 3. After finishing the troubleshooting process, delete the image quality inspection job from - HP Latex 3600 | Users Guide - Page 388
will help to resolve the majority of the typical print-quality issues related to banding, graininess, and printhead alignment. ● Advanced troubleshooting helps to resolve the above issues when the basic steps did not work, but it also covers other possible print-quality defects, diagnosis - HP Latex 3600 | Users Guide - Page 389
sensor in this guide. The test will tell you whether the substrate-advance sensor is working correctly or not (either dirty or damaged). If the substrate-advance sensor is dirty, clean the sensor. See Clean the substrate-advance sensor on page 204. ENWW Basic and advanced troubleshooting 383 - HP Latex 3600 | Users Guide - Page 390
substrate-advance sensor is included in the printer's weekly maintenance. Printhead alignment Perform a manual printhead alignment. See Alignment procedure on page 175. Advanced print-quality troubleshooting If the basic print-quality troubleshooting does not solve the problem, here are some further - HP Latex 3600 | Users Guide - Page 391
Internal Print Server, select Printer > Advance Calibration to check the substrate advance. See Substrate-advance test print on page 182. You can usually correct this problem by adjusting the substrate appears. Sometimes a bigger drop with all the ENWW Advanced print-quality troubleshooting 385 - HP Latex 3600 | Users Guide - Page 392
having the same problem with other substrates. See Clean the substrate-advance sensor on page 204. If the problem persists, try adjusting tension and vacuum settings according to the table below, step by step (a to c), until you find settings that work. 386 Chapter 11 Troubleshoot print-quality - HP Latex 3600 | Users Guide - Page 393
. Coalescence is most likely to be seen in areas of high ink density. Here are some tips for solving this problem: - Use lower ink density. - Increase the number of passes. - Change the type of mask (Large mask printhead alignment are (in this order): ENWW Advanced print-quality troubleshooting 387 - HP Latex 3600 | Users Guide - Page 394
Internal Print Server, select Printer > Advance Calibration to check the substrate advance. See Substrate-advance test print on page 182. You can usually correct this problem by adjusting the substrate advance it is likely to be gloss banding. 388 Chapter 11 Troubleshoot print-quality issues ENWW - HP Latex 3600 | Users Guide - Page 395
can be formed and deposited on the substrate to create this effect. Here are some tips for solving this problem: ● Increase the number of passes. ● Reduce the ink density. ● Check the printhead-to-ribs spacing responsible, and replace the printhead. ENWW Advanced print-quality troubleshooting 389 - HP Latex 3600 | Users Guide - Page 396
a difference in grain can be seen, and bands appear 2 cm apart. Here are some tips for solving this problem: ● Align the printheads. ● Check the scan-beam height in the Internal Print Server. If it is higher than zone and reduce the wrinkles. 390 Chapter 11 Troubleshoot print-quality issues ENWW - HP Latex 3600 | Users Guide - Page 397
Here are some tips for solving this problem: ● Check the scan-beam height in the Internal Print Server. If it is higher than normal, try lowering it. ● Align the by this issue. It can happen in both axes: the substrate axis and the scan axis. ENWW Advanced print-quality troubleshooting 391 - HP Latex 3600 | Users Guide - Page 398
). If necessary, perform a manual alignment, then reprint the printhead alignment diagnostics plot. If the problem is in the substrate axis and correct this problem, try increasing and decreasing the optimizer percentage in the substrate preset. 392 Chapter 11 Troubleshoot print-quality issues - HP Latex 3600 | Users Guide - Page 399
. Check which profile you are using. If necessary, you can make your own ICC profile for the printer, printheads, print mode, and substrate that you are using. ● Ink density, which affects color saturation. 5 of Edit a substrate preset on page 110. ENWW Advanced print-quality troubleshooting 393 - HP Latex 3600 | Users Guide - Page 400
from tile to tile. When color changes uniformly it must be within the color consistency specification; see Color consistency on page 41 for more details. Usually grays are much more sensitive adjust any parameter, make the following checks: 394 Chapter 11 Troubleshoot print-quality issues ENWW - HP Latex 3600 | Users Guide - Page 401
To confirm it, go to the Internal Print Server and select Printer > Advance Calibration to check the substrate advance. See Substrate- advance compensation on page 181. In most cases, this will solve the problem. However, you are recommended to run the OMAS Diagnostic Tests from troubleshooting 395 - HP Latex 3600 | Users Guide - Page 402
pass, while horizontal lines are not affected. To correct this problem, try adjusting tension and vacuum settings according to the table grain than expected, either throughout the print or in some specific areas. The example below shows more grain in the lower Troubleshoot print-quality issues ENWW - HP Latex 3600 | Users Guide - Page 403
problem detail. Here are some tips for solving this problem: - Increase the optimizer level. - Increase the some tips for solving this problem: - If the printhead Print Server and select Printer > Advance Calibration. See most cases, this will solve the problem. However, you are recommended to run - HP Latex 3600 | Users Guide - Page 404
If the problem persists, try adjusting tension and vacuum settings according to the table below, step by step (a to c), until you find settings ink density. You can see small circles scattered over the picture with different levels of gloss. 398 Chapter 11 Troubleshoot print-quality issues ENWW - HP Latex 3600 | Users Guide - Page 405
in severe cases the ink can be smudged by touching it. Here are some tips for solving both problems: ● Increase the curing temperature. ● Increase the curing airflow. ● Increase the curing temperature and wrong settings in the substrate preset. ENWW Advanced print-quality troubleshooting 399 - HP Latex 3600 | Users Guide - Page 406
check the ink cartridge connector (see Bent ink cartridge connector on page 400). 4. If the problem persists, insert a new ink cartridge. 5. If the problem still persists, call your service representative (see HP Customer Care Centers on page 409). Bent ink cartridge connector You may find that the - HP Latex 3600 | Users Guide - Page 407
Find more troubleshooting information in the following sections, Problem due to overheating on page 401 and Problem due to the primer system on page 401. 6. If the problem persists, insert a new printhead. 7. If no printhead works in that slot, call your service representative (see HP Customer Care - HP Latex 3600 | Users Guide - Page 408
During a printhead servicing routine ● A reseat message for a particular printhead ● A numerical error code starting with 46 (46.0X.0Y:ZZ) The message the latch. While running the test, you will already have done it at least once. 402 Chapter 12 Troubleshoot ink cartridge and printhead issues ENWW - HP Latex 3600 | Users Guide - Page 409
of these actions resolve the problem, call your service representative. If you see instructs you to replace the primer, replace it. See Replace a primer on page 280. Otherwise, call your service representative with the test results at hand. Printhead health troubleshooting Printer > Printhead cleaning - HP Latex 3600 | Users Guide - Page 410
the printhead. Call your service representative. Hard clean To perform a hard cleaning routine, go to the Internal Print Server, select Printer > Printhead cleaning, select the printhead(s) to clean and press the Hard clean button. 404 Chapter 12 Troubleshoot ink cartridge and printhead issues - HP Latex 3600 | Users Guide - Page 411
another one. 6. If no printhead works in that slot, call your service representative. Printhead cleaning roll errors You should not touch the printhead cleaner roll and spittoon on page 161. Any handling of the roll may prevent the printer from keeping track of roll usage, in which case you may see - HP Latex 3600 | Users Guide - Page 412
13 Troubleshoot other issues The printer does not start 1. Check that the power supply to the printer is working. 2. problems, call your service representative (see HP Customer Care Centers on page 409). The printer cannot be restarted from the Internal Print Server In rare cases, the printer - HP Latex 3600 | Users Guide - Page 413
Generally poor print quality (such as banding). See Troubleshoot print-quality issues on page 378. ● Either the embedded spectrophotometer or the line sensor is not working properly. If the problem persists, call your service representative (see HP Customer Care Centers on page 409). ENWW Request - HP Latex 3600 | Users Guide - Page 414
resolving printer issues before they become problems for you. HP's Proactive Support tool is designed to help businesses of all sizes reduce support costs and maximize productivity-all with the click of a mouse. A component of the HP Imaging and Printing suite of services, Proactive Support helps - HP Latex 3600 | Users Guide - Page 415
solve the problem. HP Customer Care HP Customer Care offers award-winning support to ensure you get the most from your printer, providing comprehensive, proven support expertise and new technologies to give you unique end-to-end support. Services include setup and installation, troubleshooting tools - HP Latex 3600 | Users Guide - Page 416
/allServicePlot.htm. For instance, if the URL of your printer is http://123.123.123.123, enter http://123.123.123.123/hp/device/webAccess/ allServicePlot.htm. You can request the whole list, which takes a significant time to generate; or you can request specific parts of it. If in doubt, you are - HP Latex 3600 | Users Guide - Page 417
15 Printer specifications Functional specifications HP Latex 3100/3200/3500/3600 Ink supplies Printheads Ink cartridges Cyan and black, light magenta and light cyan, yellow and magenta, HP Latex Optimizer Cyan, magenta, yellow, black, light cyan, light magenta, HP Latex Optimizer Substrate sizes - HP Latex 3600 | Users Guide - Page 418
is measured using rolls 3.2 m (126 in) wide. Physical specifications Printer physical specifications Weight HP Latex 3000 1500 kg (3307 lb) without crate Width Depth Height 5.98 m (235 in) 1.72 m (68 in) 1.67 m (66 in) HP Latex 3100/3200/3500/3600 1740 kg (3836 lb)/1870 kg (4122 lb) without - HP Latex 3600 | Users Guide - Page 419
disk 500 GB SSD (HP latex 3100/3200/3500/3600 only) 500 GB Power specifications The drying and curing components are powered with a three-phase line that requires a power distribution unit (PDU). Power specifications for drying and curing components HP Latex 3000 Mains power, input rated - HP Latex 3600 | Users Guide - Page 420
service representative to empty the ink from the tubes. Maximum operating altitude: 3000 m (10000 ft) The printer should not be exposed to direct sunlight or any other strong light source, and it should not be used in a dusty environment. Acoustic specifications Printer acoustic specifications - HP Latex 3600 | Users Guide - Page 421
instructions provided by the printer, and consult the tables below. If you feel in doubt about the correct response, or if you have followed the recommendation but the problem persists, call your service representative. See HP manually, then lower the pinchwheels and push the assembly back into the - HP Latex 3600 | Users Guide - Page 422
firmware update is being performed. The Internal Print Server is connecting to the printer. The Internal Print Server is starting the printer. The printer printer does not recover, restart it. If the problem service representative. See HP Customer Care Centers on page 409. Load substrate. The printer - HP Latex 3600 | Users Guide - Page 423
Internal Print Server. The printer is being detected while starting problem persists, run subsystem diagnostics and call your service representative. NOTE: The above table includes the most significant numerical codes. If you receive an error code that is not in the table, follow the instructions - HP Latex 3600 | Users Guide - Page 424
supporting the printhead carriage as it moves back and forth across the printer printer to printer. Color model A system of representing colors by numbers, such as RGB or CMYK. Color space A color model in which each color is represented by a specific needed to coalesce the latex, creating a polymeric - HP Latex 3600 | Users Guide - Page 425
Firmware Software that controls your printer's functionality and is stored semi-permanently in the printer (it can be updated). Gamut The range of colors and density values reproducible on an output device, such as a printer the substrate. Spindle A rod that supports a roll of substrate while it is - HP Latex 3600 | Users Guide - Page 426
Vacuum pressure The vacuum applied to the substrate in the printing zone helps to hold the substrate down on the print platen, keeping the distance to the printheads constant. 420 Glossary ENWW - HP Latex 3600 | Users Guide - Page 427
406 emergency stop buttons 10 environmental specifications 414 error messages 415 F features of printer 1 firmware update 26 functional specifications 411 H hard disk specification 413 how to use your printer 1 HP Customer Care 409 HP Proactive Support 408 I image composition 134 impinging plate - HP Latex 3600 | Users Guide - Page 428
off/on 195 maintenance tools 192 maintenance with Print Care 192 maintenance without Print Care 193 memory specifications 413 move the printer 17 multiple exports export 102 N nesting 144 non-hp ink consequences 153 O oil collector caps empty 229 oiler foams, replace 216 on-the-fly adjustment 113 - HP Latex 3600 | Users Guide - Page 429
jammed 359 load into printer 65 load onto services HP Customer Care 409 HP Proactive Support 408 T telephone support 409 thunderstorm 406 tiling 134 optimize 104 transmission and rods clean and grease 270 transmission gears and rods clean and grease 267 ENWW U unload substrate 92 using the guide
-
 1
1 -
 2
2 -
 3
3 -
 4
4 -
 5
5 -
 6
6 -
 7
7 -
8
-
9
-
10
-
11
-
12
-
13
-
14
-
15
-
16
-
17
-
18
-
19
-
20
-
21
-
22
-
23
-
24
-
25
-
26
-
27
-
28
-
29
-
30
-
31
-
32
-
33
-
34
-
35
-
36
-
37
-
38
-
39
-
40
-
41
-
42
-
43
-
44
-
45
-
46
-
47
-
48
-
49
-
50
-
51
-
52
-
53
-
54
-
55
-
56
-
57
-
58
-
59
-
60
-
61
-
62
-
63
-
64
-
65
-
66
-
67
-
68
-
69
-
70
-
71
-
72
-
73
-
74
-
75
-
76
-
77
-
78
-
79
-
80
-
81
-
82
-
83
-
84
-
85
-
86
-
87
-
88
-
89
-
90
-
91
-
92
-
93
-
94
-
95
-
96
-
97
-
98
-
99
-
100
-
101
-
102
-
103
-
104
-
105
-
106
-
107
-
108
-
109
-
110
-
111
-
112
-
113
-
114
-
115
-
116
-
117
-
118
-
119
-
120
-
121
-
122
-
123
-
124
-
125
-
126
-
127
-
128
-
129
-
130
-
131
-
132
-
133
-
134
-
135
-
136
-
137
-
138
-
139
-
140
-
141
-
142
-
143
-
144
-
145
-
146
-
147
-
148
-
149
-
150
-
151
-
152
-
153
-
154
-
155
-
156
-
157
-
158
-
159
-
160
-
161
-
162
-
163
-
164
-
165
-
166
-
167
-
168
-
169
-
170
-
171
-
172
-
173
-
174
-
175
-
176
-
177
-
178
-
179
-
180
-
181
-
182
-
183
-
184
-
185
-
186
-
187
-
188
-
189
-
190
-
191
-
192
-
193
-
194
-
195
-
196
-
197
-
198
-
199
-
200
-
201
-
202
-
203
-
204
-
205
-
206
-
207
-
208
-
209
-
210
-
211
-
212
-
213
-
214
-
215
-
216
-
217
-
218
-
219
-
220
-
221
-
222
-
223
-
224
-
225
-
226
-
227
-
228
-
229
-
230
-
231
-
232
-
233
-
234
-
235
-
236
-
237
-
238
-
239
-
240
-
241
-
242
-
243
-
244
-
245
-
246
-
247
-
248
-
249
-
250
-
251
-
252
-
253
-
254
-
255
-
256
-
257
-
258
-
259
-
260
-
261
-
262
-
263
-
264
-
265
-
266
-
267
-
268
-
269
-
270
-
271
-
272
-
273
-
274
-
275
-
276
-
277
-
278
-
279
-
280
-
281
-
282
-
283
-
284
-
285
-
286
-
287
-
288
-
289
-
290
-
291
-
292
-
293
-
294
-
295
-
296
-
297
-
298
-
299
-
300
-
301
-
302
-
303
-
304
-
305
-
306
-
307
-
308
-
309
-
310
-
311
-
312
-
313
-
314
-
315
-
316
-
317
-
318
-
319
-
320
-
321
-
322
-
323
-
324
-
325
-
326
-
327
-
328
-
329
-
330
-
331
-
332
-
333
-
334
-
335
-
336
-
337
-
338
-
339
-
340
-
341
-
342
-
343
-
344
-
345
-
346
-
347
-
348
-
349
-
350
-
351
-
352
-
353
-
354
-
355
-
356
-
357
-
358
-
359
-
360
-
361
-
362
-
363
-
364
-
365
-
366
-
367
-
368
-
369
-
370
-
371
-
372
-
373
-
374
-
375
-
376
-
377
-
378
-
379
-
380
-
381
-
382
-
383
-
384
-
385
-
386
-
387
-
388
-
389
-
390
-
391
-
392
-
393
-
394
-
395
-
396
-
397
-
398
-
399
-
400
-
401
-
402
-
403
-
404
-
405
-
406
-
407
-
408
-
409
-
410
-
411
-
412
-
413
-
414
-
415
-
416
-
417
-
418
-
419
-
420
-
421
-
422
-
423
-
424
-
425
-
426
-
427
-
428
-
429
 |
 |

HP Latex 3000 Printer Series
User Guide