HP Officejet 4100 HP Officejet 4100 series all-in-one - (English) Reference Gu - Page 9
for macintosh users, HP Photo and Imaging Director, Select Device, Settings, Status, Send a Fax - installer
 |
View all HP Officejet 4100 manuals
Add to My Manuals
Save this manual to your list of manuals |
Page 9 highlights
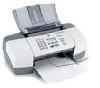
quick start feature purpose 1 Select Device: Use this feature to select the product you want to use from the list of installed HP products. 2 Settings: Use this feature to view or change various settings for your HP device, such as print, scan, or copy. 3 Status: Displays the status window for all-in-one devices only. 4 Send a Fax: Use this feature to send a fax and access fax settings. 5 Scan Picture: Scans an image and displays it in the HP Photo & Imaging Gallery. 6 Scan Document: Scans text and displays it in the selected destination text editing software program. 7 Make Copies: Displays the Copy dialog box where you can select the copy quality, the number of copies, the color, the size, and can start a copy. 8 View & Print: Displays the HP Photo & Imaging Gallery, where you can view and edit images, use HP Photo Prints, make and print a photo album, e-mail an image, unload an image to the Web, or copy an image to another application. 9 Help: Provides access to HP Photo & Imaging Help, which provides software help, a product tour, and troubleshooting information. 10 Click this arrow to access tool tips, which explain each of the Director options. for macintosh users ! Do one for the following: - For OS 9, double-click the HP Photo and Imaging Director icon on the desktop. - For OS X, double-click the HP Photo and Imaging Director icon on the dock. The following figure shows some of the features available through the HP Photo and Imaging Director for Macintosh. Consult the legend for a brief explanation of a specific feature. reference guide 5
-
 1
1 -
2
-
3
-
 4
4 -
 5
5 -
 6
6 -
 7
7 -
 8
8 -
 9
9 -
 10
10 -
 11
11 -
 12
12 -
 13
13 -
 14
14 -
15
-
16
-
17
-
18
-
19
-
20
-
21
-
22
-
23
-
24
-
25
-
26
-
27
-
28
-
29
-
30
-
31
-
32
-
33
-
34
-
35
-
36
-
37
-
38
-
39
-
40
-
41
-
42
-
43
-
44
-
45
-
46
-
47
-
48
-
49
-
50
-
51
-
52
-
53
-
54
-
55
-
56
-
57
-
58
-
59
-
60
-
61
-
62
-
63
-
64
 |
 |
