HP P2015 HP LaserJet P2015 - User Guide - Page 115
Remove tray 2
 |
UPC - 882780491984
View all HP P2015 manuals
Add to My Manuals
Save this manual to your list of manuals |
Page 115 highlights
CAUTION Do not use sharp objects, such as tweezers or needlenose pliers, to remove jams. Damage caused by sharp objects will not be covered by the warranty. 1. Open the straight-through output door. 2. Pull down the green pressure-release levers. 3. Remove tray 2. ENWW Clearing jams 105
-
 1
1 -
2
-
3
-
4
-
5
-
6
-
7
-
8
-
9
-
10
-
11
-
12
-
13
-
14
-
15
-
16
-
17
-
18
-
19
-
20
-
21
-
22
-
23
-
24
-
25
-
26
-
27
-
28
-
29
-
30
-
31
-
32
-
33
-
34
-
35
-
36
-
37
-
38
-
39
-
40
-
41
-
42
-
43
-
44
-
45
-
46
-
47
-
48
-
49
-
50
-
51
-
52
-
53
-
54
-
55
-
56
-
57
-
58
-
59
-
60
-
61
-
62
-
63
-
64
-
65
-
66
-
67
-
68
-
69
-
70
-
71
-
72
-
73
-
74
-
75
-
76
-
77
-
78
-
79
-
80
-
81
-
82
-
83
-
84
-
85
-
86
-
87
-
88
-
89
-
90
-
91
-
92
-
93
-
94
-
95
-
96
-
97
-
98
-
99
-
100
-
101
-
102
-
103
-
104
-
105
-
106
-
107
-
108
-
109
-
 110
110 -
 111
111 -
 112
112 -
 113
113 -
 114
114 -
 115
115 -
 116
116 -
 117
117 -
 118
118 -
 119
119 -
 120
120 -
121
-
122
-
123
-
124
-
125
-
126
-
127
-
128
-
129
-
130
-
131
-
132
-
133
-
134
-
135
-
136
-
137
-
138
-
139
-
140
-
141
-
142
-
143
-
144
-
145
-
146
-
147
-
148
-
149
-
150
-
151
-
152
-
153
-
154
-
155
-
156
-
157
-
158
 |
 |
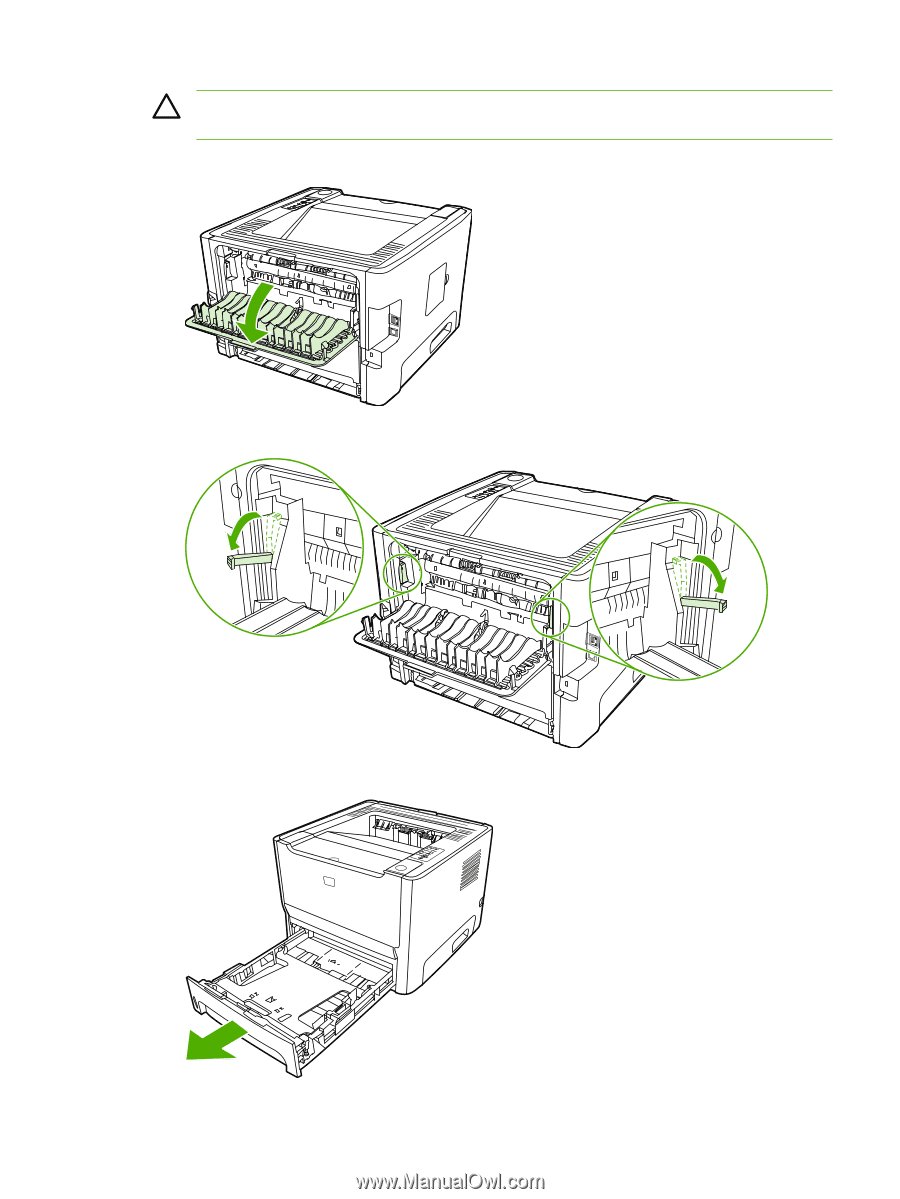
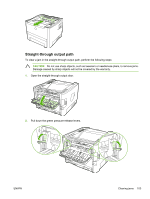
CAUTION
Do not use sharp objects, such as tweezers or needlenose pliers, to remove jams.
Damage caused by sharp objects will not be covered by the warranty.
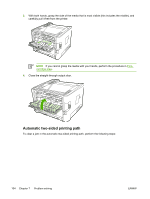
1.
Open the straight-through output door.
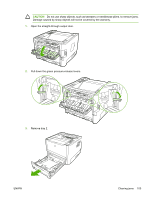
2.
Pull down the green pressure-release levers.
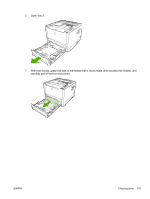
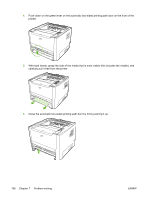
3.
Remove tray 2.
ENWW
Clearing jams
105