HP PageWide XL Pro 8200 User Guide
HP PageWide XL Pro 8200 Manual
 |
View all HP PageWide XL Pro 8200 manuals
Add to My Manuals
Save this manual to your list of manuals |
HP PageWide XL Pro 8200 manual content summary:
- HP PageWide XL Pro 8200 | User Guide - Page 1
HP PageWide XL Pro 5200/8200 MFP User Guide SUMMARY How to use your product. - HP PageWide XL Pro 8200 | User Guide - Page 2
to change without notice. The only warranties for HP products and services are set forth in the express warranty statement accompanying such products and services. Nothing herein should be construed as constituting an additional warranty. HP shall not be liable for technical or editorial errors - HP PageWide XL Pro 8200 | User Guide - Page 3
Safety precautions ...1 Main components...6 Front panel ...8 HP PrintOS ...13 HP DesignJet Utility (Windows only) ...14 Embedded Web Supported paper types...37 Paper status...39 Load roll paper...40 Unload roll paper...44 Manual load of rigid or flexible sheets (single-sided printing)...45 Manual - HP PageWide XL Pro 8200 | User Guide - Page 4
cartridge...114 Safe mode ...117 Disposal instructions ...117 5 Networking ...119 Introduction ...119 Control network protocols ...119 Front-panel menu items ...120 Link configuration methods...123 Troubleshooting ...123 6 Security...127 HP Connection Inspector...127 Access control ...128 - HP PageWide XL Pro 8200 | User Guide - Page 5
Scanning ...158 Copying ...164 Scanner preferences...169 Scanner troubleshooting...169 Scanner diagnostic plot...180 10 Collection and finishing...183 Top stacker ...183 Pro Stacker ...184 HP folders ...188 Basket ...199 Output supports ...202 11 Print quality ...209 General printing advice...209 - HP PageWide XL Pro 8200 | User Guide - Page 6
14 When you need help ...236 Request support...236 Customer Self-Repair ...237 Service information...237 15 Retrieving printer usage information ...238 Get printer accounting information ...238 Check usage statistics ...238 Check usage statistics for a job...241 Check cost - HP PageWide XL Pro 8200 | User Guide - Page 7
requests right away with the HP PageWide XL Pro 5200, with print speeds up instructions through HP Learn. ● HP pigment inks. ● Free up operator time with a versatile stacker, inline folders, auto-switch, and up to 4 or 6 rolls. ● Accept new orders and at the same time, reduce manual - HP PageWide XL Pro 8200 | User Guide - Page 8
. For any maintenance or part replacement, follow the instructions provided in HP documentation to minimize safety risks and to avoid damaging personal injury. The printer uses one power cord. Unplug the power cord before servicing the printer. To avoid the risk of electric shock: ● The printer must - HP PageWide XL Pro 8200 | User Guide - Page 9
supply voltage specified on the nameplate. ● Use only the power cord supplied by HP with the printer. Do not use a damaged power cord. Do not use the . ● Do not try to dismantle the cutter assembly: refer servicing to qualified service personnel. ● Do not stand on the drawers: the printer could - HP PageWide XL Pro 8200 | User Guide - Page 10
heavy stacks of sheets. Ink handling HP recommends that you wear gloves when handling Warnings and cautions The text of this guide includes warning and cautionary notices in appropriate to yourself and to the printer. Follow the instructions marked with these symbols: WARNING! Failure to follow - HP PageWide XL Pro 8200 | User Guide - Page 11
: Double pole. Neutral fusing. Before starting, read and follow the operating and safety instructions. Crush hazard. Keep hands away from the moving service carriage. This label is located by the access to the service carriage, on the gas springs, and in the folder. You are recommended to wear - HP PageWide XL Pro 8200 | User Guide - Page 12
Warning labels (continued) Label Explanation Risk of trapped fingers. Do not touch the rollers. This label is located on the stacker accessory. Risk of trapped fingers. Do not touch the gears while they are moving. This label is located on the stacker accessory. NOTE: The final label position and - HP PageWide XL Pro 8200 | User Guide - Page 13
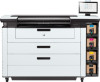
1. Print bar 2. Front panel 3. Power key 4. USB port (Pro 5200 printer only) 5. Ink cartridges 6. Input tray 7. Drawer(s) 8. Maintenance cartridge 9. Paper access front cover Rear view These components can be seen from the rear of the printer. Rear view 7 - HP PageWide XL Pro 8200 | User Guide - Page 14
1. Output module 2. Paper output 3. Airflow system 4. Power switch and plug 5. LAN connections 6. Cleaning container 7. USB port (Pro 8200 printer only) Front panel The front panel is a touch-sensitive screen on the front right of the printer. It can rotate 270° horizontally, so - HP PageWide XL Pro 8200 | User Guide - Page 15
icons. Home screens If you have the HP PageWideXL Pro 5200 Printer, there are three top-level screens that you can move between by sliding your finger across the screen, or tapping the appropriate button at the bottom of the screen. If you have the HP PageWide XL Pro 8200 Printer, there are only two - HP PageWide XL Pro 8200 | User Guide - Page 16
located on top of the front panel; it gives a summary of the printer status that can be seen from a distance. See video: http://www.hp.com/go/pagewidexl/alerts-and-status-messages/. IMPORTANT: The information provided in the beacon is for functional information purposes only, and is not relevant to - HP PageWide XL Pro 8200 | User Guide - Page 17
attention soon: for example, it is almost out of ink or paper. Yellow light The printer can print, but there is something wrong. If the problem persists, contact your service representative. Beacon 11 - HP PageWide XL Pro 8200 | User Guide - Page 18
Beacon (continued) Image Status Red light Meaning The printer is unable to print and needs attention, or a major subsystem of the printer is not working. You can change the beacon settings by tapping , then System > Beacon. For example, you can change the brightness of the beacon. You can also - HP PageWide XL Pro 8200 | User Guide - Page 19
the Print Spooler) and Remote Printer Management with the HP DesignJet Utility and Web JetAdmin continue to be available paper and ink alerts. ● Height above sea level. ● Prepare printer for reshipment. HP PrintOS HP PrintOS is a Web-based operating system for your business-an open and secure cloud- - HP PageWide XL Pro 8200 | User Guide - Page 20
to manage your printer from a computer with a TCP/IP connection. Start the HP DesignJet Utility from the icon on your taskbar or from Start > HP > HP DesignJet Utility > HP DesignJet Utility. This launches the HP DesignJet Utility, showing the printers installed on your computer. When you open the - HP PageWide XL Pro 8200 | User Guide - Page 21
use it to obtain printer information, manage settings and presets, install new firmware, and troubleshoot problems. Service engineers can use it to retrieve internal information that helps to diagnose printer problems. You can access the Embedded Web Server remotely by using an ordinary Web browser - HP PageWide XL Pro 8200 | User Guide - Page 22
and later ● Mozilla Firefox 77 and later ● Google Chrome 83 and later Supported browsers for tablet computers and mobile phones ● Google Chrome, latest version, for , for Android 9 or iOS 12 and later See video: http://www.hp.com/go/pagewidexl/connect-ews/. Make a note of your printer's IP address - HP PageWide XL Pro 8200 | User Guide - Page 23
Turn the printer on and off If you wish to turn the printer on or off or reset the printer, the normal and recommended method is to use the power key below the front panel. However, if you plan to store the printer for a long period or the power key does not seem to work, you are recommended to turn - HP PageWide XL Pro 8200 | User Guide - Page 24
per color (the accuracy of these estimates is not guaranteed). - HP-GL/2 palette-Shows the color or grayscale definitions in the currently selected fonts available (PostScript printers only). - Print folder pattern ● Service information prints - Print all pages ● Output destination prints (only - HP PageWide XL Pro 8200 | User Guide - Page 25
, in a similar way to any computer in the same network. http://www.hp.com/go/pagewidexl/connect-to-network/ The first time you connect it to a network > Gigabit Ethernet. From here you can change the settings manually. You can also do this manually using the Embedded Web Server, which you can log into - HP PageWide XL Pro 8200 | User Guide - Page 26
. 2. Download the printer software from HP's website at http://www.hp.com/go/pagewidexlproseries/support/software. 3. Select Windows or macOS Bonjour ● TCP/IP NOTE: The printer does not support AppleTalk. The following instructions apply if you intend to print from software applications using - HP PageWide XL Pro 8200 | User Guide - Page 27
front panel and tap . Note the mDNS service name of your printer. 2. Access the install package from HP's website: http://www.hp.com/go/pagewidexlproseries/support/software. If prompted, select your printer from the list. 3. When the PageWide Printer window appears on your screen, click Software - HP PageWide XL Pro 8200 | User Guide - Page 28
network connection is required, so the printer will test its own connectivity. Configure and troubleshoot the printer's connectivity and start benefitting from connecting your printer. If you are part of the HP Partner Link Pay-per-use service, remember to go to the Connectivity app and tap Printer - HP PageWide XL Pro 8200 | User Guide - Page 29
printer. To install the new firmware, you must confirm the installation manually. ● Firmware update history: A list of firmware versions that have before the version that is currently installed, if you have some problem with the current version. Configure a network folder Follow this procedure - HP PageWide XL Pro 8200 | User Guide - Page 30
Apply to save the configuration. ● The printer automatically checks that it can access the network folder. If not, see Cannot access the network folder or HP SmartStream (if installed as an accessory) on page 179. NOTE: If the product has already been configured to use a network folder and you now - HP PageWide XL Pro 8200 | User Guide - Page 31
3. Right-click the folder and click Properties. 4. In the Sharing tab, click the Advanced Sharing button. 5. Ensure that the user has the correct permission settings depending of the functionality use of the network folder. If you configured a scan-to-folder, you need to ensure full read/write - HP PageWide XL Pro 8200 | User Guide - Page 32
to any suitable group that includes that user). If the user(s) is going to use the folder to print documents, a read-only permission is enough. 6. For scanner users, If there is a Security tab in the Properties window for your folder, then you must also grant the same user Full Control over the - HP PageWide XL Pro 8200 | User Guide - Page 33
3. Open the System Preferences application and click the Sharing icon. 4. Depending of the functionality of the folder, make sure the user has the right permissions. For scanning purposes, Read & Write is needed to access the folder. 5. Click Options. 6. Check the Share files and folder using the - HP PageWide XL Pro 8200 | User Guide - Page 34
sent by the printer. This is not the same email address that is used by HP Connected. ● Attachment size limit: The maximum size of a file attached to an address book for scan-to-email and authentication purposes. The following instructions explain how to use LDAP to connect the printer to a network - HP PageWide XL Pro 8200 | User Guide - Page 35
list of email addresses for matching characters. You can refine the search results by typing additional characters and performing a new search. Printers that support LDAP also support the use of a standard outgoing email profile, so they do not require a connection to an LDAP server in order to send - HP PageWide XL Pro 8200 | User Guide - Page 36
a message is displayed. Turn email notifications on and off The notification service is always turned on, but all specific notifications are turned off by find the latest drivers and software at http://www.hp.com/go/pagewidexlproseries/support/software/. Drivers for Windows ● PCL3 driver (basic - HP PageWide XL Pro 8200 | User Guide - Page 37
the printer, and perform other actions without using the front panel. The Embedded Web Server has various accessibility options. For information about these options, click Support > Accessibility. Set Windows driver preferences 31 - HP PageWide XL Pro 8200 | User Guide - Page 38
services accessible to people with disabilities. Other sources of information This guide is supplemented by various other documents about your printer. The following documents can be downloaded from http://www.hp.com/go/pagewidexlproseries/support/manuals/: ● Introductory information ● User's guide - HP PageWide XL Pro 8200 | User Guide - Page 39
oils onto the paper. Preparing flexible and card sheets for printing Proceed as follows when you intend to print on sheets. See video: http://www.hp.com/go/pagewidexl/load-sheets-with-sheet-feeder/. Paper handling 33 - HP PageWide XL Pro 8200 | User Guide - Page 40
1. When you receive the paper from the manufacturer, store it on a flat and rigid surface, such as metal or wood shelves. 2. About an hour before printing (no more than 2 hours), remove the sheets from their envelope or other packaging and stack them on a flat and rigid surface, to acclimate them to - HP PageWide XL Pro 8200 | User Guide - Page 41
the sheets in the pile, until the entire pile has been folded. c. For sheets that tend to suffer from smears, especially sheets of 1-2 mm thickness, HP recommends also bending the whole trailing edge of the pile of sheets downwards over the rounded edge of the sheet-feeder tray. Bend the trailing - HP PageWide XL Pro 8200 | User Guide - Page 42
manual assistance to avoid print-quality issues.Inline measure markup needed ● The recommended environmental conditions for sheet printing are: - Temperature: 20-30°C - Relative humidity: 30-60% ● If there is a concave side, make sure it is facing down. ● To minimize paper jams and ink smears, HP - HP PageWide XL Pro 8200 | User Guide - Page 43
cause a paper jam. ● The input tray is located above the drawers. See Manual load of rigid or flexible sheets (single-sided printing) on page 45. ● . ● The printer automatically estimates the remaining length of the roll. Supported paper types Your printer can use a wide range of paper types, - HP PageWide XL Pro 8200 | User Guide - Page 44
your printer. See the latest information on HP-branded papers supported for your printer and download paper presets and select the category Graphics & Technical, then filter by your printer. Third-party-supported paper types These generic paper types can also be used with your printer. Rolls This - HP PageWide XL Pro 8200 | User Guide - Page 45
Blueprint ● Blueprint Boards and sheets These are non-rolled paper types: rigid boards and flexible cut sheets. Boards ● Plain/uncoated foam board ● Water-based coated foam board ● Unlined compressed board Flexible sheets and cardstock ● Water-based coated paper < 200 g/m² ● Water-based coated - HP PageWide XL Pro 8200 | User Guide - Page 46
● Error Load roll paper This is the standard procedure for loading a roll of paper into your printer. http://www.hp.com/go/pagewidexl/load-roll/ 1. Tap , then Load. TIP: If the printer is not printing and the lock light on the drawer is off, you - HP PageWide XL Pro 8200 | User Guide - Page 47
3. Open the locking levers on the left and right hubs. 4. Move the hubs outwards (they are linked) to make room for the roll. 5. Place the roll into the drawer between the hubs, with the paper edge as shown. Do not load the roll at an angle, like this: Load roll paper 41 - HP PageWide XL Pro 8200 | User Guide - Page 48
6. Slide the hubs back towards the center so that they engage with the roll. 7. Ensure that the hubs are fitted tightly to the roll on both sides. 42 Chapter 2 Paper handling - HP PageWide XL Pro 8200 | User Guide - Page 49
8. Important: Close the locking levers on the left and right hubs. 9. Feed the paper into the appropriate slot: the front slot for the front roll, the rear slot for the rear roll. TIP: The rear roll may need extra roll-ups to facilitate automatic feeding. Do not stop feeding until the paper is - HP PageWide XL Pro 8200 | User Guide - Page 50
13. Select the paper type on the front panel. The front panel remembers the last paper type loaded in this position, in case that helps. 14. When you are ready, tap Finish and check. The printer checks the position, width, and length of the loaded paper. The width and length are displayed on the - HP PageWide XL Pro 8200 | User Guide - Page 51
Close the locking levers on the left and right hubs. 8. Close the drawer. Manual load of rigid or flexible sheets (single-sided printing) Follow these instructions to load sheets manually. See video: http://www.hp.com/go/pagewidexl/printing-boards-with-input-tray/. NOTE: The lowest standard size - HP PageWide XL Pro 8200 | User Guide - Page 52
the stacker to the correct position for your paper. 9. The front panel guides you through the loading process. Align the edge of the sheet with the sheet configuration or unload the sheet and try again. NOTE: The maximum supported length of rigid sheets in the input tray is 765 mm (30.1 in - HP PageWide XL Pro 8200 | User Guide - Page 53
have an unexpected problem at any stage of the paper loading process, see Cannot load a sheet on page 51. Manual load of supported. 1. Read the relevant recommendations in General information and tips on page 33. 2. Prepare the job using HP SmartStream or your preferred RIP software. If you use HP - HP PageWide XL Pro 8200 | User Guide - Page 54
Print. See the SmartStream user guide for more information. 3. The printer starts to process the job. You can check the status of the job at any time by tapping the Job queue icon on the front panel. 4. Start the paper-loading procedure as described in Manual load of rigid or flexible sheets - HP PageWide XL Pro 8200 | User Guide - Page 55
6. If you need to adjust the image at any time, tap the ellipsis icon at the top right of the Job Queue page and select Page adjustments. You can adjust the horizontal offset (move the image on the X axis from −3 to +3) and the vertical offset (move the image on the Y axis from −3 to +3). Tap the - HP PageWide XL Pro 8200 | User Guide - Page 56
The following options are available: ● Select the paper source. ● Edit type: You can modify the type of the loaded paper. ● Edit length: You can modify the length of the loaded paper. ● Protect paper types: You can protect selected paper types to avoid printing on them unintentionally. Store paper - HP PageWide XL Pro 8200 | User Guide - Page 57
roll paper The following sections provide details for this topic. If you have a problem when trying to load a roll, try these suggestions: ● Check that you paper specifications. TIP: When loading rear rolls, you must feed more paper manually (about 40 cm (16 in)) than with front rolls. Cannot load a - HP PageWide XL Pro 8200 | User Guide - Page 58
have a problem when trying , an out-ofpaper message will appear. Paper presets Each supported paper type has its own characteristics. For optimum print quality presets with an online search or with the HP Media Locator. See video: http://www.hp.com/go/pagewidexl/download-profile/. Online search in - HP PageWide XL Pro 8200 | User Guide - Page 59
and application. When a value is selected for a given filter, only the matching paper presets will be displayed. For example, if you select "HP" from the brand filter, only HP paper presets will be displayed. The effect of using more than one filter is to narrow the search to the combination of the - HP PageWide XL Pro 8200 | User Guide - Page 60
To install a downloaded paper preset Follow these instructions to install a new paper preset. 1. After finding . Installing a new paper preset will interrupt any printing that is in progress. 3. Start the HP DesignJet Utility or the Embedded Web Server. In the Embedded Web Server, click the Paper tab - HP PageWide XL Pro 8200 | User Guide - Page 61
all the paper, tap Check now to check that the problem has been fixed successfully. See video: http://www.hp.com/go/pagewidexl/removing-paper-jams-in-xl-pro-printers/. Paper jam when loading from the input tray Follow the instructions on the front panel, which will recommend whether to remove - HP PageWide XL Pro 8200 | User Guide - Page 62
4. Move the slider button to unlock the front cover and lock the input tray. 5. Open the front cover door to check that there are no loose pieces of paper left. 6. If necessary, cut the paper; but do not try to cut a rigid sheet. IMPORTANT: Use scissors for this purpose, not a single blade. 56 - HP PageWide XL Pro 8200 | User Guide - Page 63
7. Make sure there are no loose pieces of paper left. 8. Close the front cover. 9. Move the slider button to lock the front cover and enable the input tray. Paper jam in the cut sheet/rigid input tray 57 - HP PageWide XL Pro 8200 | User Guide - Page 64
paper. Paper jam in the paper-access front cover If the paper jams behind the paper-access front cover, you may need to clear it manually. Paper jam in the paper-access front cover (paper visible) If the paper is still visible in the input tray: 1. Pull out the paper. 2. If - HP PageWide XL Pro 8200 | User Guide - Page 65
5. Pull out any paper that you see in the print zone. CAUTION: Pull out only the paper and not the struts of the printer. 6. If necessary, cut the paper; but do not try to cut a rigid sheet. IMPORTANT: Use scissors for this purpose, not a single blade. 7. Make sure there are no loose pieces of paper - HP PageWide XL Pro 8200 | User Guide - Page 66
9. Move the slider button to lock the front cover and enable the input tray. 10. Wait until the printer is ready, confirming that the jam has been removed. 11. Resume printing with another sheet of paper. Paper jam in the paper-access front cover (paper not visible) If the paper is not visible in - HP PageWide XL Pro 8200 | User Guide - Page 67
4. Make sure there are no loose pieces of paper left. 5. Close the output module. 6. Wait until the printer is ready, confirming that the jam has been removed. 7. Exceptional case: If the paper jam persists, check whether there is paper at the front: a. Open the front cover. Paper jam in the paper- - HP PageWide XL Pro 8200 | User Guide - Page 68
b. Pull out any paper in the belts area. CAUTION: Pull out only the paper and not the struts of the printer. c. If necessary, cut the paper; but do not try to cut a rigid sheet. IMPORTANT: Use scissors for this purpose, not a single blade. d. Make sure there are no loose pieces of paper left. e. - HP PageWide XL Pro 8200 | User Guide - Page 69
Paper jam in a drawer If the paper jams in a drawer, you may need to clear it manually. 1. Open the drawer in which the paper jam has occurred. 2. Cut the paper if necessary. 3. Open the front cover of the drawer. Paper jam in a drawer 63 - HP PageWide XL Pro 8200 | User Guide - Page 70
is there already. CAUTION: Take care not to cut yourself when moving the cutter. CAUTION: Do not dismantle the cutter assembly: refer it to qualified service personnel for servicing. 5. Remove the paper, cutting it manually if necessary. 64 Chapter 2 Paper handling - HP PageWide XL Pro 8200 | User Guide - Page 71
6. Make sure there are no loose pieces of paper left in the drawer. 7. Close the front cover of the drawer. 8. Rewind the paper. 9. Cut off the leading edge of the paper if it has been damaged. 10. Rewind again and feed the paper into the slot. 11. Use the paper-cut button to cut the leading edge - HP PageWide XL Pro 8200 | User Guide - Page 72
have been printed. Paper jam in the paper output If the paper jams where it emerges from the printer, you may need to remove it manually. 1. Make sure that the jam is not in the accessory interface. 2. If you have an F60 or F70 Folder installed, raise the folder tray. NOTE - HP PageWide XL Pro 8200 | User Guide - Page 73
5. Make sure there are no loose pieces of paper left. 6. Close the output module, if your printer has one. 7. Wait until the printer is ready for paper. 8. The printer resumes the job and automatically reprints any lost pages. However, you should check that all pages of the job have been printed. - HP PageWide XL Pro 8200 | User Guide - Page 74
If the paper jams in the top stacker, you may need to remove it manually. (If the top stacker is not installed, disregard this procedure.) NOTE: If your printer does not have a top stacker, it is available as an accessory. 1. - HP PageWide XL Pro 8200 | User Guide - Page 75
all pages of the job have been printed. Paper jam in the folder input (HP F60 and HP F70 folders) If the paper jams in the folder input, you may need to remove it manually. See video: http://www.hp.com/go/pagewidexl/paper-jams-in-folder-F60-and-F70/. Paper jam in the - HP PageWide XL Pro 8200 | User Guide - Page 76
1. Open the fan-fold cover to stop the folder motor and cut the power supply to it. 2. If necessary, cut the paper between the printer and the tray. 3. Remove the paper from the no-fold tray. 4. Unlatch and lift the folder input. 5. Pull out the paper from the tray. 6. If your printer has a button - HP PageWide XL Pro 8200 | User Guide - Page 77
that all pages of the job have been printed. Paper jam in the folder input (HP F40 Folder only) If the paper jams in the folder input, you may need to remove it manually. See video: http://www.hp.com/go/pagewidexl/removing-paper-jams-in-folder-F40/. 1. Disengage the printer from the - HP PageWide XL Pro 8200 | User Guide - Page 78
that there is no paper left anywhere in the folder. See Paper jam on the fan-folding path (HP F40 Folder only) on page 74 and Paper jam on the cross-folding path (HP F40 Folder only) on page 77. 7. Close the output module, if your printer has one. 8. Re-engage the - HP PageWide XL Pro 8200 | User Guide - Page 79
) If the paper jams in the no-fold tray, you may need to remove it manually. See video: http://www.hp.com/go/pagewidexl/paper-jams-in-folder-F60-and-F70/. IMPORTANT: This operation must be performed by a service engineer or by someone else with appropriate training. 1. Open the top cover of the - HP PageWide XL Pro 8200 | User Guide - Page 80
See video: http://www.hp.com/go/pagewidexl/paper-jams-in-folder-F60-and-F70/. 1. Try to you should check that all pages of the job have been printed. Paper jam on the fan-folding path (HP F40 Folder only) The following steps provide the complete procedure for this topic. If the paper jams in the - HP PageWide XL Pro 8200 | User Guide - Page 81
automatically reprints any lost pages. However, you should check that all pages of the job have been printed. Paper jam on the fan-folding path (HP F40 Folder only) 75 - HP PageWide XL Pro 8200 | User Guide - Page 82
the folder motor, and remove the paper. Paper jam on the cross-folding path (HP F60 and HP F70 folders) If the paper jams in the cross-folding path, you may need to remove it manually. See video: http://www.hp.com/go/pagewidexl/paper-jams-in-folder-F60-and-F70/. 1. Open the cross - HP PageWide XL Pro 8200 | User Guide - Page 83
the job have been printed. Paper jam on the cross-folding path (HP F40 Folder only) The following steps provide the complete procedure for this If the paper jams in the cross-folding path, you may need to remove it manually. 1. Open the top cross-folding cover. 2. Remove the paper. CAUTION: Take - HP PageWide XL Pro 8200 | User Guide - Page 84
accessory The following steps provide the complete procedure for this topic. If the paper jams in the stacker accessory, you may need to remove it manually. 78 Chapter 2 Paper handling - HP PageWide XL Pro 8200 | User Guide - Page 85
1. If your printer has an output button, press it to raise the output module. 2. Pull out the stacker by the beam at the rear of the tray. 3. Cut the paper between the printer and the stacker, if necessary. 4. Remove the paper from the stacker. Paper jam in the stacker accessory 79 - HP PageWide XL Pro 8200 | User Guide - Page 86
the scanner The following steps provide the complete procedure for this topic. If the paper jams in the scanner, you may need to remove it manually. 80 Chapter 2 Paper handling - HP PageWide XL Pro 8200 | User Guide - Page 87
open the scanner cover. 4. Remove the paper. 5. Make sure there is no paper left in the scanner (insert your hand). Paper jam in the scanner (MFP only) 81 - HP PageWide XL Pro 8200 | User Guide - Page 88
6. Close the cover. 7. Close the top stacker, if you have one. 8. The printer resumes the job and automatically reprints any lost pages. However, you should check that all pages of the job have been printed. 82 Chapter 2 Paper handling - HP PageWide XL Pro 8200 | User Guide - Page 89
feeder The sheet feeder, which is available as an accessory, provides continuous single-sheet feeding of paper into the printer. See video: http://www.hp.com/go/pagewidexl/sheet-feeder-overview/. IMPORTANT: The sheet feeder will not work unless it is powered on and connected to the printer with the - HP PageWide XL Pro 8200 | User Guide - Page 90
Up to about 50 sheets of 1 mm thickness The sheet feeder can reliably support only sheets that meet the following six requirements simultaneously: 1. Grammage: 120-1050 sheets have not been fully tested at HP, so they are not recommended, and not fully supported by HP. 4. Width: 420-1020 mm NOTE: - HP PageWide XL Pro 8200 | User Guide - Page 91
to Paper Source and change the input origin to Sheet Feeder. ● HP SmartStream: Set the paper source to Sheet feeder, in the job instructions on the front panel to clear the jam. ● Error: Follow the instructions on the front panel to correct the error. If the problem persists, contact your service - HP PageWide XL Pro 8200 | User Guide - Page 92
hp.com/go/pagewidexl/print-sheets-with-sheet-feeder-and-pro-stacker/. Before you begin: ● Make sure the sheet feeder is installed and ready to use. ● If you intend to use the Pro procedure for this topic. 1. Prepare the job using HP SmartStream or your preferred RIP software. Alternatively, go to - HP PageWide XL Pro 8200 | User Guide - Page 93
Follow these instructions to print a double-sided job with your sheet feeder. See video: http://www.hp.com/ HP SmartStream or your preferred RIP software. TIP: HP recommends printing all the A sides first, then the B sides: AAA|BBB rather than A|B, A|B, A|B. TIP: If you are using the Pro Stacker, HP - HP PageWide XL Pro 8200 | User Guide - Page 94
2. If you want the A and B sides to match, you should center the image on the sheet and try to avoid any skew. 3. After printing the A sides, flip the sheets laterally and reload them onto the sheet feeder as displayed on the front panel. Tap the ellipsis icon at the bottom and then How to flip for - HP PageWide XL Pro 8200 | User Guide - Page 95
(33.5 in) The sheet feeder can be used with sheets longer than recommended, but it may operate with reduced reliability. 1. Remove the stop from the Pro Stacker. 2. Position a sample of the sheet that you are going to use on the sheet-feeder tray. Measure the distance between the end of the - HP PageWide XL Pro 8200 | User Guide - Page 96
3. Position a rigid sheet about 5 mm thick over the sheet-feeder tray, right-justified, with its leading edge over the wires but 2-5 cm away from their end. 4. Add over the cardboard a 3-4 cm stack of sheets to be printed, right-justified, with their leading edge against the front wall. 5. Slide the - HP PageWide XL Pro 8200 | User Guide - Page 97
stop. If you find that sheets slide back, move the cardboard about 5 cm backwards and then add the rear stop. Sheet-feeder troubleshooting If you experience a problem of some kind with the sheet feeder, try these suggestions. Sheet-feeder jams Occasionally a sheet may jam when loading from the sheet - HP PageWide XL Pro 8200 | User Guide - Page 98
issue automatically. If it cannot, it stops, and you must fix the problem manually. The front panel starts the paper-jam wizard to display where the jam occurred step-by-step procedure to remove the jam. Clear the paper jam as instructed on each screen of the wizard. If there is a jam on the sheet - HP PageWide XL Pro 8200 | User Guide - Page 99
2. Pull the paper to remove it, as necessary. 3. Make sure there are no pieces of paper left on the bridge, then close the feed-roller cover. To clear a jam 93 - HP PageWide XL Pro 8200 | User Guide - Page 100
panel offers an alternative procedure that prints a rectangular plot and guides you through the procedure to correct the skew. To use that tap Optimize print quality, then Adjust skew in sheet feeder and follow the instructions. Otherwise, you can follow the procedure below. 1. Make sure not to - HP PageWide XL Pro 8200 | User Guide - Page 101
50 mm (1.97 in). See video: http://www.hp.com/go/pagewidexl/double-side-registration-with-sheet-feeder/. side B Follow these recommendations to avoid registration problems on side B. 1. Follow the guidelines print side B. 2. Follow the front-panel instructions to load the stacked sheets onto the - HP PageWide XL Pro 8200 | User Guide - Page 102
4. Check that the page has printed correctly. If not, identify the mismatch. 5. Tap Adjust to move the B image. On the next screen, you can adjust the horizontal offset (move the image on the X axis from −3 to +3) and the vertical offset (move the image on the Y axis from −3 to +3). Tap Save to - HP PageWide XL Pro 8200 | User Guide - Page 103
the printer hooks. 4. Check that the right-hand latch is closed. 5. Restart the sheet feeder, then restart the printer. 6. If the problem persists, contact your service representative: see When you need help on page 236. Some sheets fall off the sheet-feeder tray Try these suggestions. ● Check that - HP PageWide XL Pro 8200 | User Guide - Page 104
the front panel: ● OK: The cartridge is working normally. ● Reseat: The cartridge is not responding, but removing and reinserting it may solve the problem. ● Replace: The cartridge has been identified as faulty. It should be replaced by a functional cartridge. ● Low on ink: The cartridge is low on - HP PageWide XL Pro 8200 | User Guide - Page 105
the job queue and wait until the LED turns off. Replace ink cartridges from the front panel (Pro 5200 MFP only) The procedure for ink cartridge replacement is followed by some general advice. http://www.hp.com/go/pagewidexl/load-ink/ 1. Go to the front panel and tap , then the Ink cartridges tab - HP PageWide XL Pro 8200 | User Guide - Page 106
as far as it will go. 5. Follow the instructions in the front panel. 6. When you have replaced reprinted in full. HP recommends that you replace an empty cartridge with a new HP cartridge. See Ink that are related to the cartridge, nor for any problems due to ink contamination. ● You will invalidate - HP PageWide XL Pro 8200 | User Guide - Page 107
starts. Follow the instructions displayed on the front panel. If your cartridge is not an Original HP cartridge, HP recommends that you stop HP chip. Cartridges using a non‐HP chip may not function or may cease to function. More at: http://www.hp.com/learn/ds/. Replace ink cartridges (Pro 8200 MFP - HP PageWide XL Pro 8200 | User Guide - Page 108
1. Go to the cartridge that you intend to remove. The cartridges are located at the front left of the printer. 2. Disconnect the cartridge connector by pressing the tabs on each side of it and pulling it gently away from the cartridge. 3. Remove the empty cartridge from the printer. NOTE: Some - HP PageWide XL Pro 8200 | User Guide - Page 109
2. Place the cartridge on a flat surface and turn it four times (rotating it through 360 degrees) as indicated on the label, to ensure that the ink is well mixed before use. 3. Tear off the square and fold it inside the handle as illustrated. 4. Put the new cartridge into its correct place on the - HP PageWide XL Pro 8200 | User Guide - Page 110
counterfeit ink cartridges. Any service or repair required as a result is not covered under the warranty. System ink flushing, color calibration, and printhead alignment are recommended. If you experience print-quality problems, HP recommends changing to Original HP inks. Ink cartridge maintenance - HP PageWide XL Pro 8200 | User Guide - Page 111
cartridges contain a low level of ink. To maintain optimum print quality, the printheads are automatically tested at regular intervals, and automatically serviced when necessary. This takes a little time and can occasionally delay printing. When a printhead eventually needs to be replaced, the front - HP PageWide XL Pro 8200 | User Guide - Page 112
number The HP 876 PageWide XL Pro printhead has the part number 3WW75A. Replace printheads Printheads rarely need to be replaced, but the front panel will tell you when a printhead is failing or has reached the end of its life. Alternatively, a test print may indicate a printhead problem before the - HP PageWide XL Pro 8200 | User Guide - Page 113
http://www.hp.com/go/pagewidexl/change-printhead/ Replace a printhead Follow these steps to replace a printhead: 1. Ensure that all ink cartridges are at least 25% full. 2. Start the - HP PageWide XL Pro 8200 | User Guide - Page 114
7. Identify the printhead(s) that you want to replace. NOTE: You can replace more than one printhead at a time. 8. Pull up the printhead handle. 9. Lift the latch. 108 Chapter 4 Ink system - HP PageWide XL Pro 8200 | User Guide - Page 115
10. Extract the printhead carefully. IMPORTANT: Printheads are fragile. Leave the printhead oriented as shown below, if you intend to use it again later. Never touch the nozzles, which could damage them. If you remove multiple printheads and intend to use them later, make sure to keep them in the - HP PageWide XL Pro 8200 | User Guide - Page 116
the maintenance cartridge clean the printheads automatically. Avoid removing printheads unnecessarily. Printhead troubleshooting The following steps provide the complete procedure for this topic. If you have a problem with a printhead, try these suggestions. 1. Check that you have the correct type - HP PageWide XL Pro 8200 | User Guide - Page 117
that you have closed and latched the printhead cover. 5. If you still have problems when printing, see Print quality on page 209. Cleaning container The cleaning container . Cleaning container part number The HP 874/876 PageWide XL Cleaning Container has the part number 3WW73A. Cleaning container 111 - HP PageWide XL Pro 8200 | User Guide - Page 118
provide the complete procedure for this topic. You should replace the cleaning container when requested by the front panel. http://www.hp.com/go/pagewidexl/change-cleaning-container/ 1. At the front panel, tap , then , then Cleaning container > Replace. 2. Locate the cleaning container. 3. Open - HP PageWide XL Pro 8200 | User Guide - Page 119
4. Extract the cleaning container: lift up the latch, lift the cleaning container a little, then pull it out. TIP: If you leave the printer without a cleaning container for long, some drops of liquid may escape and stain the floor. Try to replace it rapidly. 5. Close the cleaning container with the - HP PageWide XL Pro 8200 | User Guide - Page 120
disposing of ink system consumables. Cleaning container troubleshooting If the cleaning container is correctly installed again. If that also fails, contact your service representative. Maintenance cartridge The maintenance cartridge cleans and cartridge part number The HP 841/874/876 maintenance - HP PageWide XL Pro 8200 | User Guide - Page 121
http://www.hp.com/go/pagewidexl/change-maintenance-cartridge/ IMPORTANT: Be ready with the back so that the printheads do not become dry. If the front panel shows an error, close the service door. 1. Remove the packaging from the new maintenance cartridge. 2. Start the replacement from the front - HP PageWide XL Pro 8200 | User Guide - Page 122
5. If you intend to insert a partially used replacement cartridge, make a note of the percentage of cloth remaining, which is shown approximately on the side of the cartridge. You will be asked for this figure later. 6. Insert the new maintenance cartridge into the slot. IMPORTANT: Be careful to - HP PageWide XL Pro 8200 | User Guide - Page 123
need replacing. Maintenance cartridge troubleshooting If the printer does not does not solve the problem, contact your service representative. Safe mode hp.com/learn/ds/. Disposal instructions HP provides many free and convenient ways to recycle your used original HP ink supplies. Additionally, HP - HP PageWide XL Pro 8200 | User Guide - Page 124
, the following items can be recycled through the HP Planet Partners program: ● Ink cartridges ● HP PageWide XL printheads ● HP recyclable large-format papers NOTE: Visit the HP website http://www.hp.com/recycle/ for details of the HP Planet Partners program: features, availability, and how to - HP PageWide XL Pro 8200 | User Guide - Page 125
use of shielded I/O cables is required. The embedded Jetdirect print server supports connection to IEEE 802.3 10Base-T Ethernet, IEEE 802.3u 100Base-TX to communicate using full- or half-duplex mode. However, you can manually configure the link using the printer's front panel, or through other configuration - HP PageWide XL Pro 8200 | User Guide - Page 126
access to the embedded Telnet server, see the HP Jetdirect Print Server Administrator's Guide for your print server model. Front-panel menu An address in the form 169.254.x.x is assigned automatically. Manual: Use the manual settings menu to configure TCP/IPv4 parameters. DHCP Release This menu - HP PageWide XL Pro 8200 | User Guide - Page 127
254.x.x is set. Legacy: The address 192.0.0.192 is set, consistent with older HP Jetdirect devices. Primary DNS Specify the IP address (n.n.n.n) of a Primary DNS Server. NOTE: This item appears only if Manual configuration is a higher priority than DHCP in the Config Precedence table, configured - HP PageWide XL Pro 8200 | User Guide - Page 128
item Values and description For some networks, you may need to contact your Independent Service Provider (ISP) for the proxy server address. Proxy Port Type the port number used by the proxy server for client support. The port number identifies the port reserved for proxy activity on your network - HP PageWide XL Pro 8200 | User Guide - Page 129
network. Otherwise, you can configure it manually. It supports 10, 100, or 1000 Mbps ● Network management tools such as HP Web Jetadmin Troubleshooting If your printer fails to communicate IO Configuration page, see the HP Jetdirect Print Servers Administrator's Guide for your print server model. - HP PageWide XL Pro 8200 | User Guide - Page 130
See the HP Jetdirect Print Servers Administrator's Guide for your print server model to interpret and troubleshoot other messages. Reset is connected. 4. Manually configure the link setting to match the port configuration of the network hub or switch. For manual configuration methods, see Link - HP PageWide XL Pro 8200 | User Guide - Page 131
at the proper speed and communication mode. ● OFF: You must manually configure the link speed and communication mode using the front panel. Your (misplaced lines, partial graphics, and so on). To solve a communication problem: ● Ensure that you have selected the correct printer when sending your - HP PageWide XL Pro 8200 | User Guide - Page 132
require further action, take the action to resolve the problems. 6. If all else fails, turn the printer read HP DesignJet Utility (Windows only) on page 14. 2. From the front panel, tap , then Security > Web services > Printing no network link issues. See Link troubleshooting on page 124. ● Take into - HP PageWide XL Pro 8200 | User Guide - Page 133
Network identification. See the HP Connection Inspector Technical White Paper at http://h10032.www1.hp.com/ctg/Manual/c05818653 for more information. is disabled, it displays a system error and recommends contacting a service representative. You can enable or disable auto-recovery in the Embedded - HP PageWide XL Pro 8200 | User Guide - Page 134
Access control The printer administrator can use passwords to control access to specific features of the printer. Administrator password The administrator password gives access to the security and configuration settings of the printer. Default administrator password Your printer comes with a default - HP PageWide XL Pro 8200 | User Guide - Page 135
How to change the administrator password HP recommends that you change the password to one of your own , then click . If you forget the password If you forget the administrator password, contact a service representative and ask for it to be reset to the default password. You cannot do this yourself - HP PageWide XL Pro 8200 | User Guide - Page 136
Directory Access Protocol (LDAP) is an open, industry-standard application protocol for accessing and maintaining distributed directory information services. Information needed before starting Ensure that you have the following information before starting the configuration: ● Server address - HP PageWide XL Pro 8200 | User Guide - Page 137
3. In the server authentication requirements section, you can select the appropriate authentication type in the server (use printer user's credentials, use LDAP administrator's credentials). You must fill in the domain name, username, and password. 4. In the LDAP database search setttings section, - HP PageWide XL Pro 8200 | User Guide - Page 138
5 minutes. ● Embedded Web Server: Enable or disable the Embedded Web Server. ● Printing & management Web services: Enable or disable Web services that are used by printing and management tools such as the HP Utility, HP Click, and SDK for RIPs. If an administrator password has been set, it must be - HP PageWide XL Pro 8200 | User Guide - Page 139
● Reset factory defaults. NOTE: The administrator password can contain only characters that appear on the front panel's on-screen keyboard. If you set a new password with the Embedded Web Server, it will reject characters that do not appear in that limited character set. Job-storage security options - HP PageWide XL Pro 8200 | User Guide - Page 140
134 Chapter 6 Security - HP PageWide XL Pro 8200 | User Guide - Page 141
ways in which you can choose to print, depending on your circumstances and preferences. ● From HP SmartStream: See the HP SmartStream documentation at http://www.hp.com/go/smartstreampagewidexl/manuals/. ● From a printer driver: Print any kind of file from a computer connected to the printer by - HP PageWide XL Pro 8200 | User Guide - Page 142
HP Customer Support Software and Driver Downloads website. Check https://support.hp your printer, click Next, then follow the on-screen instructions to install the driver. If your printer is not b. Click Add a local printer or network printer with manual settings. c. Click Next. d. Select the port to - HP PageWide XL Pro 8200 | User Guide - Page 143
f. Click HP, Hewlett-Packard, or Hewlett Packard in the Manufacturer pane, then click the name of your printer in the Printers pane. ● If your printer is in the list, select it, click Next, then follow the on-screen instructions to install the driver. ● If your printer is not in the list, click the - HP PageWide XL Pro 8200 | User Guide - Page 144
The printer drivers support any accessories such as a stacker or folder connected to your printer. The printer's default output is also the driver's default output. However, from the driver - HP PageWide XL Pro 8200 | User Guide - Page 145
the image and the edges of the paper. By default, the Horizontal cutter box is checked. Uncheck it if you want to cut the paper manually. ● Color mode - Color: Uses ink from all cartridges for full color prints. - Grayscale: Uses ink from both the color and black cartridges to produce a wider - HP PageWide XL Pro 8200 | User Guide - Page 146
Document ● Paper type ● Scale: You can resize the print in two different ways: to a percentage of its original size, or to fit a particular paper size. The default is 100% (its original size). ● Alignment: Left, center, or right ● Mirroring ● Rotation (not available in the macOS raster driver) - HP PageWide XL Pro 8200 | User Guide - Page 147
You can print from a USB flash drive containing one or more TIFF, JPEG, HP-GL/2, RTL, PDF, or PostScript files. 1. Insert the USB flash drive into to be printed. A preview of the document is displayed. Multipage documents are supported only in PDF files; in this case, you can also select a page to - HP PageWide XL Pro 8200 | User Guide - Page 148
page 23. 2. At the front panel, go to the home page and tap . 3. Select Network folder. 4. Select a file to be printed. Multipage documents are only supported in PDF; in this case, you can also select a page to print. 5. The list of print-from-Network quicksets is displayed. You can choose and - HP PageWide XL Pro 8200 | User Guide - Page 149
retained in the job queue). ● Output destination allows you to direct output to the stacker (the default, if you have one), the basket/ output supports, or the folder (if installed). ● Default folding style allows you to select the folding style when the folder is installed. To use the folder, you - HP PageWide XL Pro 8200 | User Guide - Page 150
Configure the email address book on page 28 or Windows sign-in configuration on page 131. 4. Select a file to be printed. Multipage documents are only supported in PDF; in this case, you can also select a page to print. 5. The list of print-from-My Home Folder quicksets is displayed. You can - HP PageWide XL Pro 8200 | User Guide - Page 151
match the specific needs of different kinds of images. See video: http://www.hp.com/go/pagewidexl/printing-modes-in-xl-pro-printers/. Although all print-quality modes are for 1-pass printing (in contrast to HP DesignJet printers), several parameters such as print speed, color strategy, and image - HP PageWide XL Pro 8200 | User Guide - Page 152
146 Chapter 7 Sending a job to print - HP PageWide XL Pro 8200 | User Guide - Page 153
at the left of the screen. The job queue page shows all jobs that are available in the selected job queue. See video: http://www.hp.com/go/pagewidexl/manage-job-queue/. Print & Copy queue The Print & Copy queue(s) includes jobs that are in different phases: being received, parsed, rendered, printed - HP PageWide XL Pro 8200 | User Guide - Page 154
ready to proceed with printing. Now printing The job is being printed. ● Paused: The job is paused. NOTE: Sometimes, while printing, you may see a Self-servicing status, which means that the printer is performing some task such as paper type change or print mode change between pages of the same job - HP PageWide XL Pro 8200 | User Guide - Page 155
On hold The job will not be printed until you take some action. You should respond in one of the following ways: ● On hold: Private job: Enter the PIN required to print the job. The job will be deleted from the queue after printing. ● Oh hold: Personal job: The job is not automatically printed: you - HP PageWide XL Pro 8200 | User Guide - Page 156
to manage the job in the job queue. Delete To delete a job manually, select the job and tap Delete. Cancel Sending The transfer of a file : See Configure the email server on page 28. ● To HP Smartstream: Possible only if you have HP Smartstream installed. See Accessories on page 234. ● USB drive - HP PageWide XL Pro 8200 | User Guide - Page 157
To do so, tap the Pause icon ; you can resume by tapping the Play icon end of the page that is currently printing. Reorder the job queue You can change the order of the jobs in the queue. To do so, tap the Reorder icon . . The pause takes effect at the Reprint In the History section, tap the - HP PageWide XL Pro 8200 | User Guide - Page 158
Roll policies You can choose how the printer selects which roll to use for each job. At the front panel, tap , then , then , then Roll policies. Alternatively, tap , then Job management > Roll policies. The following options are available: ● Increase productivity: To increase the productivity of - HP PageWide XL Pro 8200 | User Guide - Page 159
time after which these jobs will be removed (2-48 h). To delete a job manually, select the job and tap Delete on the bottom right. The Delete option are exactly the same whether you use the Embedded Web Server or the HP DesignJet Utility. To see the queue in the Embedded Web Server, select - HP PageWide XL Pro 8200 | User Guide - Page 160
all selected jobs to the top of the job queue. ● Print anyway: The printer will try to print the job even if there is some problem with it. ● Delete: Deletes selected jobs from the job queue. You are asked to confirm before the job is deleted. Prioritize a job in the queue - HP PageWide XL Pro 8200 | User Guide - Page 161
Delete a job from the queue Under normal circumstances, there is no need to delete a job from the queue after printing it, as it will just fall off the end of the queue as more files are sent. However, if you have sent a file in error, and want to avoid printing it, you can simply select the job and - HP PageWide XL Pro 8200 | User Guide - Page 162
the printer puts a job on hold you receive an alert. See Front panel on page 8, which explains why the job is on hold. Follow the instructions on the screen to remove the hold and continue printing. Scan queue in the Embedded Web Server To see the queue in the Embedded Web - HP PageWide XL Pro 8200 | User Guide - Page 163
9 Scanning and copying (MFP only) Multi-function printers have a built-in scanner that print jobs. Factory quicksets The printer comes with some factory quicksets already defined, designed to support typical user requirements. User quicksets Depending on the permissions set in your printer, you can - HP PageWide XL Pro 8200 | User Guide - Page 164
in a file that can be saved or delivered to whatever location you select. See video: http://www.hp.com/go/pagewidexl/scan-and-copy/. 1. Tap . 2. Select an appropriate quickset for your scan job. Any quickset permanently, tap , then Manage quicksets. 158 Chapter 9 Scanning and copying (MFP only) - HP PageWide XL Pro 8200 | User Guide - Page 165
-if you have configured the LDAP sign-in server or Windows sign-in. ● Scan to network folder-if a network folder has been added. ● Scan to HP SmartStream folder-if installed. ● Scan to email-if an email server has been configured (see Configure the email server on page 28). You can also - HP PageWide XL Pro 8200 | User Guide - Page 166
the most useful options is the one to scan a multipage or single-page document. See video: http://www.hp.com/go/pagewidexl/scan-multiple-pages/. ● Multipage: The result will be a single file containing all the another page, a new document is created. 160 Chapter 9 Scanning and copying (MFP only) - HP PageWide XL Pro 8200 | User Guide - Page 167
To change from one mode to the other, tap , then Scanner preferences > Scan-mode configuration single page. 7. Other options: See video: http://www.hp.com/go/pagewidexl/editing-features/. ● With the toolbar buttons you can zoom in and out, insert a grid over the preview and see scanner information - HP PageWide XL Pro 8200 | User Guide - Page 168
page to edit the scanned page, correct any skew manually, crop the edges, and adjust rotation, contrast, and available. The scanned images are saved in PDF format. This setting is supported only if the PostScript licence is installed. ● Original paper type allows you 9 Scanning and copying (MFP only) - HP PageWide XL Pro 8200 | User Guide - Page 169
select Background removal. Detailed background removal allows you to fine-tune the result of the smart background removal when it is on, or to set a manual level of background removal when smart removal is off, for any type of original. You can define these values on a scale of darker to lighter - HP PageWide XL Pro 8200 | User Guide - Page 170
and store: Scanned files are saved in the scan queue. Copying Copying an image prints the scanned image on your printer. See video: http://www.hp.com/go/pagewidexl/scan-and-copy/. 1. Tap . 164 Chapter 9 Scanning and copying - HP PageWide XL Pro 8200 | User Guide - Page 171
jobs in the queue. - The option of deleting pages of the copy job is not available. - The input length is always automatic: you cannot set a manual value. - If you want to print an urgent job interrupting the job currently being printed, select Allow copy to interrupt current print job. NOTE: When - HP PageWide XL Pro 8200 | User Guide - Page 172
the main settings of the quicksets before starting the copy, you can tap select Show quickset details panel. and then 166 Chapter 9 Scanning and copying (MFP only) - HP PageWide XL Pro 8200 | User Guide - Page 173
The following settings are available in copy quicksets: ● Quickset name allows you to name the quickset you are working with. ● Content type allows you to set the content type to Lines, Mixed, or Image. ● Original paper type allows you to set the content type to White paper, Photo paper, Old/ - HP PageWide XL Pro 8200 | User Guide - Page 174
allows you to fine-tune the result of the smart background removal when it is on, or to set a manual level of background removal when smart removal is off, for any type of original. You can define these values Lines/Fast, Uniform areas, or High detail. 168 Chapter 9 Scanning and copying (MFP only) - HP PageWide XL Pro 8200 | User Guide - Page 175
(the default option) ● Print scanner IQ plot: See Scanner diagnostic plot on page 180. ● Calibrate scanner: See Calibrate the scanner (MFP only) on page 226. Scanner troubleshooting In this section the most common defects and failure modes are shown, sorted by relevance and frequency of appearance - HP PageWide XL Pro 8200 | User Guide - Page 176
not use any printed version of this guide to test the scanner, as the resolution not damaged (if so, call your service representative and ask for a new MFP only) on page 222. NOTE: The problem of vertical streaks cannot always be solved, due to the technological limitations of CIS technology. HP - HP PageWide XL Pro 8200 | User Guide - Page 177
if copying). It may also help to flatten the original manually as much as possible before scanning it again. NOTE: The problem of wrinkles cannot always be solved, due to the technological limitations of CIS technology. HP offers HD Scanners with CCD technology for higher quality requirements. If - HP PageWide XL Pro 8200 | User Guide - Page 178
old or damaged maintenance sheet may cause this problem); if it is damaged, call your service representative and ask for a new maintenance sheet. 4. If the problem persists, proceed to analyze the following areas the scanning direction in these examples. 172 Chapter 9 Scanning and copying (MFP only) - HP PageWide XL Pro 8200 | User Guide - Page 179
or turning the original 90° before scanning it again. 2. If the problem persists, clean and calibrate the scanner as indicated in Maintenance on page 220 sides of the bars for neutral and vivid colors, call your service representative and report "small color differences between adjacent CIS modules". - HP PageWide XL Pro 8200 | User Guide - Page 180
or cold. Color fringing The following steps provide the complete procedure for this topic. This problem occurs when the scanner is affected by incorrect paper advance and/or miscalibration. However, some black arrow indicating the scanning direction. 174 Chapter 9 Scanning and copying (MFP only) - HP PageWide XL Pro 8200 | User Guide - Page 181
blue or green at the bottom, but it could be the other way around. If you see this effect, call your service representative and report "color fringing problem after calibration". Vibration The following steps provide the complete procedure for this topic. If your printer is not properly placed on - HP PageWide XL Pro 8200 | User Guide - Page 182
problem If the problem persists, restart service representative and report the error message. If no error message appears, try repeating your scan. 4. If the problem service representative and report an "incorrect paper advance" problem call your service representative and service representative and report the - HP PageWide XL Pro 8200 | User Guide - Page 183
4. If the problem persists, call your service representative and report a "vertical black band 20 cm wide". Scanner damages some originals HP is aware that old/thin/tracing paper original), HP recommends using a CCD scanner such as the HP DesignJet T1200 HD MFP. Object replication (ghosting) The - HP PageWide XL Pro 8200 | User Guide - Page 184
is available with various possible options. If you are experiencing problems related to border clipping, or it seems that your print has glass plate is dirty. NOTE: Completely transparent papers are not supported. In order to avoid these unwanted effects, follow these recommendations MFP only) - HP PageWide XL Pro 8200 | User Guide - Page 185
setting. You can correct the skew manually with Edit page. Cannot access the network folder or HP SmartStream (if installed as an accessory) drive seems slow, check your USB flash drive interface compatibility. Your system supports a Hi-Speed USB interface. Your USB flash drive should be compatible - HP PageWide XL Pro 8200 | User Guide - Page 186
Contrast: 0 Scanner diagnostic plot You can use the diagnostic plot to identify the cause of a scanning problem. Prepare the printer and the paper to print the diagnostic sheet Select a suitable paper type and size color-calibrating the printer. 180 Chapter 9 Scanning and copying (MFP only) - HP PageWide XL Pro 8200 | User Guide - Page 187
if printed correctly, should look like this: If you see any problems, you should follow the recommended recovery procedure, all of which are copying onto paper. HP recommends using the scan option, so that the generated file can be analyzed more easily by a remote support engineer if necessary. - HP PageWide XL Pro 8200 | User Guide - Page 188
diagnostic plot for future use We recommend saving the diagnostic plot with the maintenance sheet, in the solid tube provided. 182 Chapter 9 Scanning and copying (MFP only) - HP PageWide XL Pro 8200 | User Guide - Page 189
an accessory. It can accommodate up to 100 sheets of paper, depending on the paper type and size. When stacking natural tracing paper, use the supports attached to the top stacker (not recommended for other paper types). By default, the printer cuts the paper after every printed page, and the - HP PageWide XL Pro 8200 | User Guide - Page 190
and change the output destination to Top stacker. ● HP SmartStream: Set the destination to Top stacker, in Collection required: To avoid problems due to the characteristics of some papers, in some printed jobs to continue printing. Pro Stacker The Pro Stacker can accept roll paper - HP PageWide XL Pro 8200 | User Guide - Page 191
up to 2 mm thick ● Lever in vertical position: Boards from 2 mm to 5 mm thick ● Lever at full stroke: Boards from 5 mm to 10 mm thick Pro Stacker 185 - HP PageWide XL Pro 8200 | User Guide - Page 192
paper jams when the paper lands in the tray. The front panel will guide you through the configuration process. The stacker tray moves down based on paper weight and should be put in the vertical position. The front panel will guide you through the process. Printed pages are stacked face up and in - HP PageWide XL Pro 8200 | User Guide - Page 193
to the printer. 1. To use the stacker, select it as follows when sending the job to print: ● Front panel: Tap , then Output options > Rear stacker. Pro Stacker 187 - HP PageWide XL Pro 8200 | User Guide - Page 194
Enable Separator in the HP SmartStream job options to supported: Follow front-panel instructions to raise or lower the stacker lever to adapt the stacker to the thickness of the paper. ● Error Follow the instructions on the front panel to fix the error. If the problem persists, contact your service - HP PageWide XL Pro 8200 | User Guide - Page 195
folded will be deployed onto the top of the no-fold tray. HP F40 Folder The HP F40 Folder folds printed sheets of paper, managing the printed sheet from end to end. This folder is not available for the Pro 8200 MFP. It supports roll sizes up to 36 in (914 mm) wide, with multiple - HP PageWide XL Pro 8200 | User Guide - Page 196
Submitting a job to the folder While the folder is installed, it is the printer's default output device. If you submit a job without specifying a folding style, the default style is applied. You can tap to change the folder settings or default folding styles. NOTE: If you want to stack jobs in the - HP PageWide XL Pro 8200 | User Guide - Page 197
orientation: Select this in the Layout/Output tab. There are some paper types that are not supported by the folder. You will see a warning if you try to send such a paper type to the folder. ● HP SmartStream: Set the destination to Folder, in the job preparation pane or in the settings pane - HP PageWide XL Pro 8200 | User Guide - Page 198
You can specify in the application preferences whether you want to see the dimensions of the folded paper indicated in green in the preview. NOTE: The folded dimensions are not shown if they are unknown at this point. The green rectangle in the preview indicates which part of the page will be on top - HP PageWide XL Pro 8200 | User Guide - Page 199
The following steps are recommended to check that the required content is in the green rectangle, and to adjust the page if necessary: 1. Set the default alignment between pages and roll in the preferences so that the page is placed on the correct side of the roll. You need to do this only once. 2. - HP PageWide XL Pro 8200 | User Guide - Page 200
● Cross fold, in which folds are parallel to the printing direction Folding styles are usually based on DIN B or DIN C style: DIN B The top and bottom folds are always on opposite sides. If this is what you want, select a folding style below marked with an asterisk, as these are the ones based on - HP PageWide XL Pro 8200 | User Guide - Page 201
tabs ● DIN C 210 × 297 mm (compact fold) 210 mm width, 297 mm height ● DIN B 210 × 305 mm* 210 mm width, 305 mm height AFNOR (HP F60 and HP F70 folders only) For AFNOR style, use DIN format rolls. Jobs should be submitted as A0 portrait, A1 landscape, or A3 landscape. ● AFNOR (297 - HP PageWide XL Pro 8200 | User Guide - Page 202
ANSI ● ANSI 7.5 + 1 × 11 in 7.5 in width, 1 in margin, 11 in height ● ANSI 8.5 × 11 in 8.5 in width, 11 in height Fan fold only ● Fan fold only (210 mm) ● Fan fold only 9 in Others ● 185 + 25 × 297 mm (with binding edge) 180 mm width, 25 mm margin, 297 mm height ● ARCH 9 × 12 in 9 in width, 12 in - HP PageWide XL Pro 8200 | User Guide - Page 203
the DIN B 210 × 305 mm folding style. There are other functionalities available for purchase. For more information, contact your service representative. Tab applicator (HP F60 and HP F70 folders only) You can apply tabs to the folded paper. ● When available, a folding style with tab application can - HP PageWide XL Pro 8200 | User Guide - Page 204
Offline folding (HP F60 and HP F70 folders only) The following steps provide the complete procedure for this topic. Offline folding means that you provide the printed sheets to the folder manually: they do not come directly from the printer. The default folding style is used. 1. In the Output menu, - HP PageWide XL Pro 8200 | User Guide - Page 205
are inserting. 5. Go to the job queue and release it. Troubleshooting If you have a folding problem, try these suggestions. ● Jams: If a paper jam is detected the folder may not be calibrated. Contact your service representative. ● Communication problems: If the printer does not recognize the folder - HP PageWide XL Pro 8200 | User Guide - Page 206
the basket is installed. Follow the explained procedure for uninstalling the basket, then install the output supports. There are two baskets, one for the Pro 8200 and one for the Pro 5200. Install the basket The following steps provide the complete procedure for this topic. 200 Chapter 10 Collection - HP PageWide XL Pro 8200 | User Guide - Page 207
1. Assemble the basket. 2. Insert the bar into the printer slots. 3. Insert the cross-pieces into the printer slots. Uninstall the basket The following steps provide the complete procedure for this topic. Uninstall the basket 201 - HP PageWide XL Pro 8200 | User Guide - Page 208
1. Open the basket until the bottom cross-pieces unclip. 2. Rotate the bar until it unclips from the slots, and remove the basket. Output supports Output supports are the output path used when printing on rigid sheets if no other output accessory (compatible with rigid sheets) is attached to the - HP PageWide XL Pro 8200 | User Guide - Page 209
avoid paper jams, do not print on flexible materials when the output supports are installed. Uninstall the output supports and then install the basket. Output support ready for use Output support folded With the output support folded, another accessory such as a folder or stacker can be attached to - HP PageWide XL Pro 8200 | User Guide - Page 210
rear of the printer and grasp the wheel arm of the output support by the flap indicated below. 2. Pull the wheel arm towards you it all along the radial trajectory. Unfolding an output support The following steps provide the complete procedure for this topic. 204 Chapter 10 Collection and - HP PageWide XL Pro 8200 | User Guide - Page 211
arm towards the printer until the pin reaches the end of the linear slot. Uninstalling an output support The following steps provide the complete procedure for this topic. The output supports are installed during the printer installation procedure. You may want to uninstall them in order to print - HP PageWide XL Pro 8200 | User Guide - Page 212
to separate the magnets from the ID cover. 2. Displace the whole support, first up and then to the left to free the screw-pins. 3. Pull out the output support through both big holes in the ID cover. Installing an output support The following steps provide the complete procedure for this topic. 206 - HP PageWide XL Pro 8200 | User Guide - Page 213
for the key-cut holes in the rear of the printer. 2. Each output support has two screw-pins, and two magnets that help to reduce movement once installed. 3. Insert the output supports through both big holes in the ID cover. Make sure both screw-pins are inserted. Installing an output support 207 - HP PageWide XL Pro 8200 | User Guide - Page 214
4. Move the output support to the right and then downwards, until it reaches the end. 208 Chapter 10 Collection and finishing - HP PageWide XL Pro 8200 | User Guide - Page 215
problem: ● To achieve the best performance from your printer, use only genuine manufacturer's supplies and accessories, whose reliability and performance have been thoroughly tested to give trouble print-quality problems, you can follow a more hands-on print-quality troubleshooting procedure, by - HP PageWide XL Pro 8200 | User Guide - Page 216
diagnostic plot can be used to identify the cause. See video: http://www.hp.com/go/pagewidexl/ink-quality-defects/. Use the same paper type that you were using when you detected a problem, and check that the selected paper type is the same as the paper loaded into the printer. Tap the - HP PageWide XL Pro 8200 | User Guide - Page 217
airflows and paper-ribs space If you detect 'aeroworms' in the top part of the plot, the airflow system may need maintenance. If the problem appears on rigid sheets, check that the thickness of the sheet matches the thickness that was entered at the front panel during the paper load - HP PageWide XL Pro 8200 | User Guide - Page 218
If you cannot solve the problem, contact your service representative. Check and recover print bar If you detect problems in the top part of the plot in the bands in the fourth part of the plot indicates a possible problem in the color uniformity calibration. This part of the plot indicates whether - HP PageWide XL Pro 8200 | User Guide - Page 219
If you see defects, you should calibrate the printer by tapping , then Color uniformity calibration. You should also calibrate the printer if you are warned that a paper source has a calibration pending status. To check what calibrations have been done in the past, tap , then , then Calibration - HP PageWide XL Pro 8200 | User Guide - Page 220
the print bar. 2. Make sure that you have loaded a roll of HP Production Matte Polypropylene, 40 in (1016 mm) wide, for best results and minutes. If the problem persists, try Manual printhead alignment on page 216. If the problem still persists, try Advanced manual printhead alignment on page - HP PageWide XL Pro 8200 | User Guide - Page 221
Check airflows and paper-ribs space on page 211. 2. Check color uniformity calibration: see Color uniformity calibration on page 212. 3. If you cannot solve the problem, contact your service representative. Advanced calibrations You can run specific custom calibrations to solve particular kinds of - HP PageWide XL Pro 8200 | User Guide - Page 222
error or damage to the printer by entering an incorrect error value after Adjust manually. If the above procedures do not solve your problem, call your service representative. Manual printhead alignment Manual printhead alignment is a calibration that works on top of the automatic alignment run - HP PageWide XL Pro 8200 | User Guide - Page 223
is a lack of alignment between the paper guide and the paper advance. In this case, contact your service representative. If the skew is not the be rectangular. If the paper is correct and the problem persists, contact your service representative. Zebra defect This defect consists of light and dark - HP PageWide XL Pro 8200 | User Guide - Page 224
Leading-edge smears This defect consists of ink smears that may appear near the leading edge of a rigid sheet; typically, on sheets that are 4-5 mm or 10 mm thick. In this case, check on a flat table that the sheet is flat and not curved. 218 Chapter 11 Print quality - HP PageWide XL Pro 8200 | User Guide - Page 225
problem persists, contact your service representative. Trailing-edge smears This defect consists of ink smears that may appear near the trailing edge of a rigid sheet; typically, on sheets that are high-density or more than 700 mm long. You may see this effect if the output supports . HP recommends - HP PageWide XL Pro 8200 | User Guide - Page 226
printer in various ways. ● If you start the HP DesignJet Utility and select your printer, you see tap an alert to get help in solving the problem. You may see some alerts about the PMKs know more about printer maintenance, you can contact your service representative. ● From a distance, you can get - HP PageWide XL Pro 8200 | User Guide - Page 227
leaks and printer errors. In this case, HP recommends that you wait at least 3 hours before the water to evaporate. Move or store the Pro Stacker Move the stacker on its own wheels only service representative. This should be done by trained service personnel. Clean the exterior of the printer 221 - HP PageWide XL Pro 8200 | User Guide - Page 228
the cable before moving or storing the folder. Before using the folder again, adjust its height and reconnect the cable. Clean the scanner's glass plate (MFP only) You are recommended to clean the scanner's glass plate periodically, depending on how often you use the scanner. 1. Turn off the printer - HP PageWide XL Pro 8200 | User Guide - Page 229
glass: they will evaporate. 4. Optionally, for more thorough cleaning: ● Remove the glass plate and clean it on both sides. See Replace the scanner's glass plate (MFP only) on page 224. ● Clean the pressure rollers and the feed rollers. Clean the scanner's glass plate - HP PageWide XL Pro 8200 | User Guide - Page 230
the printer using the Power key. Replace the scanner's glass plate (MFP only) The following steps provide the complete procedure for this topic. Over scratches on the surface of the glass can reduce image quality. Contact your service representative (see When you need help on page 236) to order a new - HP PageWide XL Pro 8200 | User Guide - Page 231
black metal piece (upper or lower as appropriate), and the plastic tabs next to the glass you intend to remove. Replace the scanner's glass plate (MFP only) 225 - HP PageWide XL Pro 8200 | User Guide - Page 232
or copies, bearing in mind the limitations of CIS technology already explained in this guide. If you perform calibration successfully and still have concerns about the image quality, see Scanner troubleshooting on page 169; alternatively, you may want to consider buying a CCD scanner. To calibrate - HP PageWide XL Pro 8200 | User Guide - Page 233
tap , then Scanner preferences > Calibrate scanner. 3. Follow the instructions in the front panel. If calibration fails The following steps provide perform the calibration successfully in three consecutive attempts, call your service representative and report the error code that appears in the front - HP PageWide XL Pro 8200 | User Guide - Page 234
See video: http://www.hp.com/go/pagewidexl/replace-the-tab-reel/. 1. Open the door. 2. Pull the lower lever. 228 Chapter 12 Maintenance - HP PageWide XL Pro 8200 | User Guide - Page 235
3. Rotate the tab protector to remove it. 4. Remove the empty tabs. 5. Place the new tab reel. Replace the folder's tab reel 229 - HP PageWide XL Pro 8200 | User Guide - Page 236
6. Put back the tab protector. 7. Pull the upper lever. 8. Pass the tab between the wheels. 230 Chapter 12 Maintenance - HP PageWide XL Pro 8200 | User Guide - Page 237
asked for tabs but they do not appear on the folded jobs, open the cover and check that they are properly installed and that no problem has occurred. Update the firmware The printer's various functions are controlled by firmware that resides in the printer. From time to time firmware updates are - HP PageWide XL Pro 8200 | User Guide - Page 238
enhance its features, and may correct minor problems. IMPORTANT: You are strongly recommended to HP Web Jetadmin, with which you can make manual firmware updates or request automatic updates. ● Using a USB flash drive: Download the firmware file from http://www.hp.com/go/pagewidexlproseries/support - HP PageWide XL Pro 8200 | User Guide - Page 239
is one of the facilities provided by Web JetAdmin, which is HP's free Web-based print management software: see http://www.hp.com/go/webjetadmin. If you have difficulty in using Secure File Erase from Web JetAdmin, contact your service representative: see When you need help on page 236. Disk Wipe - HP PageWide XL Pro 8200 | User Guide - Page 240
Contact your service representative, HP SmartStream ● HP SmartTracker Scanners ● HP DesignJet SD Pro 44-in Scanner (G6H50B) ● HP DesignJet HD Pro 42-in Scanner (G6H51B) Stackers ● HP PageWide XL Pro Stacker (8SB04A) ● HP PageWide XL Top Stacker (CZ320A) Folders ● HP F70 Folder Solution (8SF70A) ● HP - HP PageWide XL Pro 8200 | User Guide - Page 241
) In addition, legacy folders compatible with previous HP PageWide XL printer models remain compatible with the new equivalent HP PageWide XL Pro 5200 and HP PageWide XL Pro 8200 Printer Series. This applies to all folder models: ● HP F70 Folder (K5H75A) ● HP F70 Folder with Tab Applicator (L3M58B - HP PageWide XL Pro 8200 | User Guide - Page 242
. If this is not the case, contact HP Support on the Web: http://www.hp.com/go/pagewidexlproseries/support/. Before calling your service representative, prepare for the call as follows: ● Review the troubleshooting suggestions in this guide. ● Review your software documentation, if relevant. ● Check - HP PageWide XL Pro 8200 | User Guide - Page 243
service engineer trying to fix a problem. There are two different ways to request this list: ● In the Embedded Web Server (see Embedded Web Server on page 15), click the Support tab and then Service support > Service , enter: http://123.123.123.123/hp/device/webAccess/allServicePlot.htm If you need - HP PageWide XL Pro 8200 | User Guide - Page 244
usage or job accounting data from the printer through the Internet. The printer provides data in XML to the application whenever requested. HP provides a Software Development Kit to facilitate the development of such applications. Check usage statistics There are two ways to display printer usage - HP PageWide XL Pro 8200 | User Guide - Page 245
The following information can be retrieved: ● In the tab Print categories usage, you can see the ink, paper area, and paper length usage divided into categories: - Mono lines: Between 0% and 10% of non-white pixel coverage, printed on standard paper, with less than 1% of color pixel coverage - Color - HP PageWide XL Pro 8200 | User Guide - Page 246
When you tap the Print usage report button, a message is displayed: The usage report was sent to the job queue and will be printed soon. All the values can be displayed in English or metric units. Print the usage information There are two different ways to print the usage information from the front - HP PageWide XL Pro 8200 | User Guide - Page 247
● Paper usage: All the papers that have been used throughout the life of the printer. Check usage statistics for a job The following steps provide the complete procedure for this topic. NOTE: The accuracy of the usage statistics is not guaranteed. 1. Access the Embedded Web Server, see Embedded Web - HP PageWide XL Pro 8200 | User Guide - Page 248
● Number: The number of the job ● Time: The date and time when the job was completed ● User: The name entered by the person who submitted the job (this item is present only if the corresponding security setting is enabled) The user name is shown only if the Show user name and job name in job - HP PageWide XL Pro 8200 | User Guide - Page 249
. ● Paper usage cost: Can be enabled or disabled. Allows you to apply a cost to the papers displayed. You can add papers from the list of supported papers. The costs can be removed or edited; they cannot be empty, but may be 0 (zero). The units selection is the same as for print - HP PageWide XL Pro 8200 | User Guide - Page 250
details and measurements of all aspects of your printer. Functional specifications Specifications of the functional characteristics of the printer. HP ink supplies Type Description Printheads Eight CMYK printheads, each containing 25344 nozzles spaced at 1200 nozzles per inch Ink cartridges - HP PageWide XL Pro 8200 | User Guide - Page 251
HP-GL/2, PCL 3 Win, TIFF, JPEG Physical specifications Specifications of the physical characteristics of the printer. Printer physical specifications - Pro 8200 MFP Width Depth Depth with paper-input accessory references 1955 mm (76.97 in) 785 mm (30.91 in) 875 mm (34.45 in) Pro 5200 MFP - HP PageWide XL Pro 8200 | User Guide - Page 252
Printer physical specifications (continued) Depth with basket folded Depth with basket unfolded Depth with output supports folded Depth with output supports unfolded Height with front panel Pro 8200 MFP Pro 5200 MFP 951 mm (37.44 in) 1226 mm (48.27 in) 867 mm (34.13 in) 983 mm (38.70 in) 1637 - HP PageWide XL Pro 8200 | User Guide - Page 253
pressure Sleep acoustic power Specifications ≤ 60 dB(A) ≤ 7.8 B(A) ≤ 36 dB(A) ≤ 5.5 B(A) ≤ 20 dB(A) ≤ 3.5 B(A) Speed specifications (Lines mode) Specifications of the printing speed of the printer. Pro 8200: 30 D/A1 pages per minute Pro 5200: 20 D/A1 pages per minute Acoustic specifications 247 - HP PageWide XL Pro 8200 | User Guide - Page 254
because when the printer starts it can diagnose the issue better and may be able to fix it automatically. If the problem persists after restarting, you should contact your service representative and be ready to give the numerical code from the error message. If the error message contains some other - HP PageWide XL Pro 8200 | User Guide - Page 255
of the IETF Zeroconf specification framework, a computer network technology used in Apple's macOS from version 10.2 onwards. It is used to discover services available on a local area network. It was originally known as Rendezvous. Color accuracy The ability to print colors that match the original - HP PageWide XL Pro 8200 | User Guide - Page 256
with original USB. Most personal computers today use Hi-Speed USB. HP-GL/2 HP Graphics Language 2: a language defined by HP to describe vector graphics. HP-RTL HP Raster Transfer Language: a language defined by HP to describe raster (bitmap) graphics. I/O Input/Output: this term describes the - HP PageWide XL Pro 8200 | User Guide - Page 257
protocols on which the Internet is based. USB Universal Serial Bus: a standard serial bus designed to connect devices to computers. Your printer supports Hi-Speed USB (sometimes called USB 2.0). USB device port A square USB socket found on USB devices, though which a computer can control the - HP PageWide XL Pro 8200 | User Guide - Page 258
248 F file erase, secure 232 firewall status 120 firmware update 231 manual setup 22 folders 188 front panel 8 accessibility 31 job queue 147 language languages 244 H hard disk specification 246 help 236 HP DesignJet Utility access 14 cannot access 126 HP PrintOS 13 I ink usage 241 ink cartridge - HP PageWide XL Pro 8200 | User Guide - Page 259
troubleshooting 123 networks link speed 120 protocols 120 security settings 120 O output supports 202 P page length accuracy 215 paper cannot load roll 51 cannot load sheet 51 jam 55 load roll 40 manual load double-sided 47 manual scan queue 149 scan-quality problems color differences between CIS - HP PageWide XL Pro 8200 | User Guide - Page 260
244 physical 245 power 246 printing resolutions 244 speed 247 speed specifications 247 stacker pro 184 top 183 statistics cost assignment 243 usage 238 usage per job 241 store folder 222 printer 221 pro stacker 221 support 236 system errors 248 T tab reel replace 227 TCP/IP settings 120 top stacker
-
 1
1 -
 2
2 -
 3
3 -
 4
4 -
 5
5 -
 6
6 -
 7
7 -
8
-
9
-
10
-
11
-
12
-
13
-
14
-
15
-
16
-
17
-
18
-
19
-
20
-
21
-
22
-
23
-
24
-
25
-
26
-
27
-
28
-
29
-
30
-
31
-
32
-
33
-
34
-
35
-
36
-
37
-
38
-
39
-
40
-
41
-
42
-
43
-
44
-
45
-
46
-
47
-
48
-
49
-
50
-
51
-
52
-
53
-
54
-
55
-
56
-
57
-
58
-
59
-
60
-
61
-
62
-
63
-
64
-
65
-
66
-
67
-
68
-
69
-
70
-
71
-
72
-
73
-
74
-
75
-
76
-
77
-
78
-
79
-
80
-
81
-
82
-
83
-
84
-
85
-
86
-
87
-
88
-
89
-
90
-
91
-
92
-
93
-
94
-
95
-
96
-
97
-
98
-
99
-
100
-
101
-
102
-
103
-
104
-
105
-
106
-
107
-
108
-
109
-
110
-
111
-
112
-
113
-
114
-
115
-
116
-
117
-
118
-
119
-
120
-
121
-
122
-
123
-
124
-
125
-
126
-
127
-
128
-
129
-
130
-
131
-
132
-
133
-
134
-
135
-
136
-
137
-
138
-
139
-
140
-
141
-
142
-
143
-
144
-
145
-
146
-
147
-
148
-
149
-
150
-
151
-
152
-
153
-
154
-
155
-
156
-
157
-
158
-
159
-
160
-
161
-
162
-
163
-
164
-
165
-
166
-
167
-
168
-
169
-
170
-
171
-
172
-
173
-
174
-
175
-
176
-
177
-
178
-
179
-
180
-
181
-
182
-
183
-
184
-
185
-
186
-
187
-
188
-
189
-
190
-
191
-
192
-
193
-
194
-
195
-
196
-
197
-
198
-
199
-
200
-
201
-
202
-
203
-
204
-
205
-
206
-
207
-
208
-
209
-
210
-
211
-
212
-
213
-
214
-
215
-
216
-
217
-
218
-
219
-
220
-
221
-
222
-
223
-
224
-
225
-
226
-
227
-
228
-
229
-
230
-
231
-
232
-
233
-
234
-
235
-
236
-
237
-
238
-
239
-
240
-
241
-
242
-
243
-
244
-
245
-
246
-
247
-
248
-
249
-
250
-
251
-
252
-
253
-
254
-
255
-
256
-
257
-
258
-
259
-
260
 |
 |

HP PageWide XL Pro 5200/8200 MFP
User Guide
SUMMARY
How to use your product.