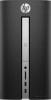
HP Pavilion 570-p000 Hardware Reference Guide OMEN X - Page 29
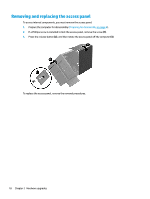
Removing an optical drive, On the inside of the case
 |
View all HP Pavilion 570-p000 manuals
Add to My Manuals
Save this manual to your list of manuals |
Page 29 highlights
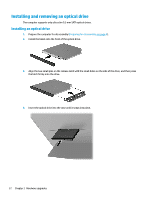
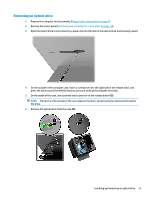
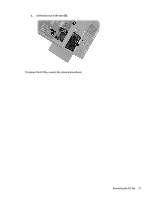
Removing an optical drive 1. Prepare the computer for disassembly (Preparing for disassembly on page 8). 2. Remove the access panel (Removing and replacing the access panel on page 18). 3. Eject the optical drive tray by inserting a paper clip into the hole in the optical drive and pressing inward. 4. On the outside of the computer case, insert a screwdriver into the right side of the release latch, and press the latch toward the left (1). Maintain pressure while performing the next step. 5. On the inside of the case, use a pointed tool to press in on the release button (2). NOTE: The latch on the outside of the case releases the drive, and pressing the release button ejects the drive. 6. Remove the optical drive from the case (3). Installing and removing an optical drive 23
-
 1
1 -
2
-
3
-
4
-
5
-
6
-
7
-
8
-
9
-
10
-
11
-
12
-
13
-
14
-
15
-
16
-
17
-
18
-
19
-
20
-
21
-
22
-
23
-
 24
24 -
 25
25 -
 26
26 -
 27
27 -
 28
28 -
 29
29 -
 30
30 -
 31
31 -
 32
32 -
 33
33 -
 34
34 -
35
-
36
-
37
-
38
-
39
-
40
-
41
-
42
-
43
-
44
-
45
 |
 |
