HP Pavilion Notebook - 14-v124ca HP Pavilion 14 Notebook PC HP Pavilion 14 Tou - Page 51
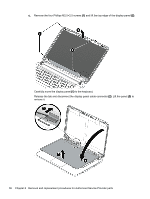
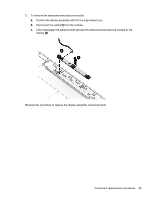
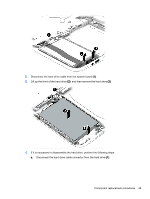
the top cover to the computer., Remove the two Phillips M2.5x4.0 screws
 |
View all HP Pavilion Notebook - 14-v124ca manuals
Add to My Manuals
Save this manual to your list of manuals |
Page 51 highlights
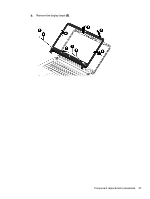
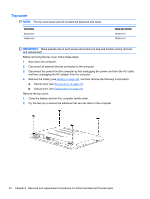
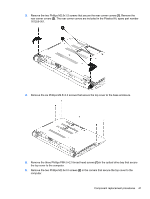
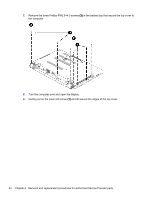
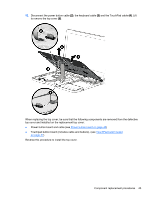
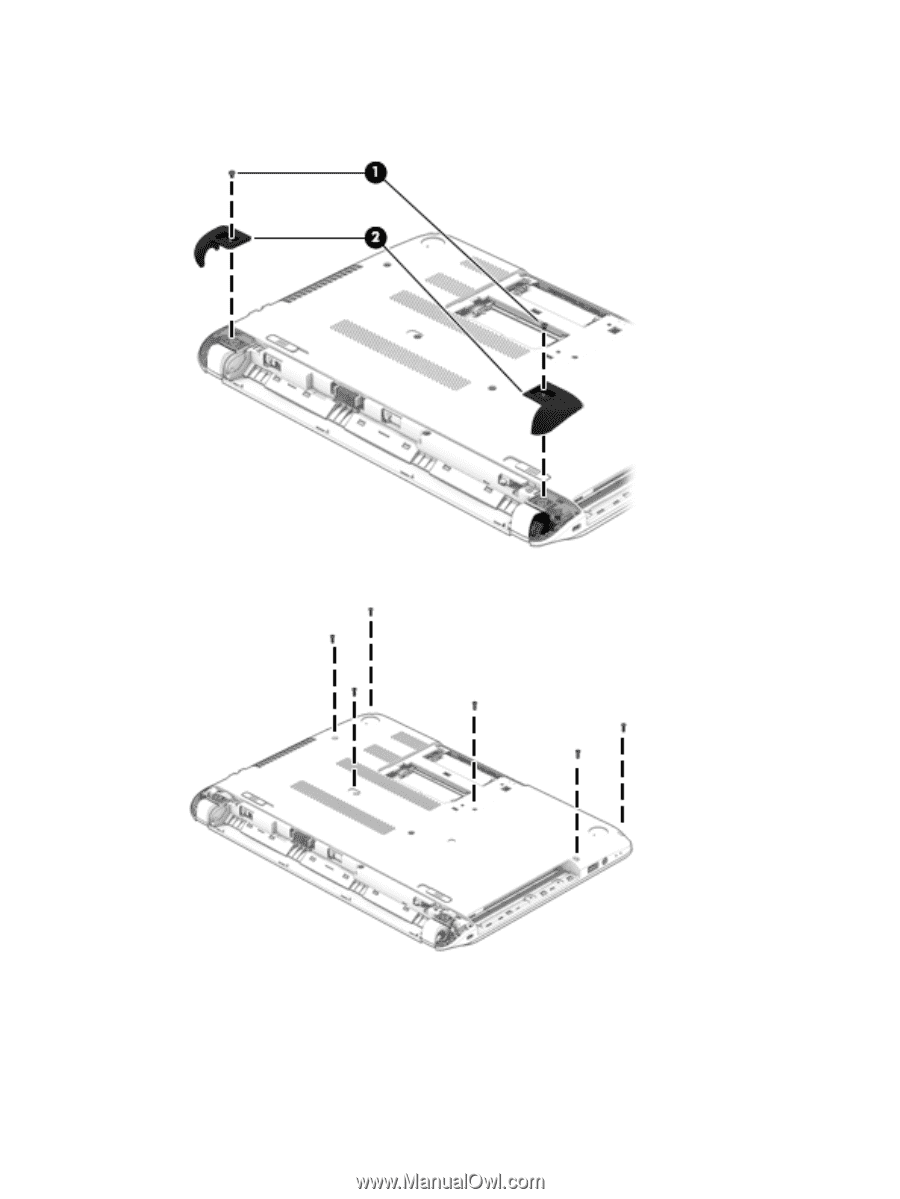
3. Remove the two Phillips M2.5x1.5 screws that secure the rear corner covers (1). Remove the rear corner covers (2). The rear corner covers are included in the Plastics Kit, spare part number 767259-001. 4. Remove the six Phillips M2.5×4.0 screws that secure the top cover to the base enclosure. 5. Remove the three Phillips PM4.5×2.0 broad head screws (1) in the optical drive bay that secure the top cover to the computer. 6. Remove the two Phillips M2.5x4.0 screws (2) in the corners that secure the top cover to the computer. Component replacement procedures 41
-
 1
1 -
2
-
3
-
4
-
5
-
6
-
7
-
8
-
9
-
10
-
11
-
12
-
13
-
14
-
15
-
16
-
17
-
18
-
19
-
20
-
21
-
22
-
23
-
24
-
25
-
26
-
27
-
28
-
29
-
30
-
31
-
32
-
33
-
34
-
35
-
36
-
37
-
38
-
39
-
40
-
41
-
42
-
43
-
44
-
45
-
 46
46 -
 47
47 -
 48
48 -
 49
49 -
 50
50 -
 51
51 -
 52
52 -
 53
53 -
 54
54 -
 55
55 -
 56
56 -
57
-
58
-
59
-
60
-
61
-
62
-
63
-
64
-
65
-
66
-
67
-
68
-
69
-
70
-
71
-
72
-
73
-
74
-
75
-
76
-
77
-
78
-
79
-
80
-
81
-
82
-
83
-
84
-
85
-
86
-
87
-
88
-
89
-
90
-
91
-
92
-
93
-
94
-
95
-
96
 |
 |
3.
Remove the two Phillips M2.5x1.5 screws that secure the rear corner covers
(1)
. Remove the
rear corner covers
(2)
. The rear corner covers are included in the Plastics Kit, spare part number
767259-001.
4.
Remove the six Phillips M2.5×4.0 screws that secure the top cover to the base enclosure.
5.
Remove the three Phillips PM4.5×2.0 broad head screws
(1)
in the optical drive bay that secure
the top cover to the computer.
6.
Remove the two Phillips M2.5x4.0 screws
(2)
in the corners that secure the top cover to the
computer.
Component replacement procedures
41