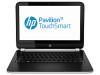
HP Pavilion TouchSmart 11-e110nr HP Pavilion 11 Notebook PC HP Pavilion TouchS
HP Pavilion TouchSmart 11-e110nr Manual
 |
View all HP Pavilion TouchSmart 11-e110nr manuals
Add to My Manuals
Save this manual to your list of manuals |
HP Pavilion TouchSmart 11-e110nr manual content summary:
- HP Pavilion TouchSmart 11-e110nr | HP Pavilion 11 Notebook PC HP Pavilion TouchS - Page 1
HP Pavilion 11 Notebook PC HP Pavilion TouchSmart 11 Notebook PC HP 215 G1 Notebook PC Maintenance and Service Guide - HP Pavilion TouchSmart 11-e110nr | HP Pavilion 11 Notebook PC HP Pavilion TouchS - Page 2
express warranty statements accompanying such products and services. Nothing herein should be construed as constituting an additional warranty. HP shall not be liable for technical or editorial errors or omissions contained herein. Product notice This guide describes features that are common to most - HP Pavilion TouchSmart 11-e110nr | HP Pavilion 11 Notebook PC HP Pavilion TouchS - Page 3
Self-Repair Parts CAUTION: Your computer includes Customer Self-Repair parts and parts that should only be accessed by an authorized service provider. See Chapter 5, "Removal and replacement procedures for Customer Self-Repair parts," for details. Accessing parts described in Chapter 6, "Removal and - HP Pavilion TouchSmart 11-e110nr | HP Pavilion 11 Notebook PC HP Pavilion TouchS - Page 4
iv Important Notice about Customer Self-Repair Parts - HP Pavilion TouchSmart 11-e110nr | HP Pavilion 11 Notebook PC HP Pavilion TouchS - Page 5
Safety warning notice WARNING! To reduce the possibility of heat-related injuries or of overheating the device, do not place the device directly on your lap or obstruct the device air vents. Use the device only on a hard, flat surface. Do not allow another hard surface, such as an adjoining optional - HP Pavilion TouchSmart 11-e110nr | HP Pavilion 11 Notebook PC HP Pavilion TouchS - Page 6
vi Safety warning notice - HP Pavilion TouchSmart 11-e110nr | HP Pavilion 11 Notebook PC HP Pavilion TouchS - Page 7
Buttons and speakers ...7 Keys ...8 Lights ...9 TouchPad ...10 Left side ...11 Right side ...12 Bottom ...13 Labels ...13 3 Illustrated parts catalog and replacement procedures preliminary requirements 28 Tools required ...28 Service considerations ...28 Plastic parts ...28 Cables and connectors - HP Pavilion TouchSmart 11-e110nr | HP Pavilion 11 Notebook PC HP Pavilion TouchS - Page 8
...40 6 Removal and replacement procedures for Authorized Service Provider parts 41 Component replacement procedures 41 RTC battery ...64 Heat sink ...66 Speakers ...68 7 Using Setup Utility (BIOS) and HP PC Hardware Diagnostics (UEFI 70 Starting Setup Utility (BIOS) ...70 Updating the BIOS - HP Pavilion TouchSmart 11-e110nr | HP Pavilion 11 Notebook PC HP Pavilion TouchS - Page 9
Manager 84 What you need to know 84 Using the HP Recovery partition 84 Using HP Recovery media to recover 85 Changing the computer boot order 85 Removing the HP Recovery partition 85 11 Power cord set requirements ...87 Requirements for all countries ...87 Requirements for specific countries - HP Pavilion TouchSmart 11-e110nr | HP Pavilion 11 Notebook PC HP Pavilion TouchS - Page 10
x - HP Pavilion TouchSmart 11-e110nr | HP Pavilion 11 Notebook PC HP Pavilion TouchS - Page 11
1 Product description Category Product Name Processor Chipset Graphics Panel Description HP Pavilion TouchSmart 11 Notebook PC/ HP Pavilion 11 Notebook PC HP Pavilion TouchSmart 11 Notebook PC HP Pavilion 11 Notebook PC ● AMD® A6-1450 1.4 GHz (turbo)/1.0 GHz processor √ (2.0 MB L2 cache, - HP Pavilion TouchSmart 11-e110nr | HP Pavilion 11 Notebook PC HP Pavilion TouchS - Page 12
Category Memory Hard drive Optical drive Audio and video Ethernet Description HP Pavilion TouchSmart 11 Notebook PC/ HP Pavilion 11 Notebook PC One customer-accessible/upgradable memory module √ slot Supports: ● 1333 MHz at 1.35 V single channel (DDR3L, 1600 MHz downgrade to 1333 MHz) for use - HP Pavilion TouchSmart 11-e110nr | HP Pavilion 11 Notebook PC HP Pavilion TouchS - Page 13
Wireless External media cards Ports Description HP Pavilion TouchSmart 11 Notebook PC/ HP Pavilion 11 Notebook PC Integrated wireless local area network (WLAN) options √ by way of wireless module Two WLAN antennas built into display assembly Support for the following WLAN formats: ● Broadcom - HP Pavilion TouchSmart 11-e110nr | HP Pavilion 11 Notebook PC HP Pavilion TouchS - Page 14
Category Description HP Pavilion TouchSmart 11 Notebook PC/ HP Pavilion 11 Notebook PC Keyboard/ 91%-size, textured, island-style keyboard (no numerical √ pointing devices keypad) Touchpad requirements: ● 2013 Touchpad ● Taps enabled as default ● PS/2 interface support ● Multi Gestures, - HP Pavilion TouchSmart 11-e110nr | HP Pavilion 11 Notebook PC HP Pavilion TouchS - Page 15
Multi-Language 64 ● Windows 8.1 Emerging Markets 64 ● Windows 8.1 Chinese Markets 64 Serviceability End user replaceable parts: ● AC adapter ● Battery (system) ● Hard drive ● Memory ● WLAN module HP Pavilion TouchSmart 11 Notebook PC/ HP Pavilion 11 Notebook PC HP 215 G1 Notebook PC √ √ √ 5 - HP Pavilion TouchSmart 11-e110nr | HP Pavilion 11 Notebook PC HP Pavilion TouchS - Page 16
connect to the Internet, you need a broadband modem (either DSL or cable, purchased separately), high-speed Internet service purchased from an Internet service provider, and a wireless router (purchased separately). (3) Webcamera light On: The webcamera is in use. (4) Webcamera Records video - HP Pavilion TouchSmart 11-e110nr | HP Pavilion 11 Notebook PC HP Pavilion TouchS - Page 17
Buttons and speakers Item (1) Component Power button (2) Speakers (2) Description ● When the computer is off, press the button to turn on the computer. ● When the computer is on, press the button briefly to initiate Sleep. ● When the computer is in the Sleep state, press the button briefly to - HP Pavilion TouchSmart 11-e110nr | HP Pavilion 11 Notebook PC HP Pavilion TouchS - Page 18
Keys Item (1) (2) (3) Component esc key fn key Windows key (4) Action keys Description Reveals system information when pressed in combination with the fn key. Executes frequently used system functions when pressed in combination with the esc key. ● Windows 8-Returns you to the Start screen from - HP Pavilion TouchSmart 11-e110nr | HP Pavilion 11 Notebook PC HP Pavilion TouchS - Page 19
Lights Item (1) Component Power light (2) Caps lock light (3) Mute light (4) Wireless light Description ● On: The computer is on. ● Blinking: The computer is in the Sleep state, a power-saving state. The computer shuts off power to the display and other unneeded components. ● Off: The - HP Pavilion TouchSmart 11-e110nr | HP Pavilion 11 Notebook PC HP Pavilion TouchS - Page 20
button (3) Right TouchPad button Description Moves the on-screen pointer and selects or activates items on the screen. NOTE: The TouchPad also supports edge-swipe gestures. Functions like the left button on an external mouse. Functions like the right button on an external mouse. 10 Chapter - HP Pavilion TouchSmart 11-e110nr | HP Pavilion 11 Notebook PC HP Pavilion TouchS - Page 21
cards such as Secure Digital (SD) memory cards. ● Blinking white: The hard drive is being accessed. ● Amber: HP 3D DriveGuard has temporarily parked the hard drive. ● On: The computer is on. ● Blinking: The computer is in is a power-saving state that uses the least amount of power. Left side 11 - HP Pavilion TouchSmart 11-e110nr | HP Pavilion 11 Notebook PC HP Pavilion TouchS - Page 22
: When a device is connected to the jack, the computer speakers are disabled. NOTE: Be sure that the device cable has a 4conductor connector that supports both audio-out (headphone) and audio in (microphone). Connect optional USB devices. Connects an optional video or audio device, such as a high - HP Pavilion TouchSmart 11-e110nr | HP Pavilion 11 Notebook PC HP Pavilion TouchS - Page 23
, and then contact support through Help and Support. Locks the battery into the battery bay. Holds the battery. Releases the battery from the battery bay. Labels The labels affixed to the computer provide information you may need when you troubleshoot system problems or travel internationally with - HP Pavilion TouchSmart 11-e110nr | HP Pavilion 11 Notebook PC HP Pavilion TouchS - Page 24
or the model number. Locate these numbers before you contact support. NOTE: Your service labels will resemble one of the examples shown below. Refer to the illustration that most closely matches the service label on your computer. Component (1) Product name (2) Serial number (3) Product - HP Pavilion TouchSmart 11-e110nr | HP Pavilion 11 Notebook PC HP Pavilion TouchS - Page 25
3 Illustrated parts catalog Computer major components Computer major components 15 - HP Pavilion TouchSmart 11-e110nr | HP Pavilion 11 Notebook PC HP Pavilion TouchS - Page 26
antenna cables) 753948-001 11.6 inch (29.46 cm), AG, SVA, LED display assembly, non-touchscreen. (Not for TouchSmart models). The display use in Latin America 744192-161 HP Pavilion TouchSmart 11 Notebook PC/ HP Pavilion 11 Notebook PC √ HP 215 G1 Notebook PC √ √ √ √ √ 16 Chapter 3 - HP Pavilion TouchSmart 11-e110nr | HP Pavilion 11 Notebook PC HP Pavilion TouchS - Page 27
Item Component For use in Canada Spare part number 744192-DB1 HP Pavilion TouchSmart 11 Notebook PC/ HP Pavilion 11 Notebook PC HP 215 G1 Notebook PC √ (3) Power button board (includes cable) 730899-001 √ √ TouchPad button board, includes: 730898-001 √ √ (4a) TouchPad button board ( - HP Pavilion TouchSmart 11-e110nr | HP Pavilion 11 Notebook PC HP Pavilion TouchS - Page 28
, and screws) 731424-001 (18) 3 cell, 36 Wh, 3.20 Ah, Li-ion battery 729892-001 (19) Service door 737253-001 HP Pavilion TouchSmart 11 Notebook PC/ HP Pavilion 11 Notebook PC √ √ √ √ √ √ √ √ √ √ √ √ √ √ √ √ √ HP 215 G1 Notebook PC √ √ √ √ √ √ √ 18 Chapter 3 Illustrated parts catalog - HP Pavilion TouchSmart 11-e110nr | HP Pavilion 11 Notebook PC HP Pavilion TouchS - Page 29
: The display assembly subcomponents are for the HP 215 G1 Notebook PC nontouchscreen models and HP Pavilion Notebook non-touchscreen models only. HP Pavilion TouchSmart 11 Notebooks, HP Pavilion 11 Notebooks with TouchSmart, and HP 215 G1 Notebook PC with TouchSmart models are spared at the display - HP Pavilion TouchSmart 11-e110nr | HP Pavilion 11 Notebook PC HP Pavilion TouchS - Page 30
right hinges) 744181-001 (7) Display back cover 744178-001 Screw pad and display screws (not illustrated) 744184-001 HP Pavilion 11 Notebook PC non-touchscreen models HP 215 G1 Notebook PC nontouchscreen models spare part number √ √ √ √ √ √ √ √ 20 Chapter 3 Illustrated parts catalog - HP Pavilion TouchSmart 11-e110nr | HP Pavilion 11 Notebook PC HP Pavilion TouchS - Page 31
includes: 731424-001 (2a) Hard drive bracket (2b) Hard drive connector cable Screws (not illustrated) (3) External DVD±RW Double-Layer with SuperMulti Drive 659940-001 HP Pavilion 11 Notebook PC HP Pavilion TouchSmart 11 Notebook PC √ √ √ √ HP 215 G1 Notebook PC √ √ √ Mass storage devices 21 - HP Pavilion TouchSmart 11-e110nr | HP Pavilion 11 Notebook PC HP Pavilion TouchS - Page 32
-001 HP Pavilion 11 Notebook PC HP Pavilion TouchSmart 11 Notebook PC HP 215 G1 Notebook PC √ √ √ √ √ √ √ √ √ √ √ √ √ √ √ √ √ √ √ √ √ √ √ Sequential part number listing Spare part number Description HP Pavilion 11 Notebook PC HP Pavilion TouchSmart 11 Notebook PC 490371 - HP Pavilion TouchSmart 11-e110nr | HP Pavilion 11 Notebook PC HP Pavilion TouchS - Page 33
Spare part number Description HP Pavilion 11 Notebook PC HP Pavilion TouchSmart 11 Notebook PC 490371-061 Power cord for use in Italy (3-pin, black, √ 1.83 m) 490371-081 Power cord for use in Denmark (3-pin, √ black, 1.83 m) 490371-111 Power - HP Pavilion TouchSmart 11-e110nr | HP Pavilion 11 Notebook PC HP Pavilion TouchS - Page 34
Spare part number Description HP Pavilion 11 Notebook PC HP Pavilion TouchSmart 11 Notebook PC 710412-001 65 W HP Smart AC adapter (non-PFC, 4.5 √ mm) 714657-001 65 W HP Smart AC adapter (non-PFC, √ select models only, 4.5 mm) 729892-001 3 cell, 36 Wh, 3.20 Ah, Li-ion battery √ 730668-001 - HP Pavilion TouchSmart 11-e110nr | HP Pavilion 11 Notebook PC HP Pavilion TouchS - Page 35
Spare part number Description HP Pavilion 11 Notebook PC HP Pavilion TouchSmart 11 Notebook PC 730895-281 Keyboard/top cover for use in , hard drive connector cable, and screws) 737253-001 Service door (includes 2 rubber feet) √ HP 215 G1 Notebook PC Sequential part number listing 25 - HP Pavilion TouchSmart 11-e110nr | HP Pavilion 11 Notebook PC HP Pavilion TouchS - Page 36
HP Pavilion 11 Notebook PC HP Pavilion TouchSmart 11 Notebook PC 738824-001 RTC battery (includes cable and double- √ sided adhesive) 741727-001 45 W HP right √ hinges and 2 rubber screws), for non- touchscreen models 744182-001 11.6 inch (29.46 cm) flat display panel, HD √ WLED AG (1366 x - HP Pavilion TouchSmart 11-e110nr | HP Pavilion 11 Notebook PC HP Pavilion TouchS - Page 37
750667-001 Webcamera/microphone module for HP √ Pavilion 11 Notebook PC non-touchscreen models 753948-001 11.6 inch (29.46 cm), (AG, SVA, LED √ TouchSmart touchscreen display assembly 754263-001 Webcamera/microphone module for HP 215 G1 Notebook PC non-touchscreen models 756117-001 Display - HP Pavilion TouchSmart 11-e110nr | HP Pavilion 11 Notebook PC HP Pavilion TouchS - Page 38
screw driver ● Magnetic screw driver ● Phillips P0 and P1 screw drivers Service considerations The following sections include some of the considerations that you must keep the points designated in the maintenance instructions. 28 Chapter 4 Removal and replacement procedures preliminary requirements - HP Pavilion TouchSmart 11-e110nr | HP Pavilion 11 Notebook PC HP Pavilion TouchS - Page 39
Cables and connectors CAUTION: When servicing the computer, be sure that cables are placed be sure that the optical drive tray is closed. Handle drives on surfaces covered with at least one inch of shock-proof foam. Avoid dropping drives from any height onto any surface. After removing a hard drive - HP Pavilion TouchSmart 11-e110nr | HP Pavilion 11 Notebook PC HP Pavilion TouchS - Page 40
levels Relative humidity 10% 40% 35,000 V 15,000 V 12,000 V 5,000 V 6,000 V 800 V 2,000 V 700 V 11,500 V 4,000 V 14,500 V 5,000 V 26,500 V 20,000 V 21,000 V 11,000 V 55% 7,500 V 3,000 V 400 V 400 V 2,000 V 3,500 V 7,000 V 5,000 V 30 Chapter 4 Removal and replacement procedures - HP Pavilion TouchSmart 11-e110nr | HP Pavilion 11 Notebook PC HP Pavilion TouchS - Page 41
material. ● Use a wrist strap connected to a properly grounded work surface and use properly grounded tools and equipment. ● Use conductive field service tools, such as cutters, screw drivers, and vacuums. ● When fixtures must directly contact dissipative surfaces, use fixtures made only of - HP Pavilion TouchSmart 11-e110nr | HP Pavilion 11 Notebook PC HP Pavilion TouchS - Page 42
with ground cords of one megohm resistance ● Static-dissipative tables or floor mats with hard ties to the ground ● Field service kits ● Static awareness labels ● Material-handling packages ● Nonconductive plastic bags, tubes, or boxes ● Metal tote boxes ● Electrostatic voltage levels and - HP Pavilion TouchSmart 11-e110nr | HP Pavilion 11 Notebook PC HP Pavilion TouchS - Page 43
Repair program is not available in all locations. Installing a part not supported by the Customer Self-Repair program may void your warranty. Check your model, serial number, product key, and length of warranty, are on the service tag at the bottom of your computer. See Labels on page 13 for details - HP Pavilion TouchSmart 11-e110nr | HP Pavilion 11 Notebook PC HP Pavilion TouchS - Page 44
reduce potential safety issues, use only the user-replaceable battery provided with the computer, a replacement battery provided by HP, or a compatible battery purchased from HP. CAUTION: Removing a user-replaceable battery that is the sole power source for the computer can cause loss of information - HP Pavilion TouchSmart 11-e110nr | HP Pavilion 11 Notebook PC HP Pavilion TouchS - Page 45
by unplugging the power cord from the computer. 3. Disconnect all external devices from the computer. 4. Remove the battery (see Battery on page 34). Remove the service door: 1. Lift up on the rear edge of the service door (1) until the left and right sides detach from the computer. 2. Remove the - HP Pavilion TouchSmart 11-e110nr | HP Pavilion 11 Notebook PC HP Pavilion TouchS - Page 46
cord from the computer. 3. Disconnect all external devices from the computer. 4. Remove the battery (see Battery on page 34). 5. Remove the service door (see Service door on page 35). Remove the hard drive: 1. Disconnect the hard drive connector cable (1) from the system board. 2. Release the hard - HP Pavilion TouchSmart 11-e110nr | HP Pavilion 11 Notebook PC HP Pavilion TouchS - Page 47
4. Remove the hard drive. 5. If it is necessary to disassemble the hard drive, perform the following steps: a. Position the hard drive with the connector toward you. b. Disconnect the hard drive connector cable (1) from the hard drive. c. Remove the four Phillips PM3.0×3.25 screws (2) that secure - HP Pavilion TouchSmart 11-e110nr | HP Pavilion 11 Notebook PC HP Pavilion TouchS - Page 48
11 b/g/n 1x1 WiFi Adapter Broadcom BCM943228HMB 802.11 a/b/g/n 2x2 WiFi + Bluetooth 4.0 Combo Adapter Ralink RT3290LE 802.11 b/g/n 1×1 WiFi + Bluetooth 4.0 Combo Adapter Realtek RTL8188EE 802.11 then contact technical support. Before removing the 5. Remove the service door (see Service door on page - HP Pavilion TouchSmart 11-e110nr | HP Pavilion 11 Notebook PC HP Pavilion TouchS - Page 49
3. Remove the WLAN module (3) by pulling the module away from the slot at an angle. NOTE: If the WLAN antenna cables are not connected to the terminals on the WLAN module, the protective sleeves must be installed on the antenna connectors, as shown in the following illustration. Reverse this - HP Pavilion TouchSmart 11-e110nr | HP Pavilion 11 Notebook PC HP Pavilion TouchS - Page 50
to the latest BIOS prior to installing new memory may result in various system problems. To update BIOS, refer to Updating the BIOS on page 70. Before Remove the battery (see Battery on page 34). 5. Remove the service door (see Service door on page 35). Remove the memory module: 1. Spread the - HP Pavilion TouchSmart 11-e110nr | HP Pavilion 11 Notebook PC HP Pavilion TouchS - Page 51
cord from the computer. 3. Disconnect all external devices from the computer. 4. Remove the battery (see Battery on page 34). 5. Remove the service door (see Service door on page 35). Remove the RTC battery: 1. Disconnect the RTC battery cable (1) from the system board. 2. Release the RTC battery - HP Pavilion TouchSmart 11-e110nr | HP Pavilion 11 Notebook PC HP Pavilion TouchS - Page 52
3. Detach the RTC battery (3) from the bottom cover. (The RTC battery is attached to the bottom cover by double-sided tape.) 4. Remove the RTC battery. Reverse this procedure to install the RTC battery. 42 Chapter 6 Removal and replacement procedures for Authorized Service Provider parts - HP Pavilion TouchSmart 11-e110nr | HP Pavilion 11 Notebook PC HP Pavilion TouchS - Page 53
the display panel for HP 215 G1 PC non-touchscreen models or HP Pavilion 11 Notebook PC non-touchscreen models only. For procedures to replace the display assembly for the HP Pavilion TouchSmart 11 Notebook PC, HP Pavilion 11 Notebook PC with TouchSmart, or the HP 215 G1 PC TouchSmart models, see - HP Pavilion TouchSmart 11-e110nr | HP Pavilion 11 Notebook PC HP Pavilion TouchS - Page 54
from the display enclosure. 3. Partially close the display cover, and position the computer with the hinges up. 44 Chapter 6 Removal and replacement procedures for Authorized Service Provider parts - HP Pavilion TouchSmart 11-e110nr | HP Pavilion 11 Notebook PC HP Pavilion TouchS - Page 55
4. Using a thin, flat tool, disengage the hinge caps (1), and then use the tool to release the tabs (2) at the bottom of the display bezel. 5. Open the display cover, and position the computer facing you. 6. Remove the display bezel. Component replacement procedures 45 - HP Pavilion TouchSmart 11-e110nr | HP Pavilion 11 Notebook PC HP Pavilion TouchS - Page 56
the display panel cable connector (2). 9. Remove the display panel. Reverse this procedure to replace the display panel. 46 Chapter 6 Removal and replacement procedures for Authorized Service Provider parts - HP Pavilion TouchSmart 11-e110nr | HP Pavilion 11 Notebook PC HP Pavilion TouchS - Page 57
HP Pavilion TouchSmart 11 Notebooks, HP Pavilion 11 Notebooks with TouchSmart, and HP 215 G1 Notebook PC TouchSmart models are spared at the display assembly only. The display assemblies for the HP 215 G1 Notebook PC non-touchscreen models and for HP Pavilion 11 Notebooks service door (see Service - HP Pavilion TouchSmart 11-e110nr | HP Pavilion 11 Notebook PC HP Pavilion TouchS - Page 58
spare part kit, spare part number 730887-001 for TouchSmart models, and spare part number 747750-001 for HP 215 G1 Notebook PC non-touchscreen models. 4. Disconnect the wireless antenna cables the system board. 48 Chapter 6 Removal and replacement procedures for Authorized Service Provider parts - HP Pavilion TouchSmart 11-e110nr | HP Pavilion 11 Notebook PC HP Pavilion TouchS - Page 59
7. Release the display panel cable from the retention clips (4) and routing channel built into the bottom cover. 8. Remove the four Phillips PM2.0×5.5 screws (1) and the two Phillips PM2.5×10.5 screws (2) that secure the display assembly to the computer. 9. Open the display hinges (3) as far as they - HP Pavilion TouchSmart 11-e110nr | HP Pavilion 11 Notebook PC HP Pavilion TouchS - Page 60
internal components for the HP 215 G1 Notebook PC non-touchscreen models or HP Pavilion 11 Notebooks non-touchscreen models only. computer. 4. Remove the battery (see Battery on page 34). 5. Remove the service door (see Service door on page 35). 6. Remove the display panel (see Display panel on - HP Pavilion TouchSmart 11-e110nr | HP Pavilion 11 Notebook PC HP Pavilion TouchS - Page 61
b. Disconnect the webcamera/microphone module cable (2) from the webcamera/microphone module. (The webcamera/microphone module cable is part of the display panel cable.) 2. If it is necessary to replace the hinges: a. Remove the six bottom screws (1) from the display hinges. b. Remove the hinges (2) - HP Pavilion TouchSmart 11-e110nr | HP Pavilion 11 Notebook PC HP Pavilion TouchS - Page 62
b. Carefully release the cable from the channel guides (2), and remove the display panel cable (3). 4. If it is necessary to replace the wireless antenna procedure to install the display assembly subcomponents. 52 Chapter 6 Removal and replacement procedures for Authorized Service Provider parts - HP Pavilion TouchSmart 11-e110nr | HP Pavilion 11 Notebook PC HP Pavilion TouchS - Page 63
cord from the computer. 3. Disconnect all external devices from the computer. 4. Remove the battery (see Battery on page 34). 5. Remove the service door (see Service door on page 35). Remove the power connector cable: 1. Remove the two Phillips PM2.0×5.5 screws (1) and the Phillips PM2.5×10.5 screw - HP Pavilion TouchSmart 11-e110nr | HP Pavilion 11 Notebook PC HP Pavilion TouchS - Page 64
5. Release the power connector (6) from the clips and mold built into the bottom cover. 6. Remove the power connector cable. Reverse this procedure to install the power connector cable. 54 Chapter 6 Removal and replacement procedures for Authorized Service Provider parts - HP Pavilion TouchSmart 11-e110nr | HP Pavilion 11 Notebook PC HP Pavilion TouchS - Page 65
Bottom cover Description TouchSmart models (includes left and right corner covers) HP 215 G1 Notebook PC non-touchscreen models ( . 4. Remove the battery (see Battery on page 34). 5. Remove the service door (see Service door on page 35). 6. Disconnect the RTC battery cable from the system board - HP Pavilion TouchSmart 11-e110nr | HP Pavilion 11 Notebook PC HP Pavilion TouchS - Page 66
system board. 4. Remove the thirteen Phillips PM2.0×4.5 screws that secure the bottom cover to the top cover. 56 Chapter 6 Removal and replacement procedures for Authorized Service Provider parts - HP Pavilion TouchSmart 11-e110nr | HP Pavilion 11 Notebook PC HP Pavilion TouchS - Page 67
. 3. Disconnect all external devices from the computer. 4. Remove the battery (see Battery on page 34), and then remove the following components: a. Service door (see Service door on page 35) b. Display assembly (see Display assembly on page 47) c. Bottom cover (see Bottom cover on page 55) Remove - HP Pavilion TouchSmart 11-e110nr | HP Pavilion 11 Notebook PC HP Pavilion TouchS - Page 68
3. Remove the power button board (3) and cable. Reverse this procedure to install the power button board. 58 Chapter 6 Removal and replacement procedures for Authorized Service Provider parts - HP Pavilion TouchSmart 11-e110nr | HP Pavilion 11 Notebook PC HP Pavilion TouchS - Page 69
. 3. Disconnect all external devices from the computer. 4. Remove the battery (see Battery on page 34), and then remove the following components: a. Service door (see Service door on page 35) b. Display assembly (see Display assembly on page 47) c. Bottom cover (see Bottom cover on page 55) Remove - HP Pavilion TouchSmart 11-e110nr | HP Pavilion 11 Notebook PC HP Pavilion TouchS - Page 70
4. Remove the TouchPad button board (4) and cables. Reverse this procedure to install the TouchPad button board. 60 Chapter 6 Removal and replacement procedures for Authorized Service Provider parts - HP Pavilion TouchSmart 11-e110nr | HP Pavilion 11 Notebook PC HP Pavilion TouchS - Page 71
. 3. Disconnect all external devices from the computer. 4. Remove the battery (see Battery on page 34), and then remove the following components: a. Service door (see Service door on page 35) b. Display assembly (see Display assembly on page 47) c. Bottom cover (see Bottom cover on page 55) Remove - HP Pavilion TouchSmart 11-e110nr | HP Pavilion 11 Notebook PC HP Pavilion TouchS - Page 72
. 3. Disconnect all external devices from the computer. 4. Remove the battery (see Battery on page 34), and then remove the following components: a. Service door (see Service door on page 35) b. Display assembly (see Display assembly on page 47) c. Bottom cover (see Bottom cover on page 55) Remove - HP Pavilion TouchSmart 11-e110nr | HP Pavilion 11 Notebook PC HP Pavilion TouchS - Page 73
. 3. Disconnect all external devices from the computer. 4. Remove the battery (see Battery on page 34), and then remove the following components: a. Service door (see Service door on page 35) b. Display assembly (see Display assembly on page 47) c. Bottom cover (see Bottom cover on page 55) Remove - HP Pavilion TouchSmart 11-e110nr | HP Pavilion 11 Notebook PC HP Pavilion TouchS - Page 74
thermal material. Description Spare part number HP Pavilion TouchSmart 11 Notebook PC/ HP Pavilion 11 Notebook PC Equipped with an AMD A4-1250 (see Battery on page 34), and then remove the following components: a. Service door (see Service door on page 35) b. Hard drive (see Hard drive on page 36 - HP Pavilion TouchSmart 11-e110nr | HP Pavilion 11 Notebook PC HP Pavilion TouchS - Page 75
NOTE: When replacing the system board, be sure that the following components are removed from the defective system board and installed on the replacement system board: ● WLAN module (see WLAN module on page 38) ● Memory module (see Memory module on page 40) ● Heat sink (see Heat sink on page 66) - HP Pavilion TouchSmart 11-e110nr | HP Pavilion 11 Notebook PC HP Pavilion TouchS - Page 76
. 3. Disconnect all external devices from the computer. 4. Remove the battery (see Battery on page 34), and then remove the following components: a. Service door (see Service door on page 35) b. Hard drive (see Hard drive on page 36) c. Display assembly (see Display assembly on page 47) d. Bottom - HP Pavilion TouchSmart 11-e110nr | HP Pavilion 11 Notebook PC HP Pavilion TouchS - Page 77
and the system board components each time the heat sink is removed. Thermal paste is used on the processor (1) and the heat sink section (2) that services it Component replacement procedures 67 - HP Pavilion TouchSmart 11-e110nr | HP Pavilion 11 Notebook PC HP Pavilion TouchS - Page 78
. 3. Disconnect all external devices from the computer. 4. Remove the battery (see Battery on page 34), and then remove the following components: a. Service door (see Service door on page 35) b. Hard drive (see Hard drive on page 36) c. Display assembly (see Display assembly on page 47) d. Bottom - HP Pavilion TouchSmart 11-e110nr | HP Pavilion 11 Notebook PC HP Pavilion TouchS - Page 79
Remove the speakers: 1. Remove the two Phillips PM2.0×3.75 screws (1) and the two Phillips PM2.0×2.75 screws (2) that secure the speakers to the bottom cover. 2. Remove the speakers (3). Reverse this procedure to install the speakers. Component replacement procedures 69 - HP Pavilion TouchSmart 11-e110nr | HP Pavilion 11 Notebook PC HP Pavilion TouchS - Page 80
Using Setup Utility (BIOS) and HP PC Hardware Diagnostics (UEFI) Setup Utility HP website. Most BIOS updates on the HP website are packaged in compressed files called SoftPaqs. Some download packages contain a file named Readme.txt, which contains information regarding installing and troubleshooting - HP Pavilion TouchSmart 11-e110nr | HP Pavilion 11 Notebook PC HP Pavilion TouchS - Page 81
cord. Downloading a Windows 8.1 BIOS update 1. From the Start screen, type support, and then select the HP Support Assistant app. 2. Click Updates and tune-ups, and then click Check for HP updates now. 3. Follow the on-screen instructions. 4. At the download area, follow these steps: a. Identify the - HP Pavilion TouchSmart 11-e110nr | HP Pavilion 11 Notebook PC HP Pavilion TouchS - Page 82
BIOS update 1. Select Start > Help and Support > Maintain. 2. Follow the on-screen instructions to identify your computer and access the BIOS file from your hard drive. Using HP PC Hardware Diagnostics (UEFI) (select models only) HP PC Hardware Diagnostics is a Unified Extensible Firmware - HP Pavilion TouchSmart 11-e110nr | HP Pavilion 11 Notebook PC HP Pavilion TouchS - Page 83
need to stop a diagnostic test, press esc. Downloading HP PC Hardware Diagnostics (UEFI) to a USB device NOTE: The HP PC Hardware Diagnostics (UEFI) download instructions are provided in English only. 1. Go to http://www.hp.com. 2. Click Support & Drivers, and then click the Drivers & Software tab - HP Pavilion TouchSmart 11-e110nr | HP Pavilion 11 Notebook PC HP Pavilion TouchS - Page 84
8 Specifications Computer specifications Metric U.S. Dimensions Width 29.0 cm 11.4 in Depth 21.7 cm 8.5 in Height 2.2 cm 0.9 in Weight 1.5 kg 3.7 lbs Input power Operating voltage and current 19.5 V dc @ 2.31 A - 45 W 19.5 V dc @ 3.33 A - 65 W - HP Pavilion TouchSmart 11-e110nr | HP Pavilion 11 Notebook PC HP Pavilion TouchS - Page 85
(typical read, including setting) Single track 1.5 ms 1.5 ms Average (read/write) 11/13 ms 11/13 ms Maximum 22 ms 22 ms Logical blocks 976,773,168 628,142,448 Disk less. NOTE: Certain restrictions and exclusions apply. Contact technical support for details. Hard drive specifications 75 - HP Pavilion TouchSmart 11-e110nr | HP Pavilion 11 Notebook PC HP Pavilion TouchS - Page 86
these recovery tools carefully, and keep them in a safe place. ● HP Recovery Manager examines the computer and determines the required storage capacity for the from support through the HP website. Go to http://www.hp.com/support, select your country or region, and follow the on-screen instructions. - HP Pavilion TouchSmart 11-e110nr | HP Pavilion 11 Notebook PC HP Pavilion TouchS - Page 87
Creation. 3. Follow the on-screen instructions to continue. To recover, see Recovering the original system using HP Recovery Manager on page 79. . For more information about using shadow copies to restore, see Help and Support. Creating a system restore point 1. Select Start > Control Panel > System - HP Pavilion TouchSmart 11-e110nr | HP Pavilion 11 Notebook PC HP Pavilion TouchS - Page 88
Control Panel > System and Security > Backup and Restore. 2. Follow the on-screen instructions to schedule and create a backup. NOTE: Windows includes the User Account Control feature Windows settings. See Help and Support for more information. 78 Chapter 9 Windows 7 - Backing up, restoring - HP Pavilion TouchSmart 11-e110nr | HP Pavilion 11 Notebook PC HP Pavilion TouchS - Page 89
software fixes the problems. If uninstalling does not fix the problems, you can Click System Restore, and follow the on-screen instructions. Restoring specific files If files are accidentally deleted from Support for more information. Recovering the original system using HP Recovery Manager HP - HP Pavilion TouchSmart 11-e110nr | HP Pavilion 11 Notebook PC HP Pavilion TouchS - Page 90
the recovery media do not work, you can obtain recovery discs for your system from support through the HP website. Go to http://www.hp.com/support, select your country or region, and follow the on-screen instructions. ● The Minimized Image Recovery option is recommended for advanced users only. All - HP Pavilion TouchSmart 11-e110nr | HP Pavilion 11 Notebook PC HP Pavilion TouchS - Page 91
Changing the computer boot order To change the boot order for recovery discs: 1. Restart the computer. 2. Press esc while the computer is restarting, and then press f9 for boot options. 3. Select Internal CD/DVD ROM Drive from the boot options window. To change the boot order for a recovery flash - HP Pavilion TouchSmart 11-e110nr | HP Pavilion 11 Notebook PC HP Pavilion TouchS - Page 92
and create backups of personal information. For more information and steps, see Windows Help and Support. From the Start screen, type help, and then select Help and Support. Creating HP Recovery media HP Recovery Manager is a software program that offers a way to create recovery media after you - HP Pavilion TouchSmart 11-e110nr | HP Pavilion 11 Notebook PC HP Pavilion TouchS - Page 93
and Support. ● If you need to correct a problem with a preinstalled application or driver, use the Drivers and Applications Reinstall option of HP Recovery type recovery, select HP Recovery Manager, and then select Drivers and Applications Reinstall, and follow the on-screen instructions. ● If you - HP Pavilion TouchSmart 11-e110nr | HP Pavilion 11 Notebook PC HP Pavilion TouchS - Page 94
, you can obtain recovery media for your system from the HP website. For U.S. support, go to http://www.hp.com/go/contactHP. For worldwide support, go to http://welcome.hp.com/country/us/en/wwcontact_us.html. IMPORTANT: HP Recovery Manager does not automatically provide backups of your personal data - HP Pavilion TouchSmart 11-e110nr | HP Pavilion 11 Notebook PC HP Pavilion TouchS - Page 95
or - Press and hold f11 as you press the power button. 2. Select Troubleshoot from the boot options menu. 3. Select HP Recovery Manager, and follow the on-screen instructions. Using HP Recovery media to recover You can use HP Recovery media to recover the original system. This method can be used if - HP Pavilion TouchSmart 11-e110nr | HP Pavilion 11 Notebook PC HP Pavilion TouchS - Page 96
Follow these steps to remove the HP Recovery partition: 1. From the Start screen, type recovery, and then select HP Recovery Manager. 2. Select Remove Recovery Partition, and follow the on-screen instructions to continue. 86 Chapter 10 Windows 8.1 - Backing up, restoring, and recovering - HP Pavilion TouchSmart 11-e110nr | HP Pavilion 11 Notebook PC HP Pavilion TouchS - Page 97
11 Power cord set requirements The wide-range input feature of the computer permits it to operate from any line voltage from 100 to 120 V ac, - HP Pavilion TouchSmart 11-e110nr | HP Pavilion 11 Notebook PC HP Pavilion TouchS - Page 98
FIMKO UTE VDE ISI SII IMQ JIS KEMA SANZ NEMKO CCC SASO PSB SABS KTL SEMKO SEV BSMI TISI ASTA Applicable note number 1 1 1 1 1 2 1 1 1 1 1 1 1 1 3 1 1 1 4 7 1 1 5 1 1 6 1 1 88 Chapter 11 Power cord set requirements - HP Pavilion TouchSmart 11-e110nr | HP Pavilion 11 Notebook PC HP Pavilion TouchS - Page 99
Country/region Accredited agency Applicable note number The United States UL 2 1. The flexible cord must be Type HO5VV-F, 3-conductor, 0.75 mm² conductor size. Power cord set fittings (appliance coupler and wall plug) must bear the certification mark of the agency responsible for evaluation in - HP Pavilion TouchSmart 11-e110nr | HP Pavilion 11 Notebook PC HP Pavilion TouchS - Page 100
dispose of the battery in general household waste. Follow the local laws and regulations in your area for battery disposal. HP encourages customers to recycle used electronic hardware, HP original print cartridges, and rechargeable batteries. For more information about recycling programs, see the - HP Pavilion TouchSmart 11-e110nr | HP Pavilion 11 Notebook PC HP Pavilion TouchS - Page 101
latch 13 BIOS downloading 71 updating 70 Bluetooth label 14 boot order changing HP Recovery Manager for Windows 8.1 computer models 85 changing in Windows 7 left side 11 lights 9 right side 12 speakers 7 TouchPad 10 computer major components 15 specifications 74 connectors, service considerations 29 - HP Pavilion TouchSmart 11-e110nr | HP Pavilion 11 Notebook PC HP Pavilion TouchS - Page 102
drive light 11 HDMI port 12 headphone jack 12 heat sink removal 66 spare part number 18, 25, 66 HP Recovery Manager correcting boot problems for guidelines 31 plastic parts, service considerations 28 ports external monitor 11 HDMI 12 monitor 11 product description 3 USB 11, 12 power button 7 - HP Pavilion TouchSmart 11-e110nr | HP Pavilion 11 Notebook PC HP Pavilion TouchS - Page 103
85 supported discs for Windows 8.1 computer models 83 USB flash drive for Windows 8.1 computer models 85 using HP Recovery media cable slot 11 security, product description 4 serial number 14 serial number, computer 14 service considerations cables 29 connectors 29 plastic parts 28 service door - HP Pavilion TouchSmart 11-e110nr | HP Pavilion 11 Notebook PC HP Pavilion TouchS - Page 104
number 17, 25, 59 TouchPad components 10 TouchPad zone 10 transporting guidelines 31 traveling with the computer 14 U USB port 11, 12 V vents 11 video, product description 2 W webcamera light 6 webcamera, location 6 webcamera/microphone module removal 50 spare part number 19, 27, 50 Windows File
-
 1
1 -
 2
2 -
 3
3 -
 4
4 -
 5
5 -
 6
6 -
 7
7 -
8
-
9
-
10
-
11
-
12
-
13
-
14
-
15
-
16
-
17
-
18
-
19
-
20
-
21
-
22
-
23
-
24
-
25
-
26
-
27
-
28
-
29
-
30
-
31
-
32
-
33
-
34
-
35
-
36
-
37
-
38
-
39
-
40
-
41
-
42
-
43
-
44
-
45
-
46
-
47
-
48
-
49
-
50
-
51
-
52
-
53
-
54
-
55
-
56
-
57
-
58
-
59
-
60
-
61
-
62
-
63
-
64
-
65
-
66
-
67
-
68
-
69
-
70
-
71
-
72
-
73
-
74
-
75
-
76
-
77
-
78
-
79
-
80
-
81
-
82
-
83
-
84
-
85
-
86
-
87
-
88
-
89
-
90
-
91
-
92
-
93
-
94
-
95
-
96
-
97
-
98
-
99
-
100
-
101
-
102
-
103
-
104
 |
 |

HP Pavilion 11 Notebook PC
HP Pavilion TouchSmart 11 Notebook
PC
HP 215 G1 Notebook PC
Maintenance and Service Guide