HP Pavilion TouchSmart 11-e110nr HP Pavilion 11 Notebook PC HP Pavilion TouchS - Page 54
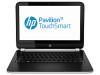
Remove the display panel, the top and sides of the bezel disengage from the display enclosure.
 |
View all HP Pavilion TouchSmart 11-e110nr manuals
Add to My Manuals
Save this manual to your list of manuals |
Page 54 highlights
Remove the display panel: 1. Remove the plastic screw covers (1) and the two Phillips screws (2) that secure the display bezel to the display assembly. 2. Flex the inside edges of the left and right sides (1), and the top edge (2) of the display bezel until the top and sides of the bezel disengage from the display enclosure. 3. Partially close the display cover, and position the computer with the hinges up. 44 Chapter 6 Removal and replacement procedures for Authorized Service Provider parts
-
 1
1 -
2
-
3
-
4
-
5
-
6
-
7
-
8
-
9
-
10
-
11
-
12
-
13
-
14
-
15
-
16
-
17
-
18
-
19
-
20
-
21
-
22
-
23
-
24
-
25
-
26
-
27
-
28
-
29
-
30
-
31
-
32
-
33
-
34
-
35
-
36
-
37
-
38
-
39
-
40
-
41
-
42
-
43
-
44
-
45
-
46
-
47
-
48
-
 49
49 -
 50
50 -
 51
51 -
 52
52 -
 53
53 -
 54
54 -
 55
55 -
 56
56 -
 57
57 -
 58
58 -
 59
59 -
60
-
61
-
62
-
63
-
64
-
65
-
66
-
67
-
68
-
69
-
70
-
71
-
72
-
73
-
74
-
75
-
76
-
77
-
78
-
79
-
80
-
81
-
82
-
83
-
84
-
85
-
86
-
87
-
88
-
89
-
90
-
91
-
92
-
93
-
94
-
95
-
96
-
97
-
98
-
99
-
100
-
101
-
102
-
103
-
104
 |
 |

Remove the display panel:
1.
Remove the plastic screw covers
(1)
and the two Phillips screws
(2)
that secure the display
bezel to the display assembly.
2.
Flex the inside edges of the left and right sides
(1)
, and the top edge
(2)
of the display bezel until
the top and sides of the bezel disengage from the display enclosure.
3.
Partially close the display cover, and position the computer with the hinges up.
44
Chapter 6
Removal and replacement procedures for Authorized Service Provider parts