HP Photosmart A520 Basics Guide - Page 11
Insert or replace the print cartridge, CAUTION - ink cartridges
 |
View all HP Photosmart A520 manuals
Add to My Manuals
Save this manual to your list of manuals |
Page 11 highlights
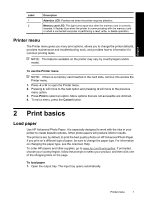
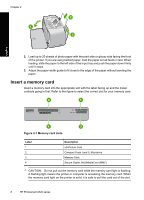
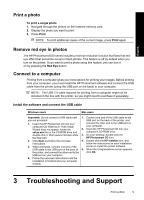
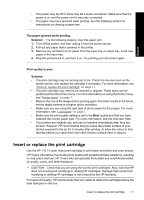
• The power may be off or there may be a loose connection. Make sure that the power is on and the power cord is securely connected. • The paper may have jammed while printing. See the following section for instructions on clearing a paper jam. English The paper jammed while printing. Solution: Try the following steps to clear the paper jam: 1. Turn off the printer, and then unplug it from the power source. 2. Pull out any paper that is jammed in the printer. 3. Remove any wrinkled or torn paper from the input tray or output tray. Load new paper in the input tray. 4. Plug the printer back in, and turn it on. Try printing your document again. Print quality is poor. Solution: • The print cartridge may be running out of ink. Check the ink-level icon on the printer screen, and replace the cartridge if necessary. For more information, see "Insert or replace the print cartridge" on page 11. • The print cartridge may need to be cleaned or aligned. These tasks can be performed from the Printer menu. For more information on using the Printer menu, see "Printer menu" on page 7. • Reduce the size of the image and try printing again. For better results in the future, set the digital camera to a higher photo resolution. • Make sure you are using the right type of photo paper for the project. For more information, see "Load paper" on page 7. • Make sure the print quality setting is set to the Best quality and that you have selected the correct paper type. For more information, see the onscreen Help. • Your photos are instantly dry, and can be handled immediately after they are printed. However, HP recommends that you leave the printed surface of your photos exposed to the air for 3 minutes after printing, to allow the colors to fully develop before you stack them with other photos or place them in albums. Insert or replace the print cartridge Use the HP 110 Tri-color Inkjet print cartridge to print black-and-white and color photos. HP Vivera Inks deliver true-to-life photo quality and exceptional fade resistance, resulting in vivid colors that last. HP Vivera Inks are specially formulated and scientifically tested for quality, purity, and fade resistance. CAUTION: Check that you are using the correct print cartridges. Also, note that HP does not recommend modifying or refilling HP cartridges. Damage that results from modifying or refilling HP cartridges is not covered by the HP warranty. For best print quality, HP recommends that you install all retail print cartridges before the date stamped on the box. Insert or replace the print cartridge 11
-
 1
1 -
2
-
3
-
4
-
5
-
 6
6 -
 7
7 -
 8
8 -
 9
9 -
 10
10 -
 11
11 -
 12
12 -
 13
13 -
 14
14 -
 15
15 -
 16
16 -
17
-
18
-
19
-
20
-
21
-
22
-
23
-
24
-
25
-
26
-
27
-
28
-
29
-
30
-
31
-
32
-
33
-
34
-
35
-
36
-
37
-
38
-
39
-
40
-
41
-
42
-
43
-
44
-
45
 |
 |