HP Photosmart C4200 Basics Guide - Page 8
Make a copy, Scan an image, Print 10 x 15 cm (4 x 6 inch) photos - software for windows 7
 |
View all HP Photosmart C4200 manuals
Add to My Manuals
Save this manual to your list of manuals |
Page 8 highlights
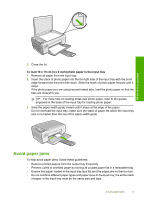
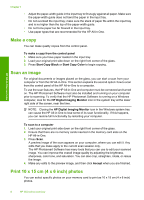
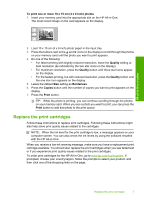
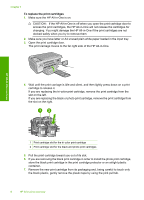
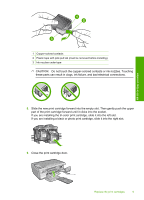
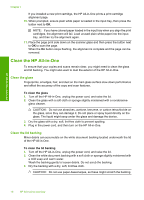
HP All-in-One overview Chapter 1 • Adjust the paper-width guide in the input tray to fit snugly against all paper. Make sure the paper-width guide does not bend the paper in the input tray. • Do not overload the input tray; make sure the stack of paper fits within the input tray and is no higher than the top of the paper-width guide. • Do not force paper too far forward in the input tray. • Use paper types that are recommended for the HP All-in-One. Make a copy You can make quality copies from the control panel. To make a copy from the control panel 1. Make sure you have paper loaded in the input tray. 2. Load your original print side down on the right front corner of the glass. 3. Press Start Copy Black or Start Copy Color to begin copying. Scan an image For original documents or images placed on the glass, you can start a scan from your computer or from the HP All-in-One. This section explains the second option: how to scan from the control panel of the HP All-in-One to a computer. To use the scan features, the HP All-in-One and computer must be connected and turned on. The HP Photosmart Software must also be installed and running on your computer prior to scanning. To verify that the HP Photosmart Software is running on a Windows computer, look for the HP Digital Imaging Monitor icon in the system tray at the lower right side of the screen, near the time. NOTE: Closing the HP Digital Imaging Monitor icon in the Windows system tray can cause the HP All-in-One to lose some of its scan functionality. If this happens, you can restore full functionality by restarting your computer. To scan to a computer 1. Load your original print side down on the right front corner of the glass. 2. Ensure that there are no memory cards inserted in the memory card slots on the HP All-in-One. 3. Press Scan. A preview image of the scan appears on your computer, where you can edit it. Any edits that you make apply to the current scan session only. The HP Photosmart Software has many tools that you can use to edit your scanned image. You can improve the overall image quality by adjusting the brightness, sharpness, color tone, and saturation. You can also crop, straighten, rotate, or resize the image. 4. Make any edits to the preview image, and then click Accept when you are finished. Print 10 x 15 cm (4 x 6 inch) photos You can select specific photos on your memory card to print as 10 x 15 cm (4 x 6 inch) photos. 6 HP All-in-One overview
-
 1
1 -
2
-
 3
3 -
 4
4 -
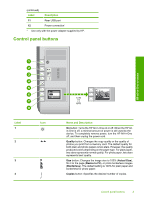 5
5 -
 6
6 -
 7
7 -
 8
8 -
 9
9 -
 10
10 -
 11
11 -
 12
12 -
 13
13 -
14
-
15
-
16
-
17
-
18
-
19
-
20
-
21
-
22
-
23
 |
 |