HP Photosmart C4700 User Guide - Page 12
Set up a USB connection, Connection Type, Searching, Printer Found, clients - install
 |
View all HP Photosmart C4700 manuals
Add to My Manuals
Save this manual to your list of manuals |
Page 12 highlights
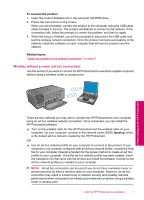
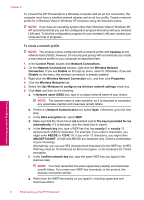
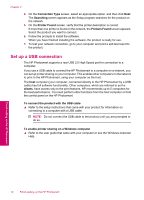
Chapter 2 4. On the Connection Type screen, select an appropriate option, and then click Next. The Searching screen appears as the Setup program searches for the product on the network. 5. On the Printer Found screen, verify that the printer description is correct. If more than one printer is found on the network, the Printers Found screen appears. Select the product you want to connect. 6. Follow the prompts to install the software. When you have finished installing the software, the product is ready for use. 7. To test your network connection, go to your computer and print a self-test report to the product. Set up a USB connection The HP Photosmart supports a rear USB 2.0 High Speed port for connection to a computer. If you use a USB cable to connect the HP Photosmart to a computer on a network, you can set up printer sharing on your computer. This enables other computers on the network to print to the HP Photosmart, using your computer as the host. The host computer (your computer, connected directly to the HP Photosmart by a USB cable) has full software functionality. Other computers, which are referred to as the clients, have access only to the print features. HP recommends up to 5 computers for the best performance. You must perform other functions from the host computer or from the control panel on the HP Photosmart. To connect the product with the USB cable ▲ Refer to the setup instructions that came with your product for information on connecting to a computer with a USB cable. NOTE: Do not connect the USB cable to the product until you are prompted to do so. To enable printer sharing on a Windows computer ▲ Refer to the user guide that came with your computer or see the Windows onscreen Help. Finish setting up the HP Photosmart 10 Finish setting up the HP Photosmart
-
 1
1 -
2
-
3
-
4
-
5
-
6
-
 7
7 -
 8
8 -
 9
9 -
 10
10 -
 11
11 -
 12
12 -
 13
13 -
 14
14 -
 15
15 -
 16
16 -
 17
17 -
18
-
19
-
20
-
21
-
22
-
23
-
24
-
25
-
26
-
27
-
28
-
29
-
30
-
31
-
32
-
33
-
34
-
35
-
36
-
37
-
38
-
39
-
40
-
41
-
42
-
43
-
44
-
45
-
46
-
47
-
48
-
49
-
50
-
51
-
52
-
53
-
54
-
55
-
56
-
57
-
58
-
59
-
60
-
61
-
62
-
63
-
64
-
65
-
66
-
67
-
68
-
69
-
70
-
71
-
72
-
73
-
74
-
75
-
76
-
77
-
78
-
79
-
80
-
81
-
82
-
83
-
84
-
85
-
86
-
87
-
88
-
89
-
90
-
91
-
92
-
93
-
94
-
95
-
96
-
97
-
98
-
99
-
100
-
101
-
102
-
103
-
104
-
105
-
106
-
107
-
108
-
109
-
110
-
111
-
112
-
113
-
114
-
115
-
116
-
117
-
118
-
119
-
120
 |
 |