HP Photosmart M437 User Guide - Page 12
Focusing on the subject, Optimizing focus, Shutter, Focus Lock, Close-up, For pictures and video clips
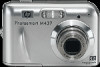 |
View all HP Photosmart M437 manuals
Add to My Manuals
Save this manual to your list of manuals |
Page 12 highlights
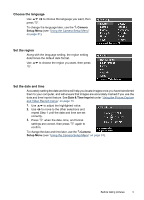
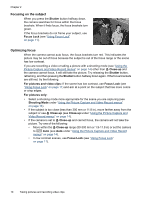
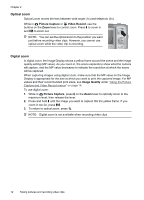
Chapter 2 Focusing on the subject When you press the Shutter button halfway down, the camera searches for focus within the focus brackets. When it finds focus, the focus brackets turn green. If the focus brackets do not frame your subject, use Focus Lock (see "Using Focus Lock" on page 11). Optimizing focus When the camera cannot auto focus, the focus brackets turn red. This indicates the picture may be out of focus because the subject is out of the focus range or the scene has low contrast. If you are recording a video or taking a picture with a shooting mode (see "Using the Picture Capture and Video Record menus" on page 14) other than Close-up and the camera cannot focus, it will still take the picture. Try releasing the Shutter button, reframing, and then pressing the Shutter button halfway down again. If the focus brackets are still red, try the following. For pictures and video clips: If the scene has low contrast, use Focus Lock (see "Using Focus Lock" on page 11) and aim at a point on the subject that has more colors or crisp edges. For pictures only: • Select a shooting mode more appropriate for the scene you are capturing (see Shooting Mode under "Using the Picture Capture and Video Record menus" on page 14). • If the subject is too close (less than 300 mm or 11.8 in), move farther away from the subject or use Close-up (see Close-up under "Using the Picture Capture and Video Record menus" on page 14). • If the camera is set to Close-up and cannot focus, the camera will not take the picture. Try one of the following: • Move within the Close-up range (50-300 mm or 1.9-11.8 in) or set the camera to Auto (see Auto under "Using the Picture Capture and Video Record menus" on page 14). • In low contrast scenes, use Focus Lock (see "Using Focus Lock" on page 11). 10 Taking pictures and recording video clips
-
 1
1 -
2
-
3
-
4
-
5
-
6
-
 7
7 -
 8
8 -
 9
9 -
 10
10 -
 11
11 -
 12
12 -
 13
13 -
 14
14 -
 15
15 -
 16
16 -
 17
17 -
18
-
19
-
20
-
21
-
22
-
23
-
24
-
25
-
26
-
27
-
28
-
29
-
30
-
31
-
32
-
33
-
34
-
35
-
36
-
37
-
38
-
39
-
40
-
41
-
42
-
43
-
44
-
45
-
46
-
47
-
48
-
49
 |
 |
