HP Photosmart M437 User Guide - Page 15
Setting options for taking pictures and recording video clips, Setting the flash, Flash Setting—Red- - flash does not work
 |
View all HP Photosmart M437 manuals
Add to My Manuals
Save this manual to your list of manuals |
Page 15 highlights
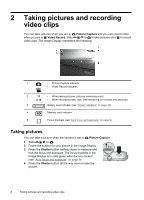
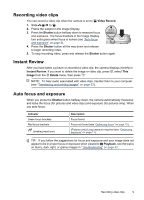
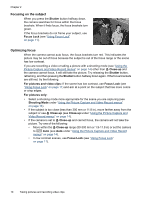
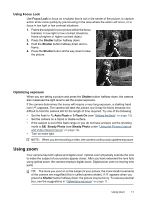
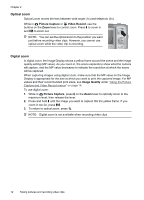
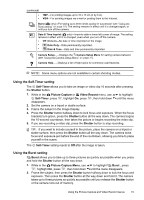
3 Setting options for taking pictures and recording video clips Your camera's default settings work well for most shooting situations. For some situations, however, the features described in this chapter can improve the pictures you take and the video clips you record. In addition to setting features that optimize the camera for lighting and motion, you can also set the camera to take a series of pictures rapidly or take images 10 seconds after you press the Shutter button, giving you time to place yourself in the image. Setting the flash To select a flash setting, press while in Picture Capture, use to highlight the desired flash mode, then press . To exit without changing the flash setting, press . Auto Flash (Default)-The camera uses the flash if necessary. Red-Eye-The camera uses the flash with red-eye reduction, if necessary, to minimize the possibility of human eyes appearing red in the final image. For information about red-eye, see "Flash Setting-Red-Eye" on page 13. Flash On-The camera always uses flash. If the light is behind your subject, use this setting to increase the light on the front of your subject. Flash Off-The camera does not use flash. Use this setting to capture poorly lit subjects beyond the flash range or to capture scenes with the existing light. The flash setting remains in effect until it is changed again, or you turn off the camera. NOTE: The flash is set to Flash Off in Landscape, Sunset, and Theatre shooting modes, and while recording video clips or using Burst. The flash is set to Red-Eye in Night Portrait shooting mode. Flash Setting-Red-Eye The red-eye phenomenon is caused when light from the flash reflects off the subjects' eyes, which can make human eyes appear red in the captured image. Using RedEye causes the camera to flash quickly up to three times to shrink the subject's pupils (reducing the effect of the red-eye phenomenon) before using the main flash and capturing the image. Since it takes longer to take a picture using this setting, make sure your subjects wait for the additional flashes. Setting options for taking pictures and recording video clips 13
-
 1
1 -
2
-
3
-
4
-
5
-
6
-
7
-
8
-
9
-
 10
10 -
 11
11 -
 12
12 -
 13
13 -
 14
14 -
 15
15 -
 16
16 -
 17
17 -
 18
18 -
 19
19 -
 20
20 -
21
-
22
-
23
-
24
-
25
-
26
-
27
-
28
-
29
-
30
-
31
-
32
-
33
-
34
-
35
-
36
-
37
-
38
-
39
-
40
-
41
-
42
-
43
-
44
-
45
-
46
-
47
-
48
-
49
 |
 |
