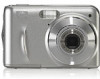
HP Photosmart M730 User Guide - Page 16
Using the Picture Capture and Video Record menus, Picture Capture, Video Record
 |
View all HP Photosmart M730 manuals
Add to My Manuals
Save this manual to your list of manuals |
Page 16 highlights
Chapter 3 Using the Picture Capture and Video Record menus The Picture Capture and Video Record menus allow you to adjust camera settings that affect the characteristics of the pictures and video clips you capture. The Picture Capture Menu displays only those features available for taking pictures while the Video Record Menu displays only features available for recording video clips. 1. Slide to or , then press . 2. Use to highlight an option, then press to display the option's menu. 3. Use to highlight a setting, then press to change the setting or press to exit without changing the setting. 4. To exit the menu, press repeatedly until you return to Picture Capture or Video Record. For on-camera information about an option, use menu, then press . to highlight Help... in the option's Unless otherwise noted, the setting remains in effect until you turn off the camera. The next time you turn on the camera, the settings reset to their defaults. Shooting Mode ( only)-For selecting a predefined setting optimized for particular types of scenes or shooting situations. • Auto Mode (Default)-For taking good shots quickly, when you do not have time to select a special shooting mode. • Close-up-For taking close-up pictures of subjects between 150 mm and 1 m (5.9 to 39.97 in) away. • Steady Photo-For minimizing picture blur when the subject is moving or you cannot hold the camera still long enough in moderate to dim light conditions (see "Optimizing exposure" on page 11). • Theatre-For capturing images at school programs, concerts, or indoor sporting events without using flash. • / Panorama-For grand landscapes or group pictures where you need to capture a wide shot that one image cannot capture (see "Using Panorama mode" on page 15). • Landscape-For scenes with deep perspective, such as mountain scenes. • Portrait-For pictures that have one or more people as their primary subject. • Action-For capturing sporting events, moving cars, or any scene where you want to stop the action. • Night Portrait-For capturing images of people at night. This mode uses the flash and a long exposure. As a result, you must set the camera on a tripod or stable surface. • Beach-For capturing scenes at the beach. • Snow-For capturing scenes in snow. • Sunset-For capturing outdoor scenes at sunset. Self-Timer-For capturing images or recording video after a 10-second delay (see "Using the Self-Timer setting" on page 16). Adaptive Lighting ( only)-Balances the relationship between light and dark areas. For more information, see "Adaptive Lighting" on page 17. Off (Default), On 14 Setting options for taking pictures and recording video clips
-
 1
1 -
2
-
3
-
4
-
5
-
6
-
7
-
8
-
9
-
10
-
 11
11 -
 12
12 -
 13
13 -
 14
14 -
 15
15 -
 16
16 -
 17
17 -
 18
18 -
 19
19 -
 20
20 -
 21
21 -
22
-
23
-
24
-
25
-
26
-
27
-
28
-
29
-
30
-
31
-
32
-
33
-
34
-
35
-
36
-
37
-
38
-
39
-
40
-
41
-
42
-
43
-
44
-
45
-
46
-
47
-
48
-
49
-
50
 |
 |
