HP ProLiant BL35p ProLiant BL35p Server Blade Maintenance and Service Guide - Page 13
Power down the server blade, IMPORTANT, WARNING, CAUTION
 |
View all HP ProLiant BL35p manuals
Add to My Manuals
Save this manual to your list of manuals |
Page 13 highlights
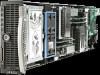
Power down the server blade Before powering down the server blade, always back up critical data. Power down the server blade using either of the following methods: • Press the Power On/Standby button on the server blade front panel. Be sure that the server blade is in standby mode by observing that the power LED is amber. This process may take 30 seconds, during which time some internal circuitry remains active. • Use the virtual power button feature in iLO. After initiating a manual or virtual power down command, be sure that the server blade goes into standby mode by observing that the power LED is amber. IMPORTANT: When the server blade is in standby mode, auxiliary power is still being provided. To remove all power from the server blade, remove the server blade from the server blade enclosure. Removing the sleeve from the server blade enclosure is not necessary. IMPORTANT: Remote power procedures require the most recent firmware for the power enclosure and server blade enclosure management modules. For the most recent firmware, refer to the HP website (http://www.hp.com/go/support). Remove the server blade 1. Back up all server blade data. 2. Power down the server blade (on page 13). 3. Remove the server blade from the HP BladeSystem p-Class sleeve. WARNING: To reduce the risk of personal injury from hot surfaces, allow the drives and the internal system components to cool before touching them. CAUTION: To prevent damage to electrical components, properly ground the server blade before beginning any installation procedure. Improper grounding can cause ESD. Removal and replacement procedures 13
-
 1
1 -
2
-
3
-
4
-
5
-
6
-
7
-
 8
8 -
 9
9 -
 10
10 -
 11
11 -
 12
12 -
 13
13 -
 14
14 -
 15
15 -
 16
16 -
 17
17 -
 18
18 -
19
-
20
-
21
-
22
-
23
-
24
-
25
-
26
-
27
-
28
-
29
-
30
-
31
-
32
-
33
-
34
-
35
-
36
-
37
-
38
-
39
-
40
-
41
-
42
-
43
-
44
 |
 |
