HP ProLiant SL270s HP ProLiant SL270s Gen8 Server User Guide - Page 49
Connect all internal or external cabling to the installed board.
 |
View all HP ProLiant SL270s manuals
Add to My Manuals
Save this manual to your list of manuals |
Page 49 highlights
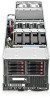
8. Remove the PCI cage. 9. Remove the expansion slot cover from the PCI riser board assembly. IMPORTANT: If the expansion board ships with an extender bracket, remove it from the expansion board before inserting the board into the expansion slot of the PCI riser board assembly. 10. Install the expansion board or FlexibleLOM into the slot until it seats firmly. 11. Connect all internal or external cabling to the installed board. 12. Install all components removed from the server. 13. Install the server into the chassis ("Installing the server into the chassis" on page 23). 14. Power up the server (on page 15). Hardware options installation 49
-
 1
1 -
2
-
3
-
4
-
5
-
6
-
7
-
8
-
9
-
10
-
11
-
12
-
13
-
14
-
15
-
16
-
17
-
18
-
19
-
20
-
21
-
22
-
23
-
24
-
25
-
26
-
27
-
28
-
29
-
30
-
31
-
32
-
33
-
34
-
35
-
36
-
37
-
38
-
39
-
40
-
41
-
42
-
43
-
 44
44 -
 45
45 -
 46
46 -
 47
47 -
 48
48 -
 49
49 -
 50
50 -
 51
51 -
 52
52 -
 53
53 -
 54
54 -
55
-
56
-
57
-
58
-
59
-
60
-
61
-
62
-
63
-
64
-
65
-
66
-
67
-
68
-
69
-
70
-
71
-
72
-
73
-
74
-
75
-
76
-
77
-
78
-
79
-
80
-
81
-
82
-
83
-
84
-
85
-
86
-
87
-
88
-
89
-
90
-
91
-
92
-
93
-
94
-
95
-
96
-
97
-
98
-
99
-
100
-
101
-
102
-
103
-
104
-
105
-
106
-
107
 |
 |

Hardware options installation 49
8.
Remove the PCI cage.
9.
Remove the expansion slot cover from the PCI riser board assembly.
IMPORTANT:
If the expansion board ships with an extender bracket, remove it from the
expansion board before inserting the board into the expansion slot of the PCI riser board
assembly.
10.
Install the expansion board or FlexibleLOM into the slot until it seats firmly.
11.
Connect all internal or external cabling to the installed board.
12.
Install all components removed from the server.
13.
Install the server into the chassis ("
Installing the server into the chassis
" on page
23
).
14.
Power up the server (on page
15
).