HP R1500 HP UPS R5000 Installation Instructions - Page 5
Installing the UPS, Connecting the battery leads, Attaching the UPS front bezel
 |
View all HP R1500 manuals
Add to My Manuals
Save this manual to your list of manuals |
Page 5 highlights
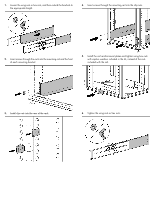
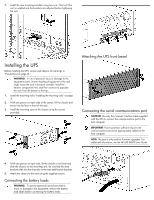
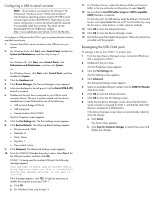
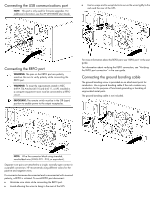
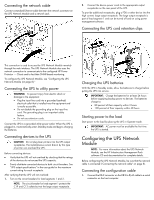
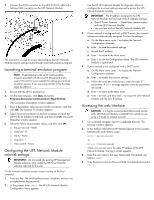
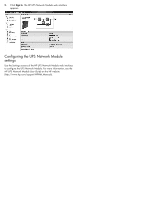
7. Install the rear mounting brackets using hex nuts. Wait until the unit is installed and the brackets are adjusted before tightening the nuts. Installing the UPS Before installing the UPS, review and observe all warnings in "Precautions (on page 2)." WARNING: A risk of personal injury or damage to the equipment exists. Uneven loading of equipment in the rack might cause the rack to become unstable. Install the heavier components first, and then continue to populate the rack from the bottom to the top. 1. Install the mounting rails ("Installing the mounting rails" on page 3). 2. With one person on each side of the carton, lift the chassis and lower it to the floor in front of the rack. 3. Install the mounting ears on the chassis using the screws provided. Attaching the UPS front bezel Connecting the serial communications port CAUTION: Use only the computer interface cable supplied with the UPS to connect the communications port to the host computer. IMPORTANT: Power protector software requires the communications port to be appropriately cabled to the host computer. NOTE: This port is only used for firmware upgrades. For additional information, see the HP UPS R5000 User Guide. 4. With one person on each side, lift the chassis to rail level and slide the chassis on the mounting rails. Be sure that the cleat brackets slide into the channels on the rear stabilization brackets. 5. Attach the chassis to the rack using the supplied screws. Connecting the battery leads WARNING: To prevent personal injury from electric shock or damage to the equipment, remove the battery lead labels before connecting the battery leads.
-
 1
1 -
 2
2 -
 3
3 -
 4
4 -
 5
5 -
 6
6 -
 7
7 -
 8
8 -
 9
9 -
 10
10 -
 11
11
 |
 |
