HP Rp5700 Troubleshooting Guide - Page 58
Advanced, Onboard Devices, Storage, DPS Self-test, Storage Options, Emulation, Changes and Exit - raid
 |
UPC - 884420470731
View all HP Rp5700 manuals
Add to My Manuals
Save this manual to your list of manuals |
Page 58 highlights
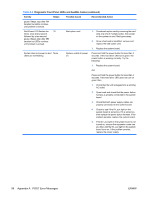
Table A-1 Numeric Codes and Text Messages (continued) Control panel message Description Recommended action 1155-Serial Port Address Conflict Detected Both external and internal serial ports are assigned to same IRQ. 1. Remove any serial port expansion cards. 2. Clear CMOS. (See Appendix B, Password Security and Resetting CMOS on page 57.) 3. Reconfigure card resources and/or run Computer Setup or Windows utilities. 1201-System Audio Address Conflict Detected Device IRQ address conflicts with another device. Enter Computer Setup and reset the IRQ in Advanced > Onboard Devices. 1202-MIDI Port Address Conflict Detected Device IRQ address conflicts with another device. Enter Computer Setup and reset the IRQ in Advanced > Onboard Devices. 1203-Game Port Address Conflict Detected Device IRQ address conflicts with another device. Enter Computer Setup and reset the IRQ in Advanced > Onboard Devices. 1720-SMART Hard Drive Detects Imminent Failure Hard drive is about to fail. (Some hard drives 1. have a hard drive firmware patch that will fix an erroneous error message.) Determine if hard drive is giving correct error message. Enter Computer Setup and run the Drive Protection System test under Storage > DPS Self-test. 2. Apply hard drive firmware patch if applicable. (Available at http://www.hp.com/support.) 3. Back up contents and replace hard drive. 1796-SATA Cabling Error One or more SATA devices are improperly attached. For optimal performance, the SATA 0 and SATA 1 connectors must be used before SATA 2. For one device, use SATA 0. For two devices, use SATA 0 and SATA 1. For three devices, use SATA 0, SATA 1, and SATA 2. 1797-SATA Drivelock is not supported in RAID mode. Drivelock is enabled on one or more SATA hard drives, and they cannot be accessed while the system is configured for RAID mode. Either remove the Drivelocked SATA device or disable the Drivelock feature. To disable the Drivelock feature, enter Computer Setup, change Storage > Storage Options > SATA Emulation to IDE, and select File > Save Changes and Exit. Reenter Computer Setup and select Security > Drivelock. For each listed Drivelock-capable SATA device, ensure Drivelock is Disabled. Lastly, change Storage > Storage Options > SATA Emulation back to RAID and select File > Save Changes and Exit. 1801-Microcode Patch Error Processor is not supported by ROM BIOS. 1. Upgrade BIOS to proper version. 2. Change the processor. 2216-Powered USB cable not attached Powered USB cable is not properly attached 1. to the USB PlusPower expansion card or to the system board. Be sure that the USB PlusPower expansion card is seated correctly in its slot in the riser card. 2. Be sure that the system board cable harness is plugged into both system board connectors (one yellow and one black) on the system board. 3. Be sure that the system board cable harness is plugged into the USB PlusPower expansion card. 52 Appendix A POST Error Messages ENWW
-
 1
1 -
2
-
3
-
4
-
5
-
6
-
7
-
8
-
9
-
10
-
11
-
12
-
13
-
14
-
15
-
16
-
17
-
18
-
19
-
20
-
21
-
22
-
23
-
24
-
25
-
26
-
27
-
28
-
29
-
30
-
31
-
32
-
33
-
34
-
35
-
36
-
37
-
38
-
39
-
40
-
41
-
42
-
43
-
44
-
45
-
46
-
47
-
48
-
49
-
50
-
51
-
52
-
 53
53 -
 54
54 -
 55
55 -
 56
56 -
 57
57 -
 58
58 -
 59
59 -
 60
60 -
 61
61 -
 62
62 -
 63
63 -
64
-
65
-
66
-
67
-
68
-
69
-
70
 |
 |