HP Scitex FB7600 TN Replacing the Printing Table - Page 12
Installing the New Printing Table, Removing the Old, Printing Table
 |
View all HP Scitex FB7600 manuals
Add to My Manuals
Save this manual to your list of manuals |
Page 12 highlights
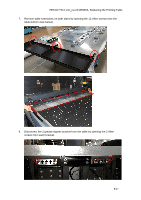
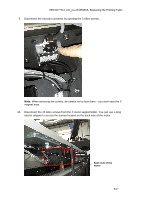
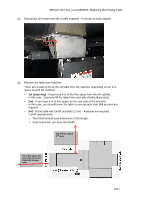
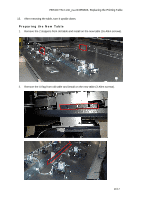
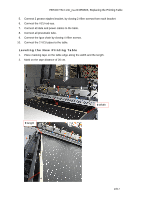
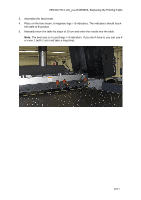
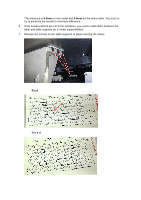
FB7x00 TN # emr_na-c04359603, Replacing the Printing Table 3. Remove the VCU adaptor from old table and install on the new table. 4. Turn the new table upside down and put it on the 2 pieces of woods on the floor. Installing the New Printing Table Note: Install the new printing table by performing the steps of "Removing the Old Printing Table" in the reverse order. 1. Place new table on the machine. Note: Be careful not to lose the screws when working in the X magnet area. 2. Tighten the screws on the 3 table supports, 6 screws on each support. 3. Tighten the 40 Allen screws on X motor support/slider. You can use a long ratchet adaptor to access the screws located on the back side of the motor. 4. Install table extensions on both sides using the 12 Allen screws. 12/17
-
 1
1 -
2
-
3
-
4
-
5
-
6
-
 7
7 -
 8
8 -
 9
9 -
 10
10 -
 11
11 -
 12
12 -
 13
13 -
 14
14 -
 15
15 -
 16
16 -
 17
17
 |
 |
