HP Scitex FB7600 TN Replacing the Printing Table - Page 13
Leveling the New Printing Table, Connect the 2 VCU pipes to the table.
 |
View all HP Scitex FB7600 manuals
Add to My Manuals
Save this manual to your list of manuals |
Page 13 highlights
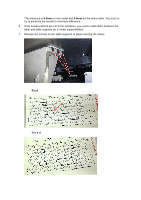
FB7x00 TN # emr_na-c04359603, Replacing the Printing Table 5. Connect 2 grease nipples bracket, by closing 2 Allen screws from each bracket 6. Connect the VCU rod-eye. 7. Connect all data and power cables to the table. 8. Connect all pneumatic tube. 9. Connect the Igus chain by closing 4 Allen screws. 10. Connect the 2 VCU pipes to the table. Leveling the New Printing Table 1. Place masking tape on the table edge along the width and the length. 2. Mark on the tape distance of 20 cm. 0 length 0 Width 13/17
-
 1
1 -
2
-
3
-
4
-
5
-
6
-
7
-
 8
8 -
 9
9 -
 10
10 -
 11
11 -
 12
12 -
 13
13 -
 14
14 -
 15
15 -
 16
16 -
 17
17
 |
 |

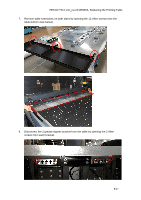
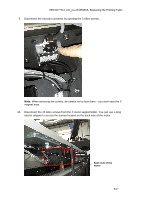
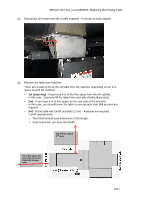
FB7x00 TN # emr_na-c04359603, Replacing the Printing Table
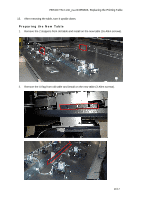
5.
Connect 2 grease nipples bracket, by closing 2 Allen screws from each bracket
6.
Connect the VCU rod-eye.
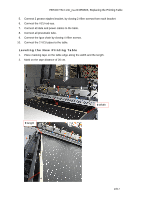
7.
Connect all data and power cables to the table.
8.
Connect all pneumatic tube.
9.
Connect the Igus chain by closing 4 Allen screws.
10.
Connect the 2 VCU pipes to the table.
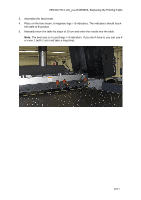
Leveling the New Printing Table
1.
Place masking tape on the table edge along the width and the length.
2.
Mark on the tape distance of 20 cm.
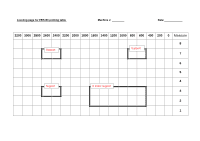
0
Width
0
length
13/17