HP Scitex LX850 HP Scitex LX850 & LX820 Printer: Installation Guide - Page 58
Create a shared folder on the HP Internal Print Server computer, HP Designjet LX820/LX850, scitexlx
 |
View all HP Scitex LX850 manuals
Add to My Manuals
Save this manual to your list of manuals |
Page 58 highlights
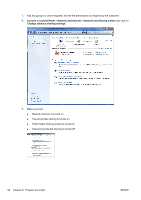
6. Attach the holder to the printer with the four T20 screws. TIP: It is better to connect the power cable to the monitor before connecting it to the printer. 7. Connect the monitor, keyboard and mouse to the computer. 8. Plug the power cords of the computer, monitor and LAN switch into the outlets provided on the side of the electrical cabinet facing the computer. WARNING! The outlets are for the computer, monitor and switch only. Never plug any other equipment into the outlets. 9. Place the HP Internal Print Server computer in the electrical compartment and secure it with the two straps. 10. Put the switch inside the electrical compartment. 11. Route the customer LAN cable and connect it to the switch. NOTE: The LAN cable, on the customer network side, must be connected to a hub/switch port configured as autosense. Otherwise, there will be no communication between the HP switch provided with the printer and the rest of the customer's network. The HP Procurve 1400-8G switch that is included with the printer supports one low-level communication protocol: autosense. If the connector to which the switch is connected is set to any other protocol (such as half-duplex), no communication can occur. 12. Connect the HP Internal Print Server computer to the switch using the cable included in the shipment. 13. Connect the printer to the switch using the available cable. 14. Plug the power cord of the switch into the power strip. NOTE: For Russian installations, you must also install the two 2 MB memory cards. Create a shared folder on the HP Internal Print Server computer A shared folder must be created on the HP Internal Print Server computer for the RIP to be able to send jobs to the HP Internal Print Server and view the contents of the shared folder. 1. Log in to the HP Internal Print Server computer using the administrative user account that is already set up on the computer. ● HP Designjet LX820/LX850: User name scitexlx, no password. 2. Create a folder called OutJobs. 54 Chapter 8 Prepare the printer ENWW
-
 1
1 -
2
-
3
-
4
-
5
-
6
-
7
-
8
-
9
-
10
-
11
-
12
-
13
-
14
-
15
-
16
-
17
-
18
-
19
-
20
-
21
-
22
-
23
-
24
-
25
-
26
-
27
-
28
-
29
-
30
-
31
-
32
-
33
-
34
-
35
-
36
-
37
-
38
-
39
-
40
-
41
-
42
-
43
-
44
-
45
-
46
-
47
-
48
-
49
-
50
-
51
-
52
-
 53
53 -
 54
54 -
 55
55 -
 56
56 -
 57
57 -
 58
58 -
 59
59 -
 60
60 -
 61
61 -
 62
62 -
 63
63 -
64
-
65
-
66
-
67
-
68
-
69
-
70
-
71
-
72
-
73
-
74
-
75
-
76
-
77
-
78
-
79
-
80
-
81
-
82
-
83
-
84
-
85
 |
 |
