HP Sprocket Studio User Guide - Page 3
Caring for your HP Sprocket Studio, How to Reset your HP Sprocket Studio - app
 |
View all HP Sprocket Studio manuals
Add to My Manuals
Save this manual to your list of manuals |
Page 3 highlights
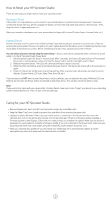
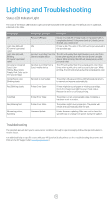
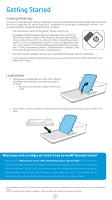
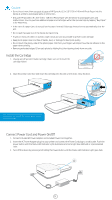
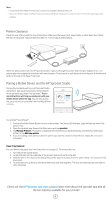
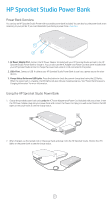
How to Reset your HP Sprocket Studio There are two ways you might need to reset your sprocket printer: Hardware Reset If the printer isn't responding or won't connect to your mobile device, try performing a hardware reset. If you have connectivity issues with your printer, unuplug the power cord from the wall outlet and wait for a few seconds . Then, plug the printer in again and power on. When you complete a hardware reset, your personalized settings will be saved (Custom Name, Personal Color, etc.). Factory Reset Perform a factory reset to return to the default settings if you want to gift your sprocket to someone else. A factory reset might also be used if Privacy is turned on for your mobile device and the device is lost. Completing a factory reset would allow a new phone to connect. Before completing a factory reset, update your printer firmware. You can initiate a factory reset by using the steps below. A factory reset can be completed when connected to a wall outlet or to the HP Sprocket Studio Power Bank. 1. Hold the power button for about 7 seconds total. After 3 seconds, the Status LED light will turn off to indicate the printer is shutting down; continue to hold the Power button until the LED lights start to flash. 2. Release the power button. The LEDs will continue blinking for about 6 seconds. 3. While the LEDs are blinking, press and release the power button. The device will remain off until you power on again. 4. Power on; the printer will be reset to factoring settings. After a factory reset, all settings are reset to factory defaults (Custom Name, LED color, Sleep Time, Auto-Off, etc.) If you decide you do NOT want to reset the printer to factory defaults, you can abandon the reset. While the LEDs are blinking, do not press the Power button as directed in step three above. This will also cancel the factory reset. Note: If you want to pair again with your device after a Factory Reset, make sure to also "forget" your device in your operating system's Paired Devices list. Then, re-pair in the sprocket app. Caring for your HP Sprocket Studio • Remove fingerprints, dust, and dirt from the printer using a dry microfiber cloth. • Keep the Paper Tray Cover closed to prevent dust and debris from entering the paper path. • Update the printer firmware. Make sure your mobile device is connected to the Internet and then open the sprocket app. Turn on the printer and connect it to the sprocket app. If there is a firmware update available, a firmware update screen displays. Follow the on-screen prompts to complete the update. Make sure the printer is plugged in to a wall outlet to complete a firmware update. If you are connected to the power bank, make sure you plug the power bank into a wall outlet using the included AC power adapter and power cord. • Keep your sprocket app updated. If you don't have your mobile app set to automatically update, go to the appropriate app store and make sure the latest version is installed. 2
-
 1
1 -
 2
2 -
 3
3 -
 4
4 -
 5
5 -
 6
6 -
 7
7 -
 8
8 -
 9
9 -
10
-
11
-
12
-
13
-
14
-
15
 |
 |
