HP T5540 Troubleshooting Guide: HP t5630, t5545, t5145, and t5540 Thin Clients - Page 20
Installing Thin Client Options, Installing the USB Device
 |
UPC - 884420407706
View all HP T5540 manuals
Add to My Manuals
Save this manual to your list of manuals |
Page 20 highlights
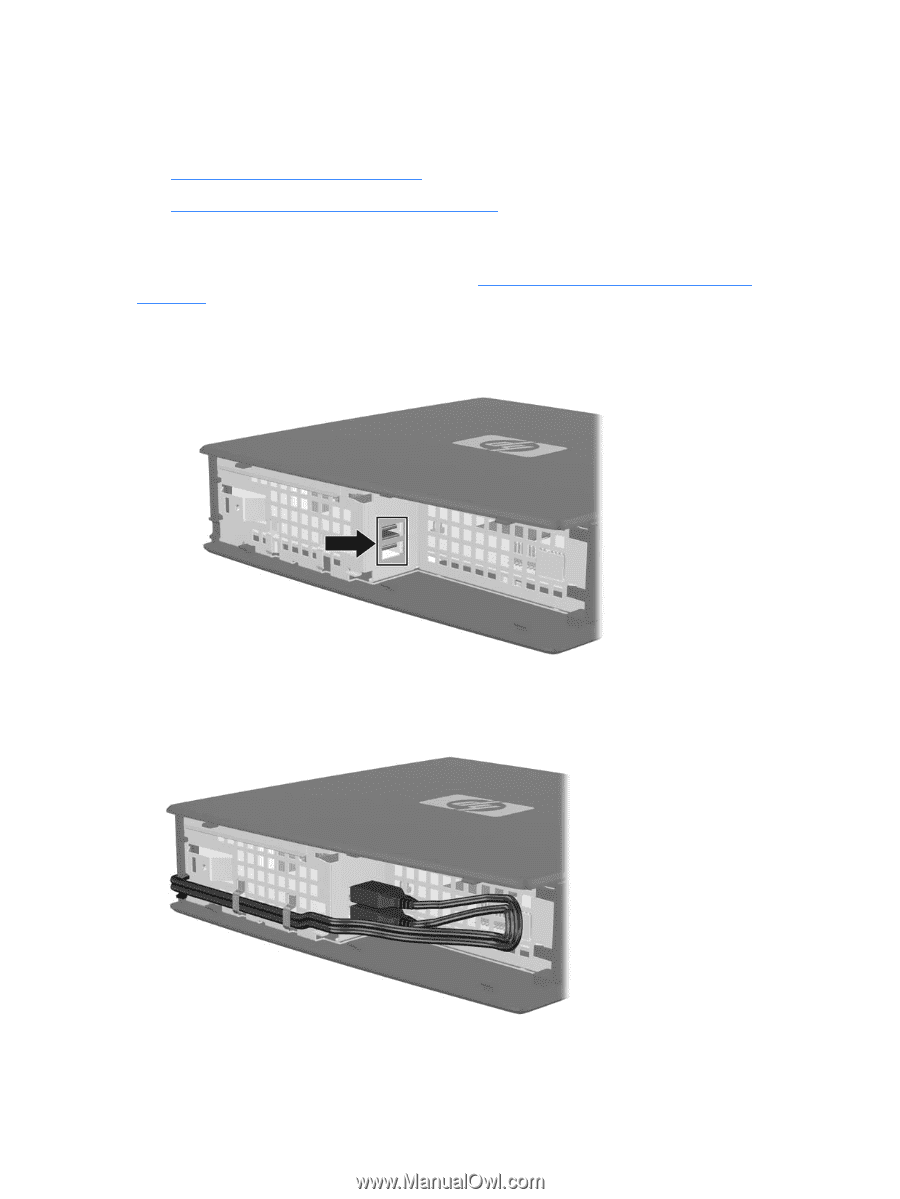
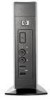
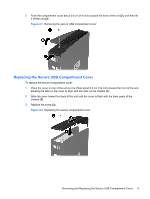
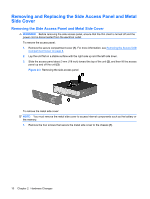
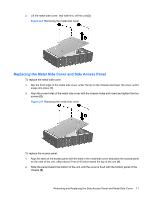
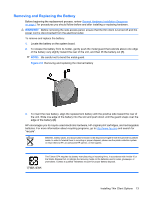
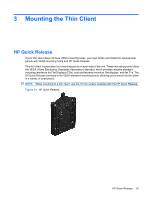
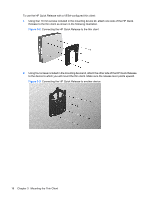
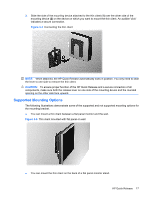
Installing Thin Client Options Various options can be installed on the thin client: ● Installing the USB Device on page 12 ● Removing and Replacing the Battery on page 13 Installing the USB Device Before beginning the replacement process, review General Hardware Installation Sequence on page 7 for procedures you should follow before and after installing or replacing hardware. ▲ Insert the USB device into the USB port in the secure USB compartment. See the following illustration for the location of the ports in the secure USB compartment. Figure 2-6 USB ports in the secure USB compartment If you install a USB mouse and a USB keyboard in the secure USB compartment, route the cables around and through the clips, then out the secure cable routing slot, as shown in the following illustration. Figure 2-7 Using the secure cable routing slot 12 Chapter 2 Hardware Changes
-
 1
1 -
2
-
3
-
4
-
5
-
6
-
7
-
8
-
9
-
10
-
11
-
12
-
13
-
14
-
 15
15 -
 16
16 -
 17
17 -
 18
18 -
 19
19 -
 20
20 -
 21
21 -
 22
22 -
 23
23 -
 24
24 -
 25
25 -
26
-
27
-
28
-
29
-
30
-
31
-
32
-
33
-
34
-
35
-
36
-
37
-
38
-
39
-
40
-
41
-
42
-
43
-
44
-
45
-
46
-
47
-
48
-
49
-
50
-
51
-
52
-
53
-
54
-
55
-
56
-
57
-
58
-
59
-
60
-
61
-
62
-
63
-
64
-
65
-
66
-
67
-
68
-
69
-
70
-
71
-
72
-
73
 |
 |