HP Vectra VE 4/xx HP Vectra VE 4/xxX PC Series - User’s Guide - Page 12
Starting the PC for the First Time
 |
View all HP Vectra VE 4/xx manuals
Add to My Manuals
Save this manual to your list of manuals |
Page 12 highlights
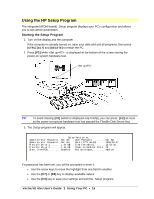
Starting the PC for the First Time Your PC's hard disk has preinstalled software that is initialized the first time you start the PC. The initialization takes approximately three minutes, and sets up your software to use the hardware installed in your computer. To initialize your software: 1. Switch on the display and then the computer. First power-on the display Then power-on the computer 2. The PC performs a power-on system hardware test which checks the configuration. This test is performed each time the PC is switched on. A screen is displayed that shows the progress of the test and indicates any errors found. If an error is detected, see "Error Messages" in Chapter 4. 3. The software initialization routine starts. It displays the software license agreement and gives you an opportunity to read Working in Comfort (ergonomic advice for computer users). You may be asked to enter information during the initialization routine, for example: ◊ The name of the person who will use the computer and your company name. (If necessary, the name of the user can be changed later.) ◊ The current date and time. ◊ The type of printer (for example, HP LaserJet 4M). You may also be requested to enter the connection used by the printer (for example, LPT1 for a parallel printer or COM1 for a serial printer). ◊ The model number of your display. (HP display model numbers are shown on the rear of the display.) 4. Follow any other instructions that are displayed on the screen. 5. Adjust the display screen's brightness and contrast to your needs. If the picture does not fill the screen or is not centered, adjust it using the controls on the display. Refer to the display's manual for details. Vectra VE 4/xx User's Guide 1 Setting Up Your PC • 12
-
 1
1 -
2
-
3
-
4
-
5
-
6
-
 7
7 -
 8
8 -
 9
9 -
 10
10 -
 11
11 -
 12
12 -
 13
13 -
 14
14 -
 15
15 -
 16
16 -
 17
17 -
18
-
19
-
20
-
21
-
22
-
23
-
24
-
25
-
26
-
27
-
28
-
29
-
30
-
31
-
32
-
33
-
34
-
35
-
36
-
37
-
38
-
39
-
40
-
41
-
42
-
43
-
44
-
45
-
46
-
47
-
48
-
49
-
50
-
51
-
52
-
53
-
54
-
55
-
56
-
57
-
58
-
59
-
60
-
61
-
62
-
63
-
64
-
65
-
66
-
67
-
68
-
69
-
70
-
71
-
72
-
73
-
74
-
75
-
76
-
77
-
78
-
79
-
80
-
81
-
82
-
83
-
84
-
85
-
86
-
87
-
88
-
89
-
90
-
91
-
92
-
93
-
94
-
95
-
96
-
97
-
98
-
99
-
100
-
101
-
102
-
103
-
104
-
105
-
106
-
107
-
108
-
109
-
110
-
111
-
112
-
113
-
114
-
115
-
116
-
117
-
118
-
119
-
120
-
121
-
122
-
123
-
124
-
125
 |
 |
