HP Vectra XU 6/XXX HP Vectra XU 6/xxx PC - Installing an Operating System, D35 - Page 6
IDE CD-ROM ATAPI 1.2/Dual Channel PCI IDE
 |
View all HP Vectra XU 6/XXX manuals
Add to My Manuals
Save this manual to your list of manuals |
Page 6 highlights
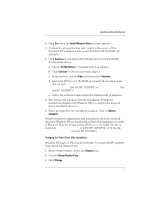
Installing an Operating System 2. Installing the HP Drivers Windows NT must be fully installed and running on your HP Vectra before you can install the HP drivers. The drivers are located on the HP Vectra XU/VT Drivers and Documentation CD-ROM supplied with your HP Vectra PC. (This CD-ROM is referred to as the HP Drivers CD-ROM in the following instructions.) NOTE The instructions below assume that drive letter D: is assigned to your CD-ROM drive. Installing IDE Mass Storage (CD-ROM) Drivers 1 Double-click the Windows NT Setup icon. 2 In the Options menu, choose Add/Remove SCSI Adapters. 3 Select IDE CD-ROM (ATAPI 1.2)/Dual Channel PCI IDE, click Remove, then click OK to confirm that you want to remove the adapter. 4 Click Add and then click OK. 5 Scroll down the list of adapters and select Other. 6 Insert the HP Drivers CD-ROM; type D:\IDE\WINNT35 and then click OK. 7 When the next dialog box displays CMD 64xx 32-bit IDE Adapter, click OK, then click Install. 8 Click Continue to confirm the path for the files. 9 Close the SCSI Adapter Setup dialog box, then close the Windows NT Setup window. 10 After the installation, shutdown Windows NT and then restart the computer. Enabling Networking after Installation 1 In the Control Panel, choose the Network icon. 6
-
 1
1 -
 2
2 -
 3
3 -
 4
4 -
 5
5 -
 6
6 -
 7
7 -
 8
8 -
 9
9 -
 10
10 -
 11
11 -
 12
12 -
13
-
14
-
15
-
16
-
17
-
18
-
19
-
20
 |
 |