HP Workstation xw6000 Creative Sound Blaster Audigy 2 ZS Quick Start Guide - Page 1
HP Workstation xw6000 Manual
 |
View all HP Workstation xw6000 manuals
Add to My Manuals
Save this manual to your list of manuals |
Page 1 highlights
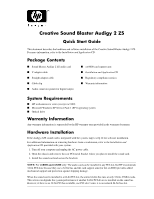
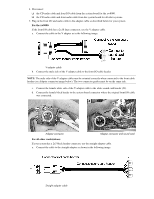
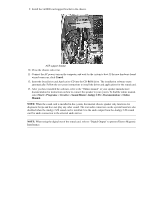
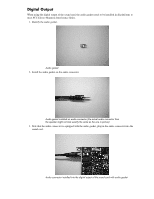
Creative Sound Blaster Audigy 2 ZS Quick Start Guide This document describes the hardware and software installation of the Creative Sound Blaster Audigy 2 ZS. For more information, refer to the Installation and Application CD. Package Contents ■ Sound Blaster Audigy 2 ZS audio card ■ V adapter cable ■ Straight adapter cable ■ Cable clip ■ Audio connector gasket for digital output ■ xw8000 card support arm ■ Installation and Application CD ■ Regulatory compliance notices ■ Warranty information System Requirements ■ HP workstation xw series (except xw3100) ■ Microsoft Windows XP Service Pack 1 (SP1) operating system ■ Optical drive Warranty Information Any warranty information is superseded by the HP warranty term provided in the warranty document. Hardware Installation If the Audigy 2 ZS sound card is integrated with the system, skip to step 12 for software installation. For additional information on removing hardware from a workstation, refer to the Installation and Application CD provided with your system. 1. Turn off your computer and unplug the AC power cable. 2. Open the chassis and remove the rear PCI metal bracket where you plan to install the sound card. 3. Install the sound card and secure the brackets. NOTE: For xw8000 and xw8200 only: The audio card can be installed in any PCI slot, but HP recommends 32-bit PCI slots because they use a 32-bit bus and the card support arm (for the xw8000) provides added mechanical support and protection against shipping damage. When the sound card is installed in a 64-bit PCI slot, the entire 64-bits bus runs at only 32-bits 33Mhz mode. This action can degrade the system performance if another 64-bit PCI device is installed on the same bus. However, if there is no 32-bit PCI bus available, use PCI slot 3 since it is an isolated 64-bit bus slot.
-
 1
1 -
 2
2 -
 3
3 -
 4
4 -
 5
5 -
 6
6 -
 7
7 -
8
-
9
-
10
-
11
-
12
 |
 |