HP Xw460c NVIDIA Quadro FX 560M installation - Page 8
Step 4A, Step 5, Step 4B
 |
View all HP Xw460c manuals
Add to My Manuals
Save this manual to your list of manuals |
Page 8 highlights
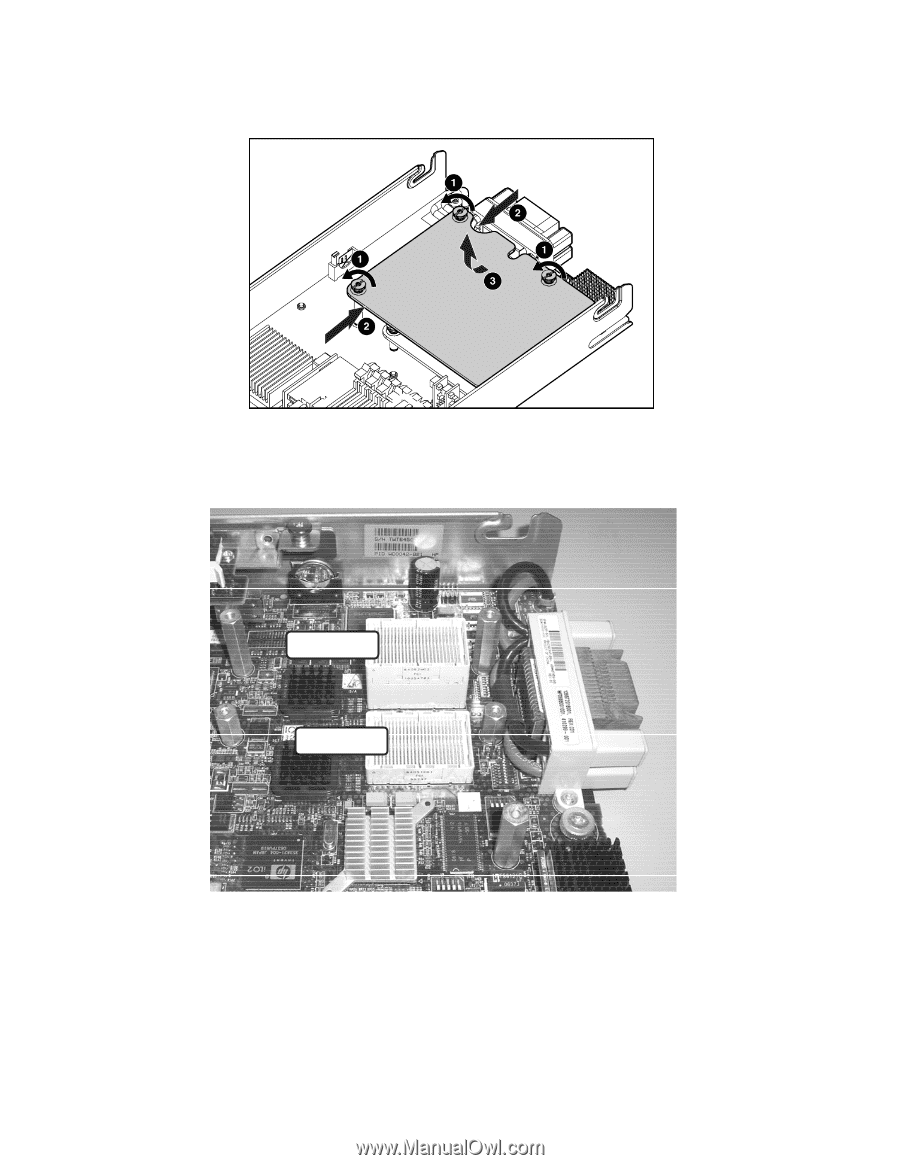
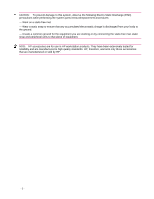
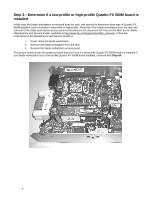
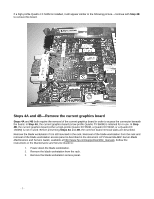
To remove the graphics board, unscrew the three captive retaining screws as shown below, and unplug the board from its connector by lifting up. After removing the graphics board, the blade workstation should appear as shown below. The two connectors that will be used by the low-profile Quadro FX 560M graphics boards are the Mezzanine 1 and Mezzanine 2 connectors. Mezzanine 2 Mezzanine 1 Complete the step below based on the specific installation sequence that you're following: • Step 4A: Retain the low-profile Quadro FX 560M graphics board that has been removed. Ensure that you have a second low-profile Quadro FX 560M graphics board available, and continue with Step 5. • Step 4B: Set aside the graphics board that has just been removed-this board will not be used further. Ensure that you have two low-profile Quadro FX 560M graphics boards available, and continue with Step 5. - 8 -
-
 1
1 -
2
-
 3
3 -
 4
4 -
 5
5 -
 6
6 -
 7
7 -
 8
8 -
 9
9 -
 10
10
 |
 |