HP Xw6200 User Manual for Integrated Intel SATA RAID for Windows XP and Window - Page 8
Storage > Storage Options > SATA Emulation
 |
UPC - 882780333536
View all HP Xw6200 manuals
Add to My Manuals
Save this manual to your list of manuals |
Page 8 highlights
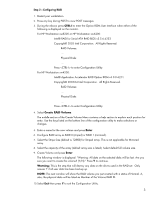
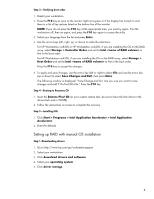
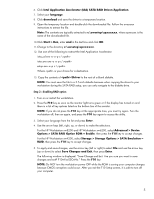
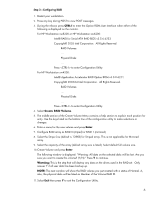
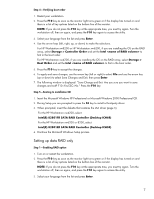
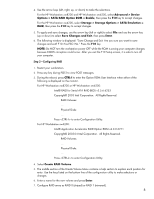
4. Use the arrow keys (left, right, up, or down) to make the selections. For the HP Workstation xw8200 and HP Workstation xw6200, select Advanced > Device Options > SATA RAID Option ROM = Enable, then press the F10 key to accept changes. For the HP Workstation xw4200, select Storage > Storage Options > SATA Emulation = RAID, then press the F10 key to accept changes. 5. To apply and save changes, use the arrow key (left or right) to select File and use the arrow key (up or down) to select Save Changes and Exit, then press Enter. 6. The following window is displayed: "Save Change and Exit. Are you sure you want to save changes and exit? F10=Yes ESC=No." Press the F10 key. NOTE: Do NOT turn the workstation power OFF while the ROM is saving your computer changes because CMOS corruption could occur. After you exit the F10 Setup screen, it is safe to turn off your computer. Step 2-Configuring RAID 1. Restart your workstation. 2. Press any key during POST to view POST messages. 3. During the reboot, press CTRL-I to enter the Option ROM User Interface when either of the following is displayed on the monitor. For HP Workstation xw8200 or HP Workstation xw6200: Intel® RAID for Serial ATA RAID BIOS v3.5.6.6253 Copyright© 2003 Intel Corporation. All Rights Reserved. RAID Volumes: ... Physical Disks: ... Press to enter Configuration Utility. For HP Workstation xw4200: Intel® Application Accelerator RAID Option ROM v4.0.0.6211 Copyright© 2003-04 Intel Corporation. All Rights Reserved. RAID Volumes: ... Physical Disks: ... Press to enter Configuration Utility. 4. Select Create RAID Volume. 5. The middle section of the Create Volume Menu contains a help section to explain each position for entry. Use the keys listed on the bottom line of the configuration utility to make selections or changes. 6. Enter a name for the new volume and press Enter. 7. Configure RAID array as RAID 0 (striped) or RAID 1 (mirrored). 8
-
 1
1 -
2
-
 3
3 -
 4
4 -
 5
5 -
 6
6 -
 7
7 -
 8
8 -
 9
9 -
 10
10
 |
 |