HP Z200 HP SATA/SAS Hard Drive and Solid State Drive Installation - Page 8
Step 4—Reassembling the computer, Regulatory notices, Technical support
 |
View all HP Z200 manuals
Add to My Manuals
Save this manual to your list of manuals |
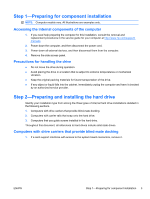
Page 8 highlights
Step 4-Reassembling the computer 1. Reinstall the card support, if applicable. 2. Reinstall the side access panel. 3. Reconnect power to the computer and all external devices. 4. Restore power to the computer and all external devices. Step 5-Configuring the computer When powering up the computer after installation, a new hard drive identifies itself as un-initialized storage. Consult the operating system documentation for information about how to set up the new drive. NOTE: Some operating systems such as Microsoft® Windows Vista® automatically schedule defragmenting sessions. This offers no benefit for an SSD, therefore the user can remove the automatic scheduling. This will also save energy. Go into Control Panel, select Control Panel Home, and then select System and Maintenance. In the Administrative Tools area select Defragment your hard drive. Select Select Volumes and then uncheck the box for any SSD disks or volumes. Regulatory notices This product has been tested and found to comply with the limits for a Class B digital device of the FCC Rules. Refer to the documentation that came with the computer for additional regulatory information governing this product. Technical support Comprehensive technical support is available online at http://www.hp.com/support. You can also call HP for technical support. For support telephone numbers, refer to the documentation supplied with the computer. Japanese 日本語 This document is available in Japanese. See http://www.hp.com/support/manuals, then select your product and select Japanese from the drop down Manual Language menu http://www.hp.com/support/manuals Manual Language Japanese 8 HP SATA/SAS hard drive and Solid State Drive installation ENWW
-
 1
1 -
2
-
 3
3 -
 4
4 -
 5
5 -
 6
6 -
 7
7 -
 8
8
 |
 |
